Setting Up Your CVD Portal
Audience. A manufacturer placing products with digital elements on the EU market, setting up coordinated vulnerability disclosure for the first time.
Outcome. A public disclosure portal that researchers can report to, a published reporting channel discoverable per RFC 9116, a documented vulnerability handling procedure, and an append-only audit trail.
Why it matters. CRA Annex I Part II point 5 requires manufacturers to provide a contact address for reporting vulnerabilities. From 11 September 2026 the Article 14 reporting obligations apply, and a working intake channel is the precondition for meeting them.
Time required. About 45 minutes. Steps 6 and 7 need input from whoever owns your security process.
Prerequisites.
- A work email address on your company domain. Public providers such as Gmail and Outlook are rejected at signup to prevent brand impersonation.
- Your company legal name and the Member State where your cybersecurity decisions are predominantly taken.
- Optional, a PGP public key if you want researchers to send encrypted reports.
Step 1. Create the account
Go to the registration page and sign up with your work email, or use Google or GitHub single sign-on.
The email domain you use becomes your disclosure subdomain, so security@acmecorp.com produces the portal acmecorp.cvdportal.com. The subdomain is fixed at signup and the Settings panel shows it as read only. On the Enterprise plan you can serve the portal from your own domain instead, which Step 4 covers.
Accept the Terms of Service. The marketing email checkbox is optional and independent of the account.
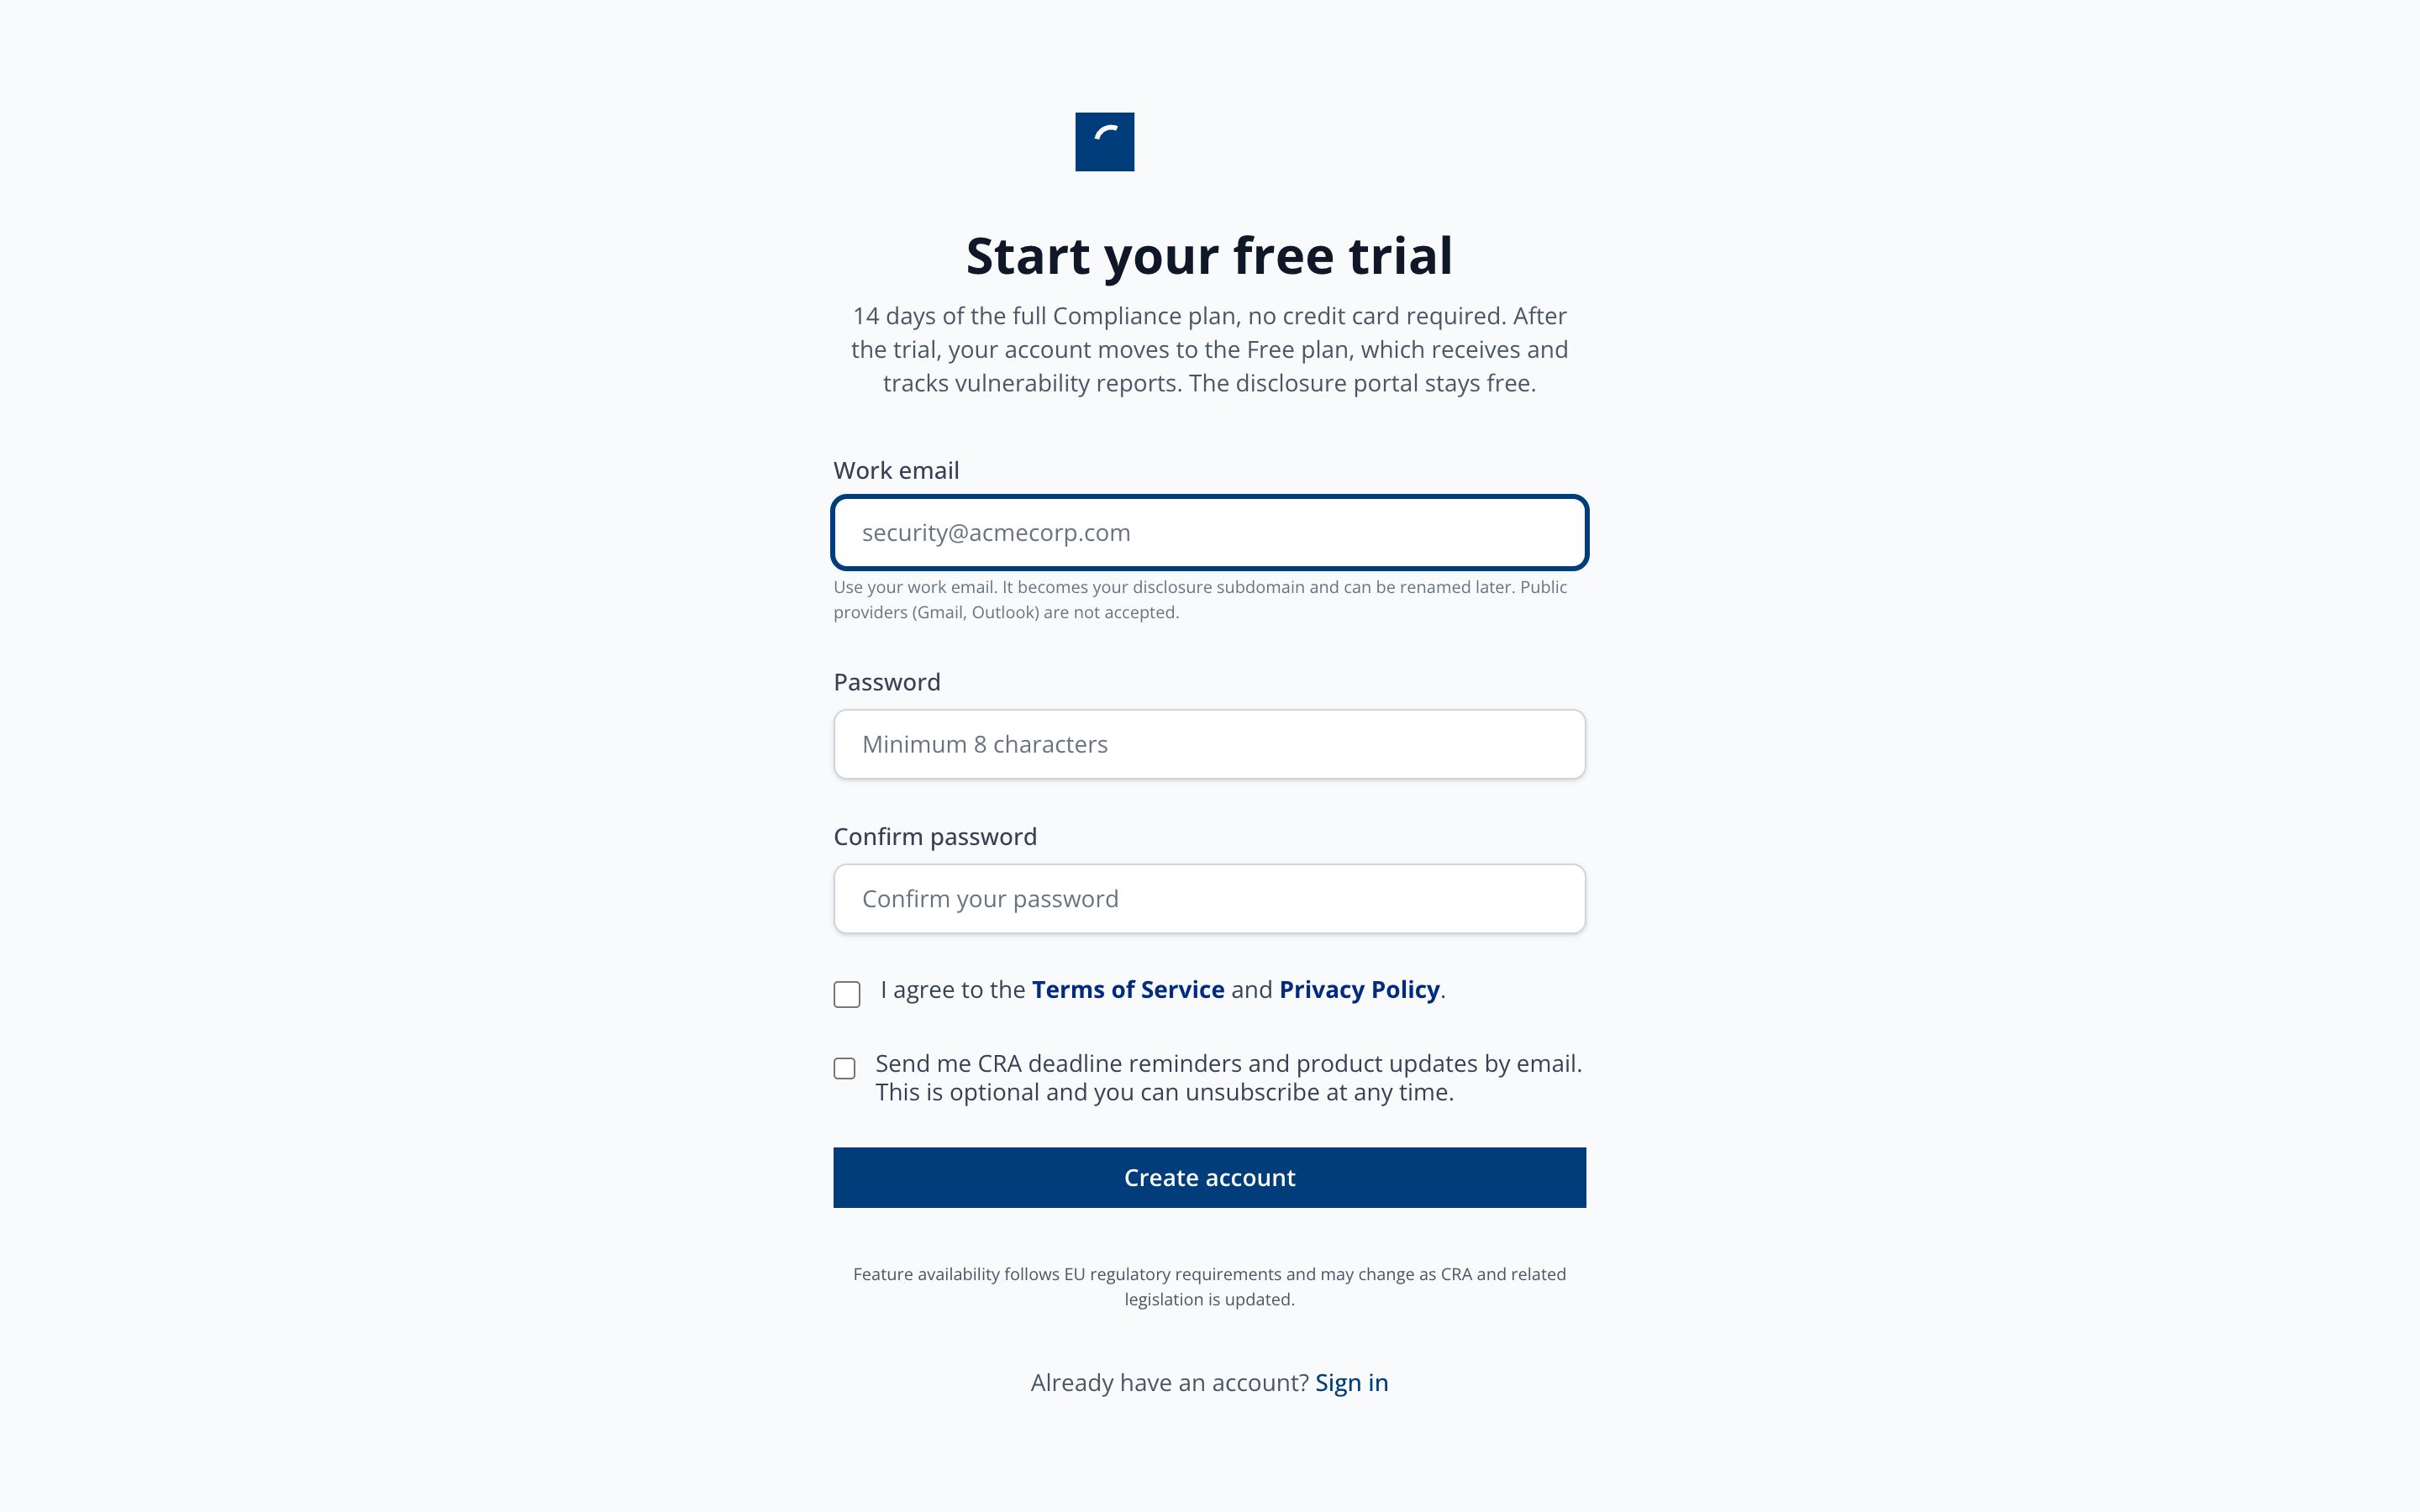
The account starts on a 14 day trial of the full Compliance plan with no card required. After the trial it moves to the Free plan, which continues to receive and track vulnerability reports. The disclosure portal itself is free permanently for as long as you use it. An account that nobody signs in to for 90 days after the trial ends can be closed, and we email a notice at least 30 days before that happens. Signing in keeps the account open.
Step 2. Verify the address and sign in
Click the verification link sent to your address. Until the company is verified, every dashboard route redirects to the verification page.
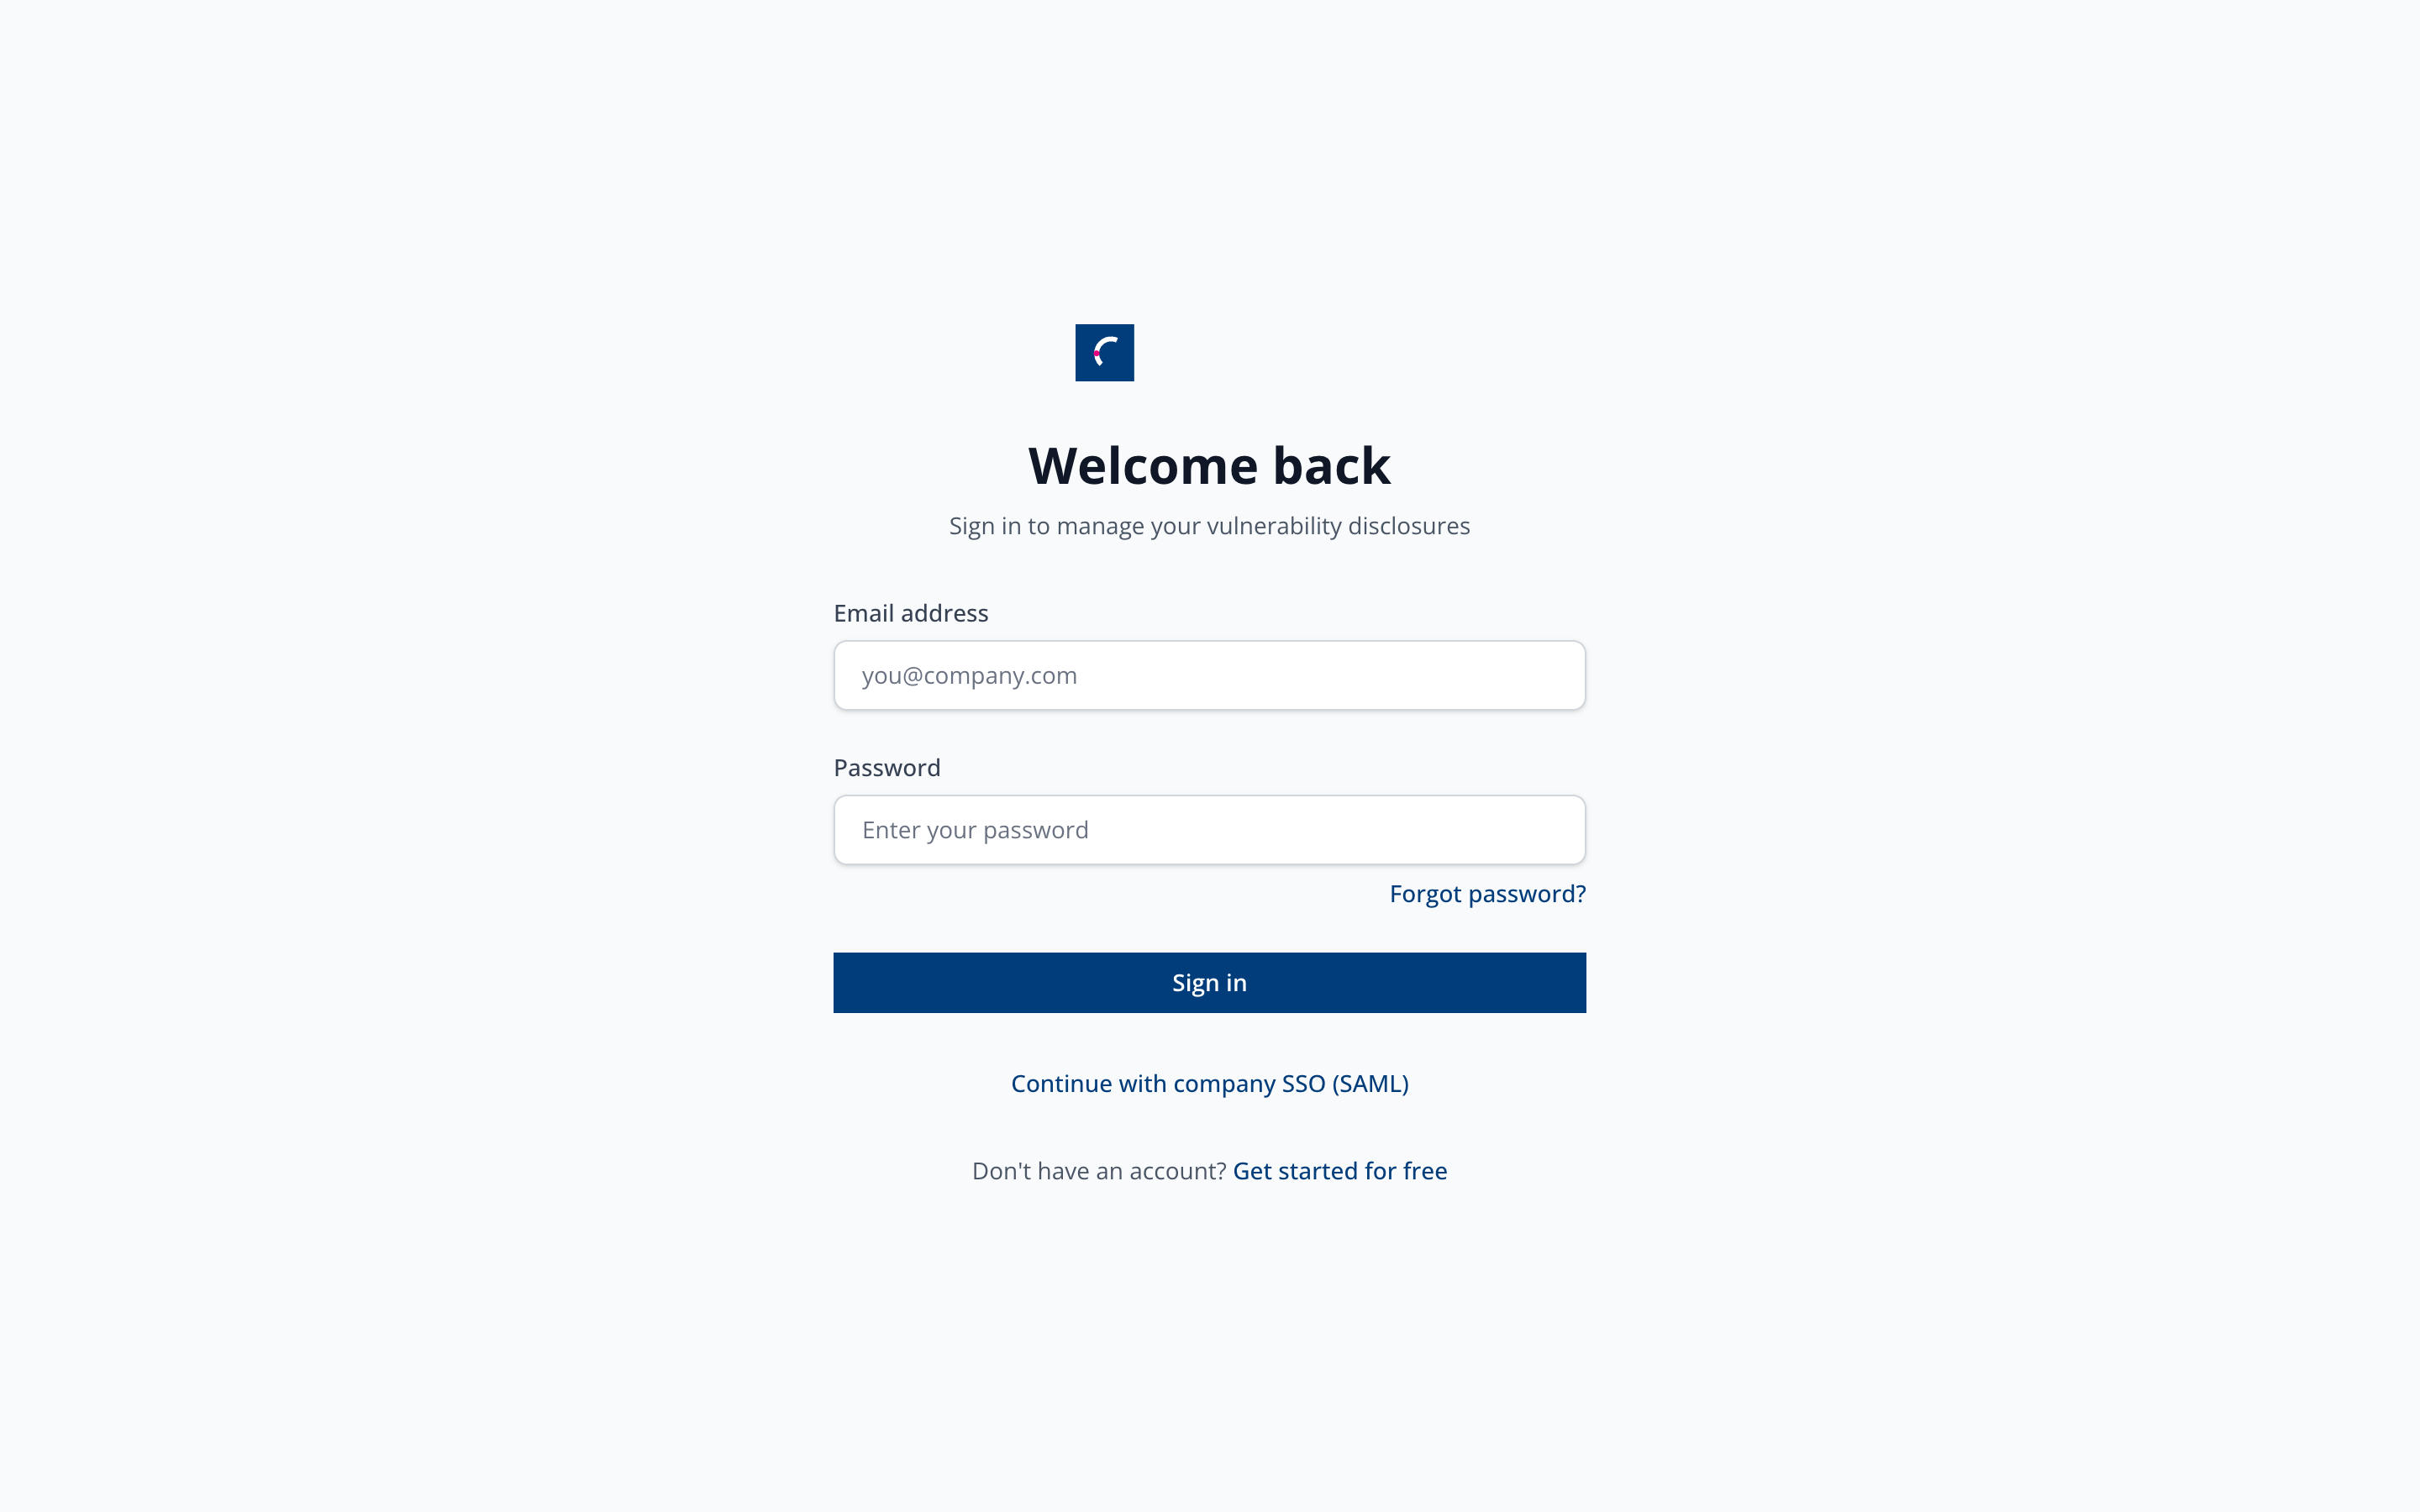
Sign in at the login page. Company SSO through SAML is available on Enterprise if your organisation requires it.
Step 3. Complete the company profile
Open Settings, then the General tab.
Set the company name and confirm the subdomain and slug. These drive your public portal URL and every portal link.
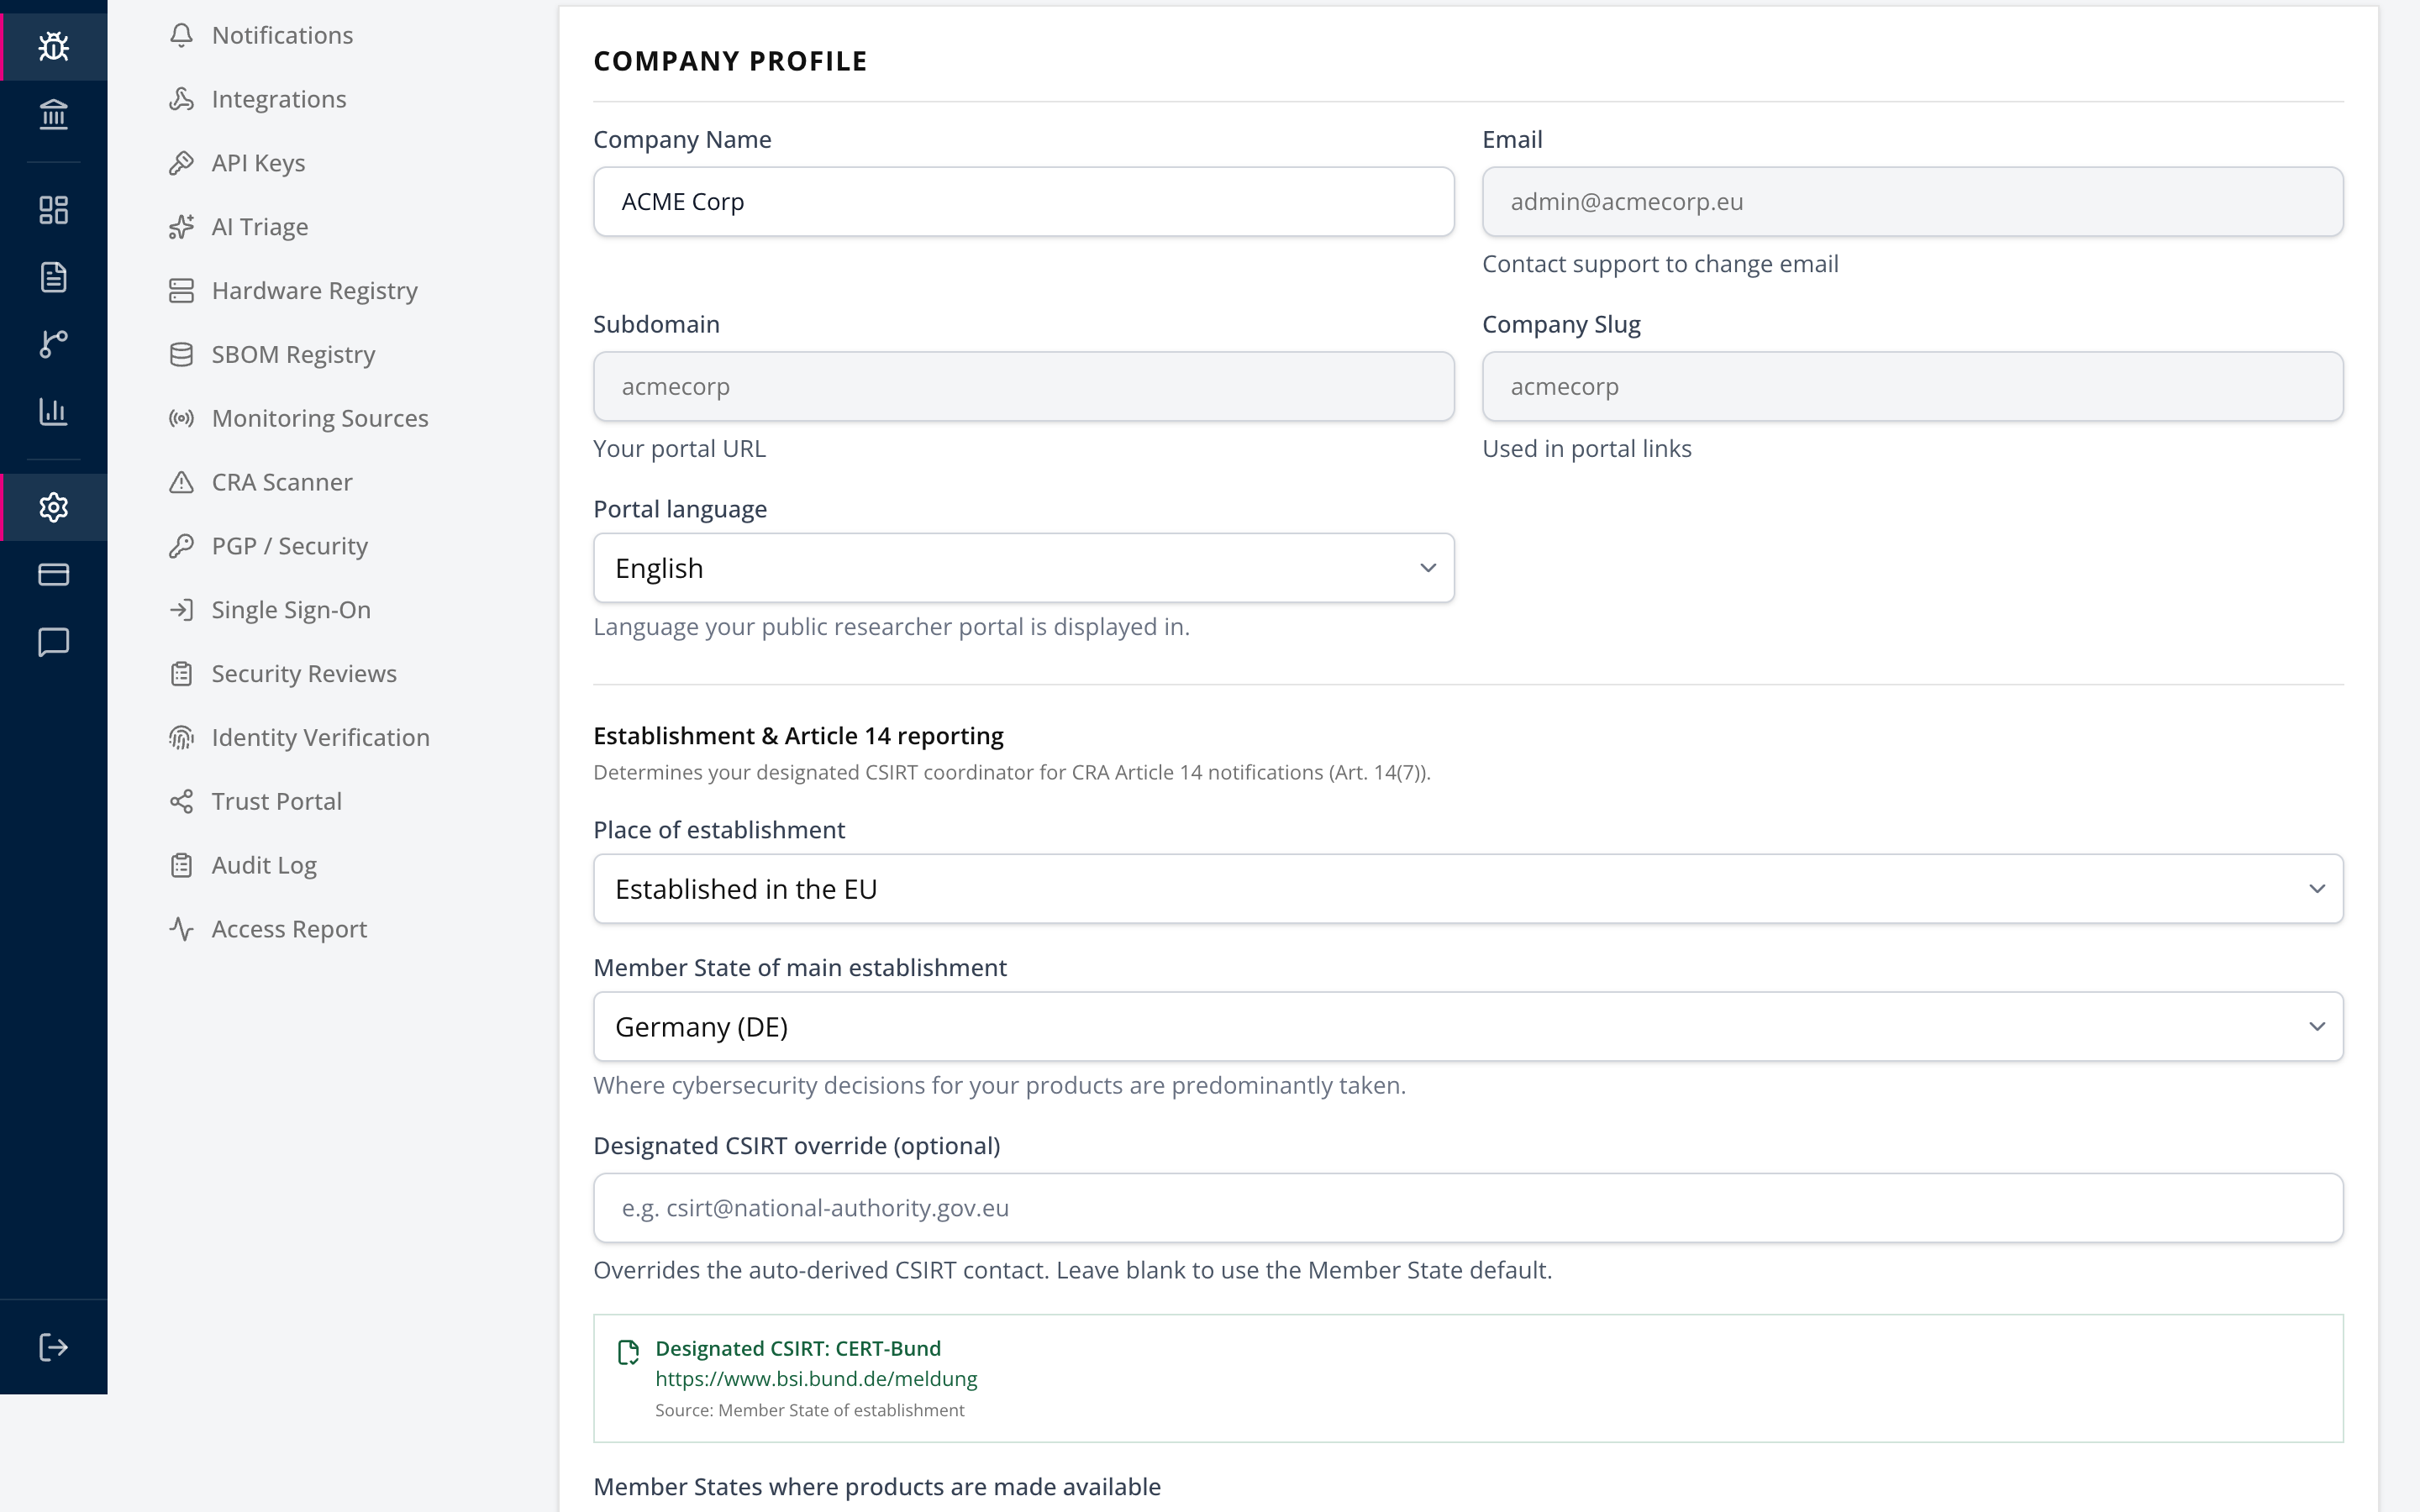
In the same panel, set Establishment and Article 14 reporting. Choose your place of establishment and the Member State of main establishment. This determines the CSIRT that receives your Article 14 notifications under Article 14(7). Until a Member State is set, the app warns that no designated CSIRT could be determined and Article 14 reporting stays disabled.
Add the Member States where your products are made available. These prefill new submissions and are reported in the Article 14 early warning so the CSIRT can disseminate to affected states.
Leave Designated CSIRT override blank unless a national authority has instructed you otherwise.
Step 4. Apply your branding
Still under Settings, then General, scroll to Branding.
Upload your logo and set the portal colour. Branding and a custom domain are Enterprise features. On other plans, these panels show an upgrade notice.
Once the DNS challenge for a custom domain passes, that domain becomes the host the portal names itself by. Your CSAF provider metadata and advisories, the RSS advisory feed, the generated security.txt, the Annex II user-information sheet, the Vulnerability Handling Procedure, and the Article 14 filing all cite the custom domain instead of your .cvdportal.com subdomain. The subdomain keeps working, so nothing you published earlier breaks. Two things stay on the platform by design. Your inbound report address remains security@<slug>.cvdportal.com, because a custom domain routes web traffic and not mail, and the public compliance-verification page stays on cvdportal.com/verify/<slug>, because that attestation is issued by the platform rather than by you.
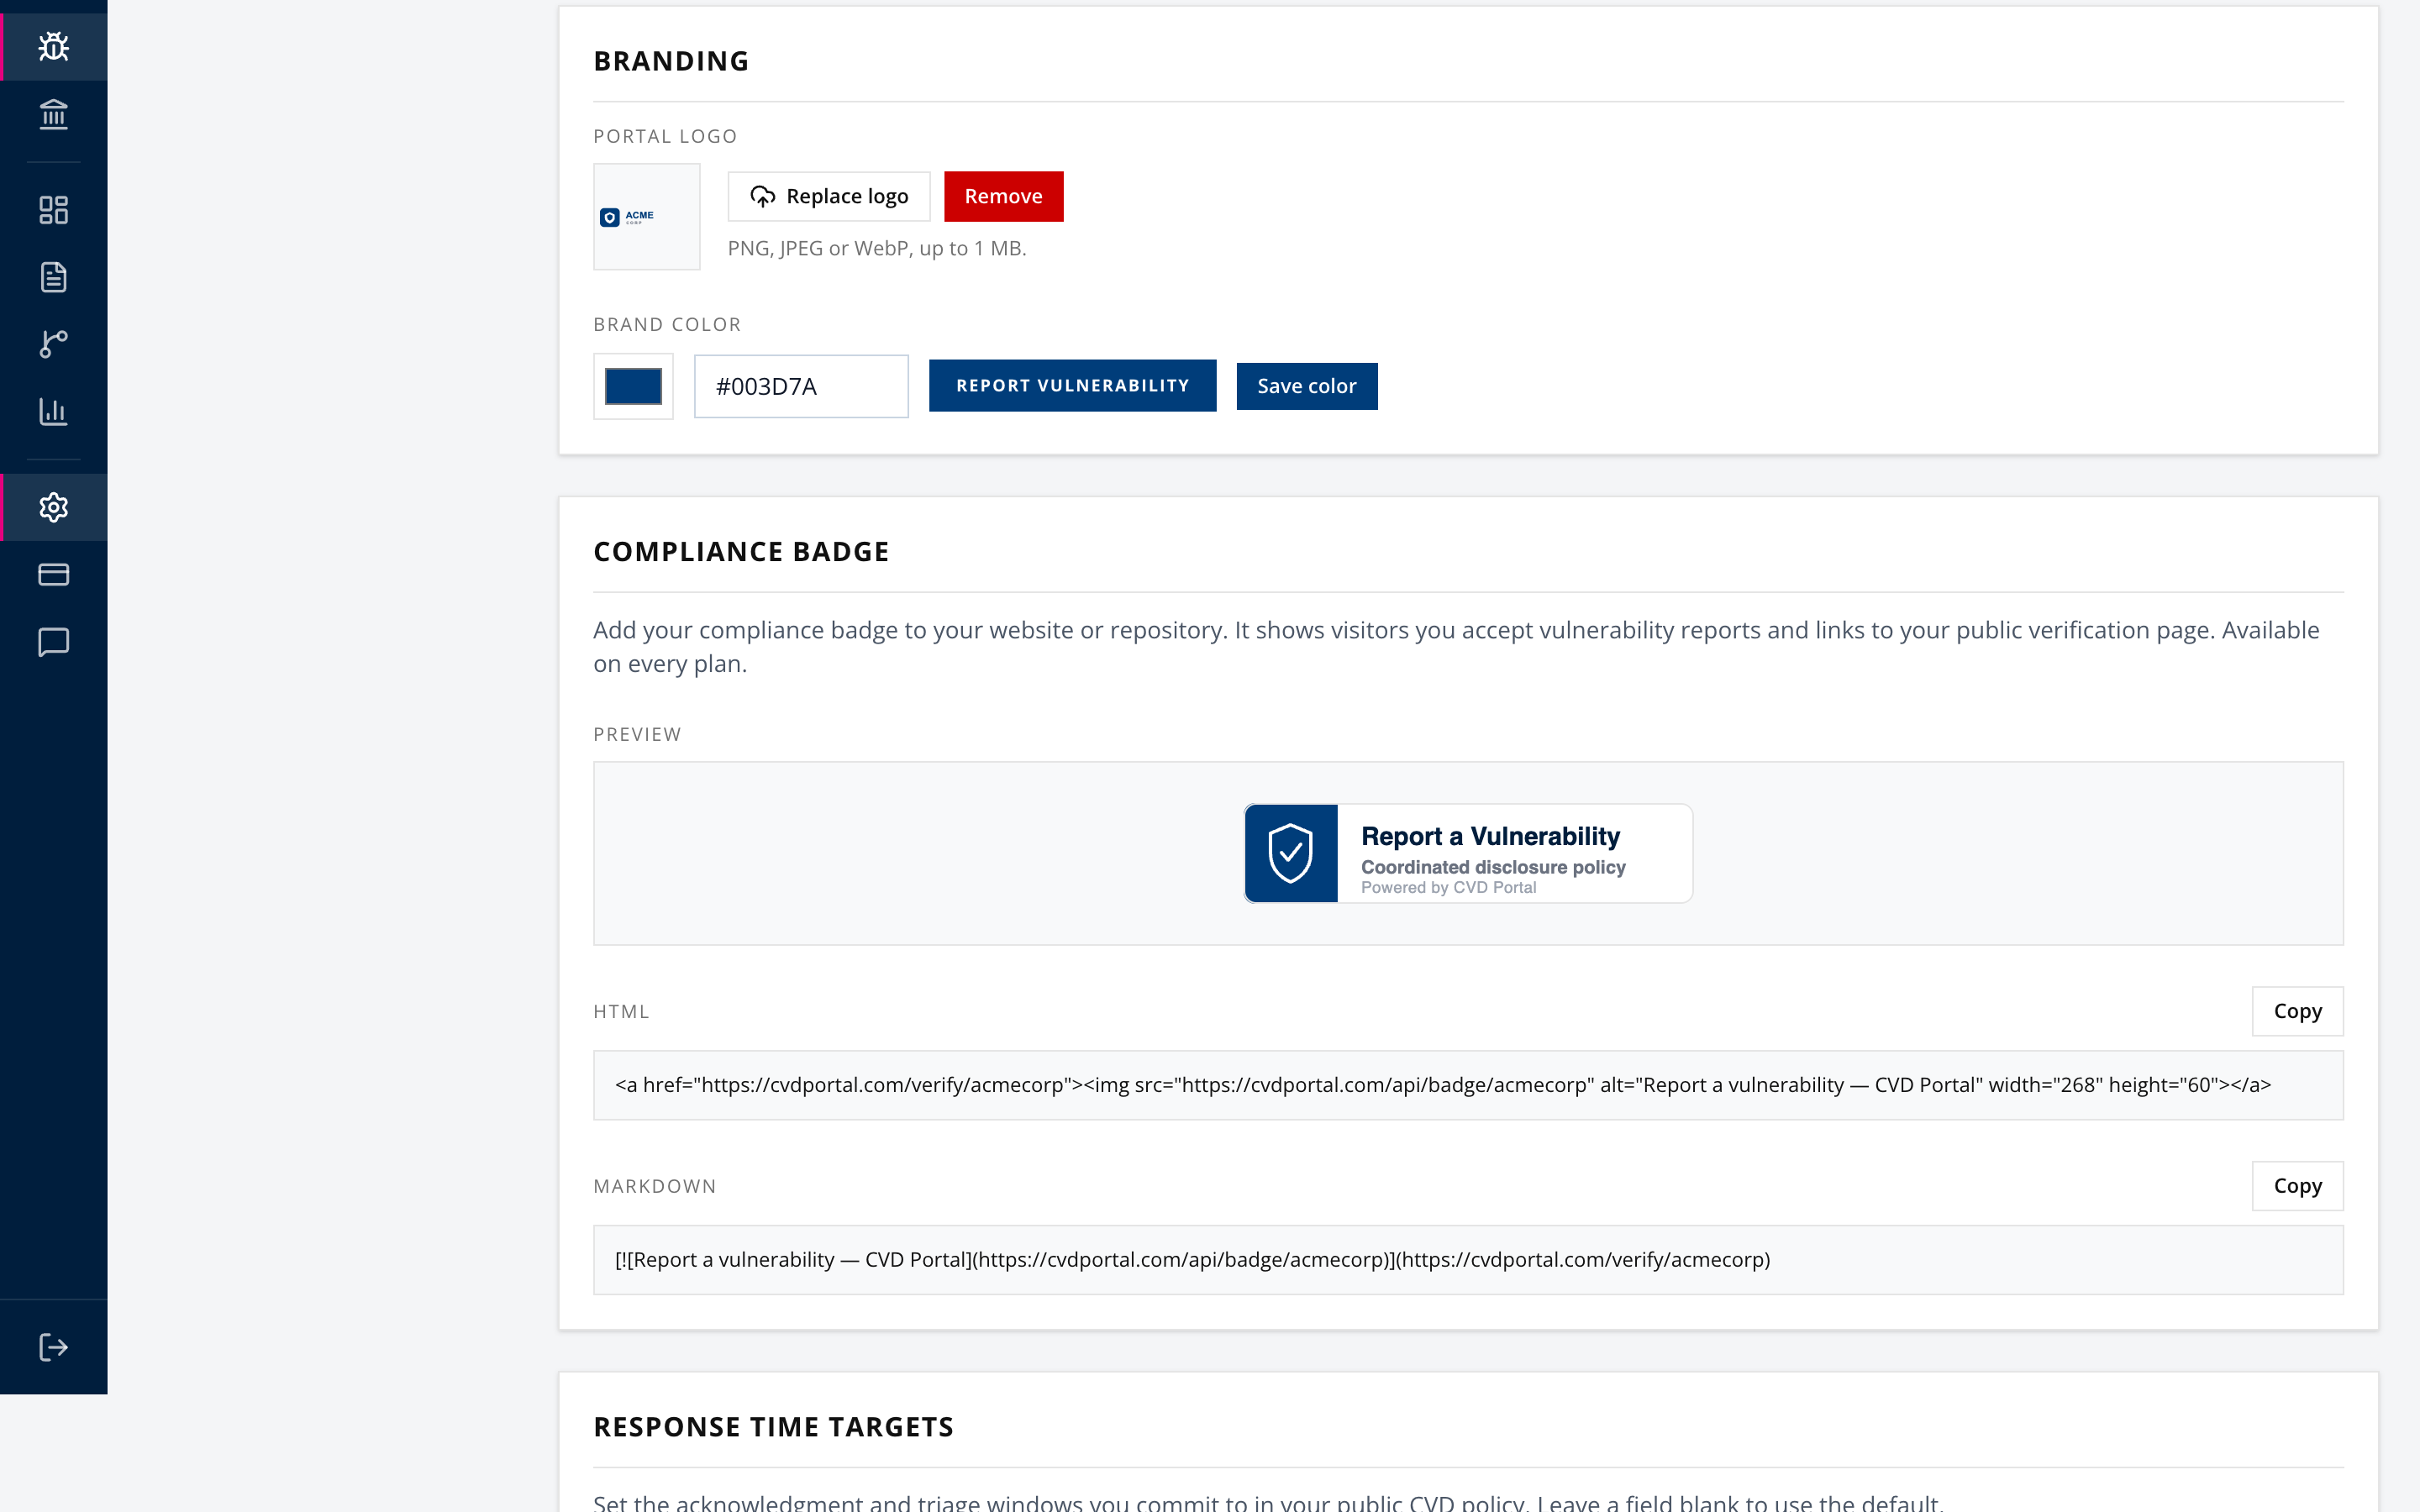
Branding is what makes the portal read as yours rather than as a third party form, which materially affects whether researchers trust it enough to report.
Step 5. Set response time targets
Scroll to Response Time Targets and Resolution SLAs. On the Free plan, the response targets are fixed at 48 hours for acknowledgment and 10 business days for triage.
Custom response targets need a paid plan. Resolution SLAs, one resolution deadline per severity, need the Enterprise plan.
The acknowledgment target governs the SLA badge shown on the submissions inbox. Reports past the target are flagged as breached, which is the signal your team works from.
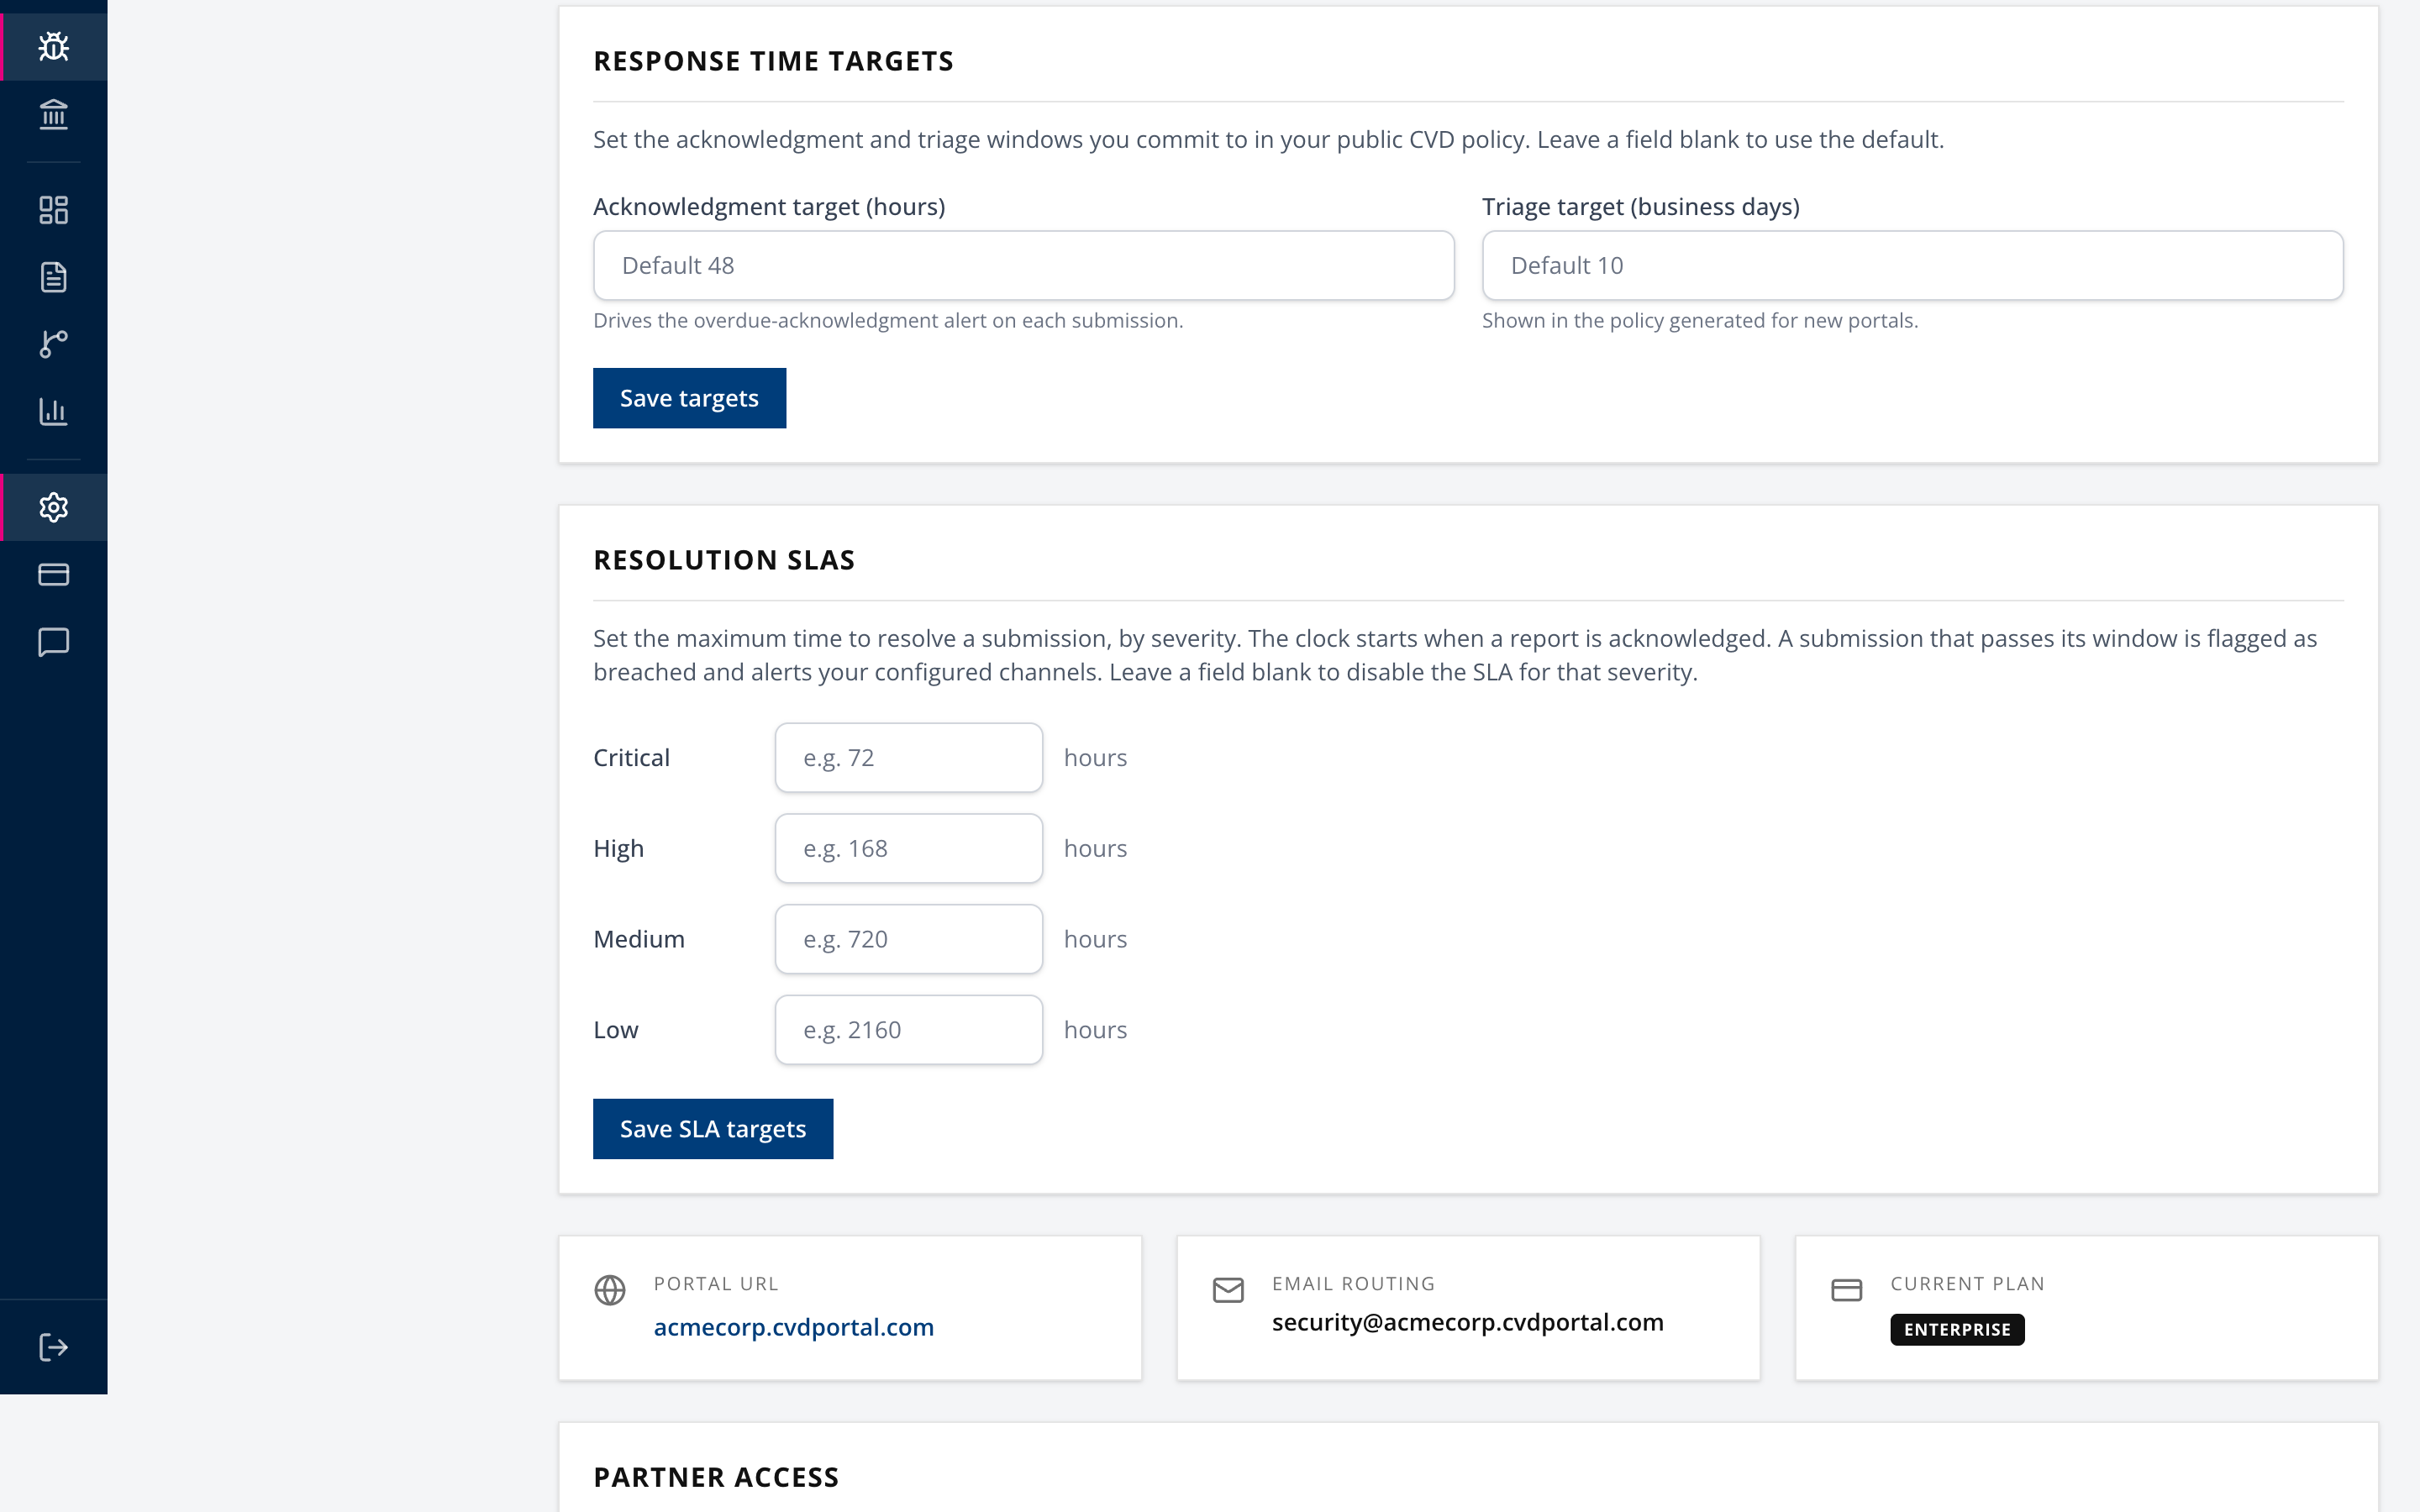
Set an acknowledgment target you can actually meet. 48 hours is the common default and is well inside what the CRA expects for a functioning process.
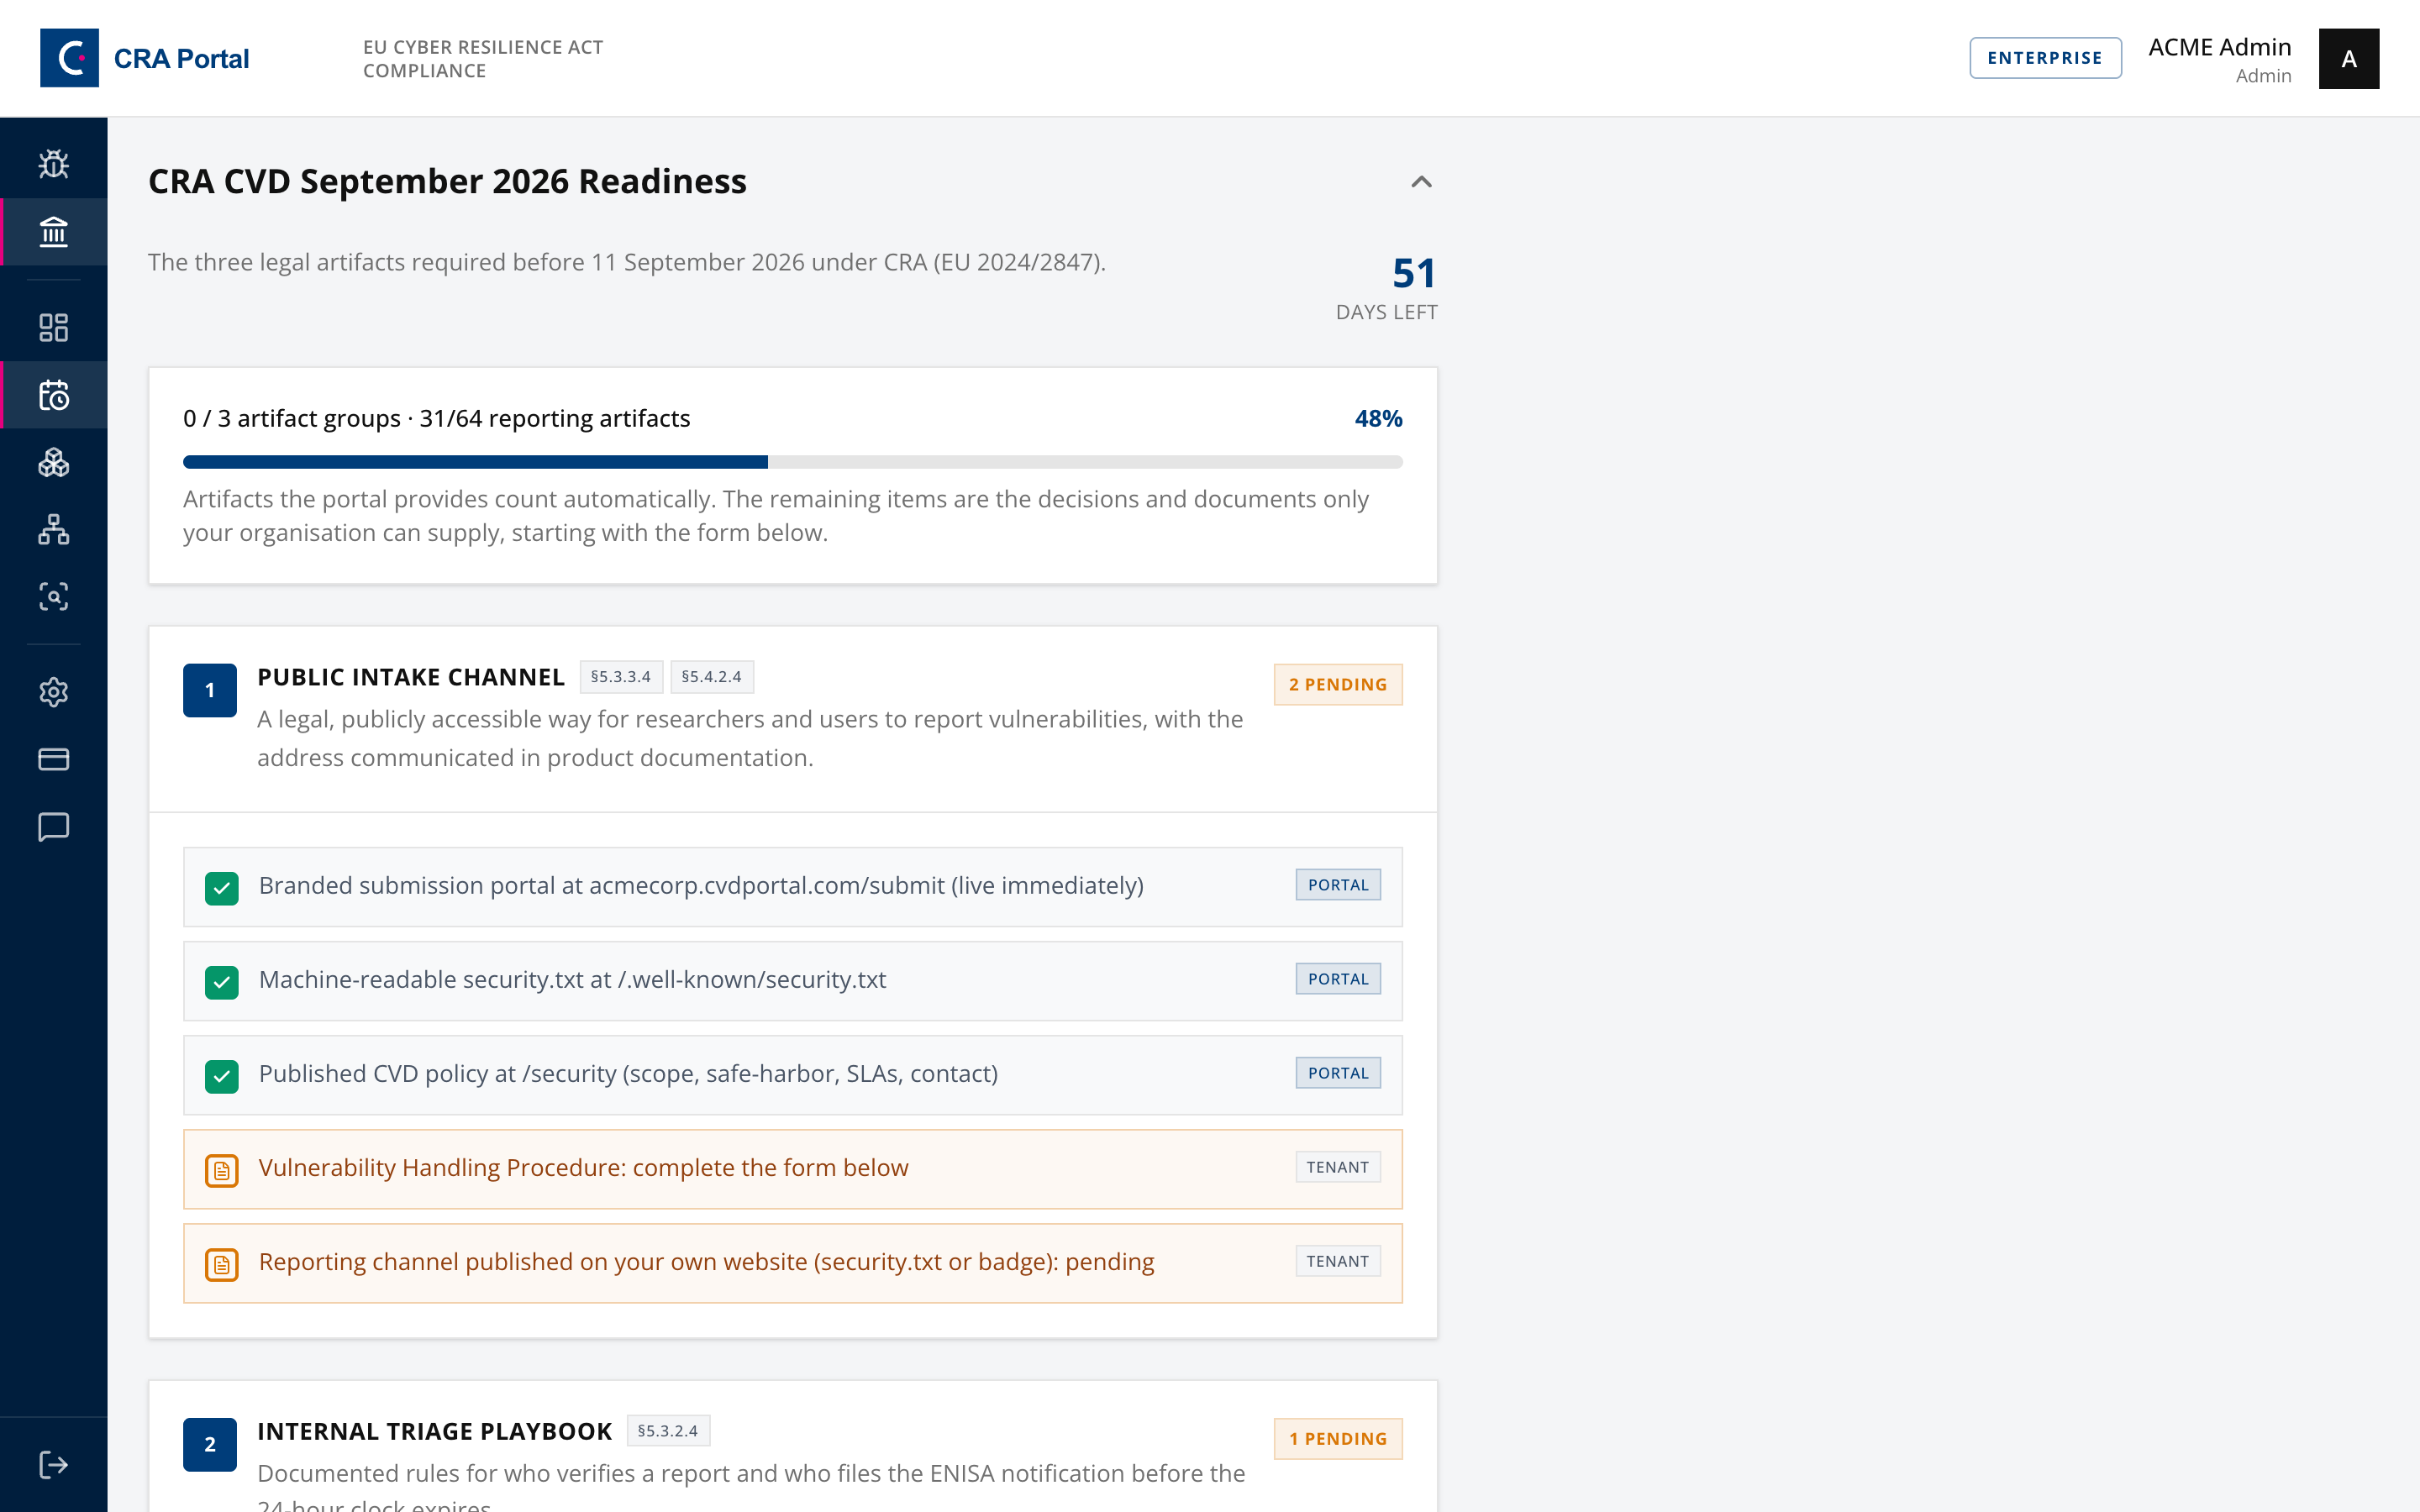
Step 6. Work through September 2026 readiness
Open Readiness.
The September 2026 Article 14 Readiness section tracks the three things that have to exist before the reporting obligations apply.
- Public Intake Channel. A reachable address researchers can use.
- Internal Triage Playbook. A documented procedure for what happens after a report lands.
- Paper Trail. Evidence that the process was followed.
Step 7. Produce the vulnerability handling procedure
In the Vulnerability Handling Procedure section, choose one of two paths.
- Generate a procedure document. Answer the prompts and the app drafts a procedure aligned to the CRA vulnerability handling requirements. Use Save & Generate Document to store it.
- I already have a policy. Enter a link or a reference to your existing procedure, then click Mark complete.
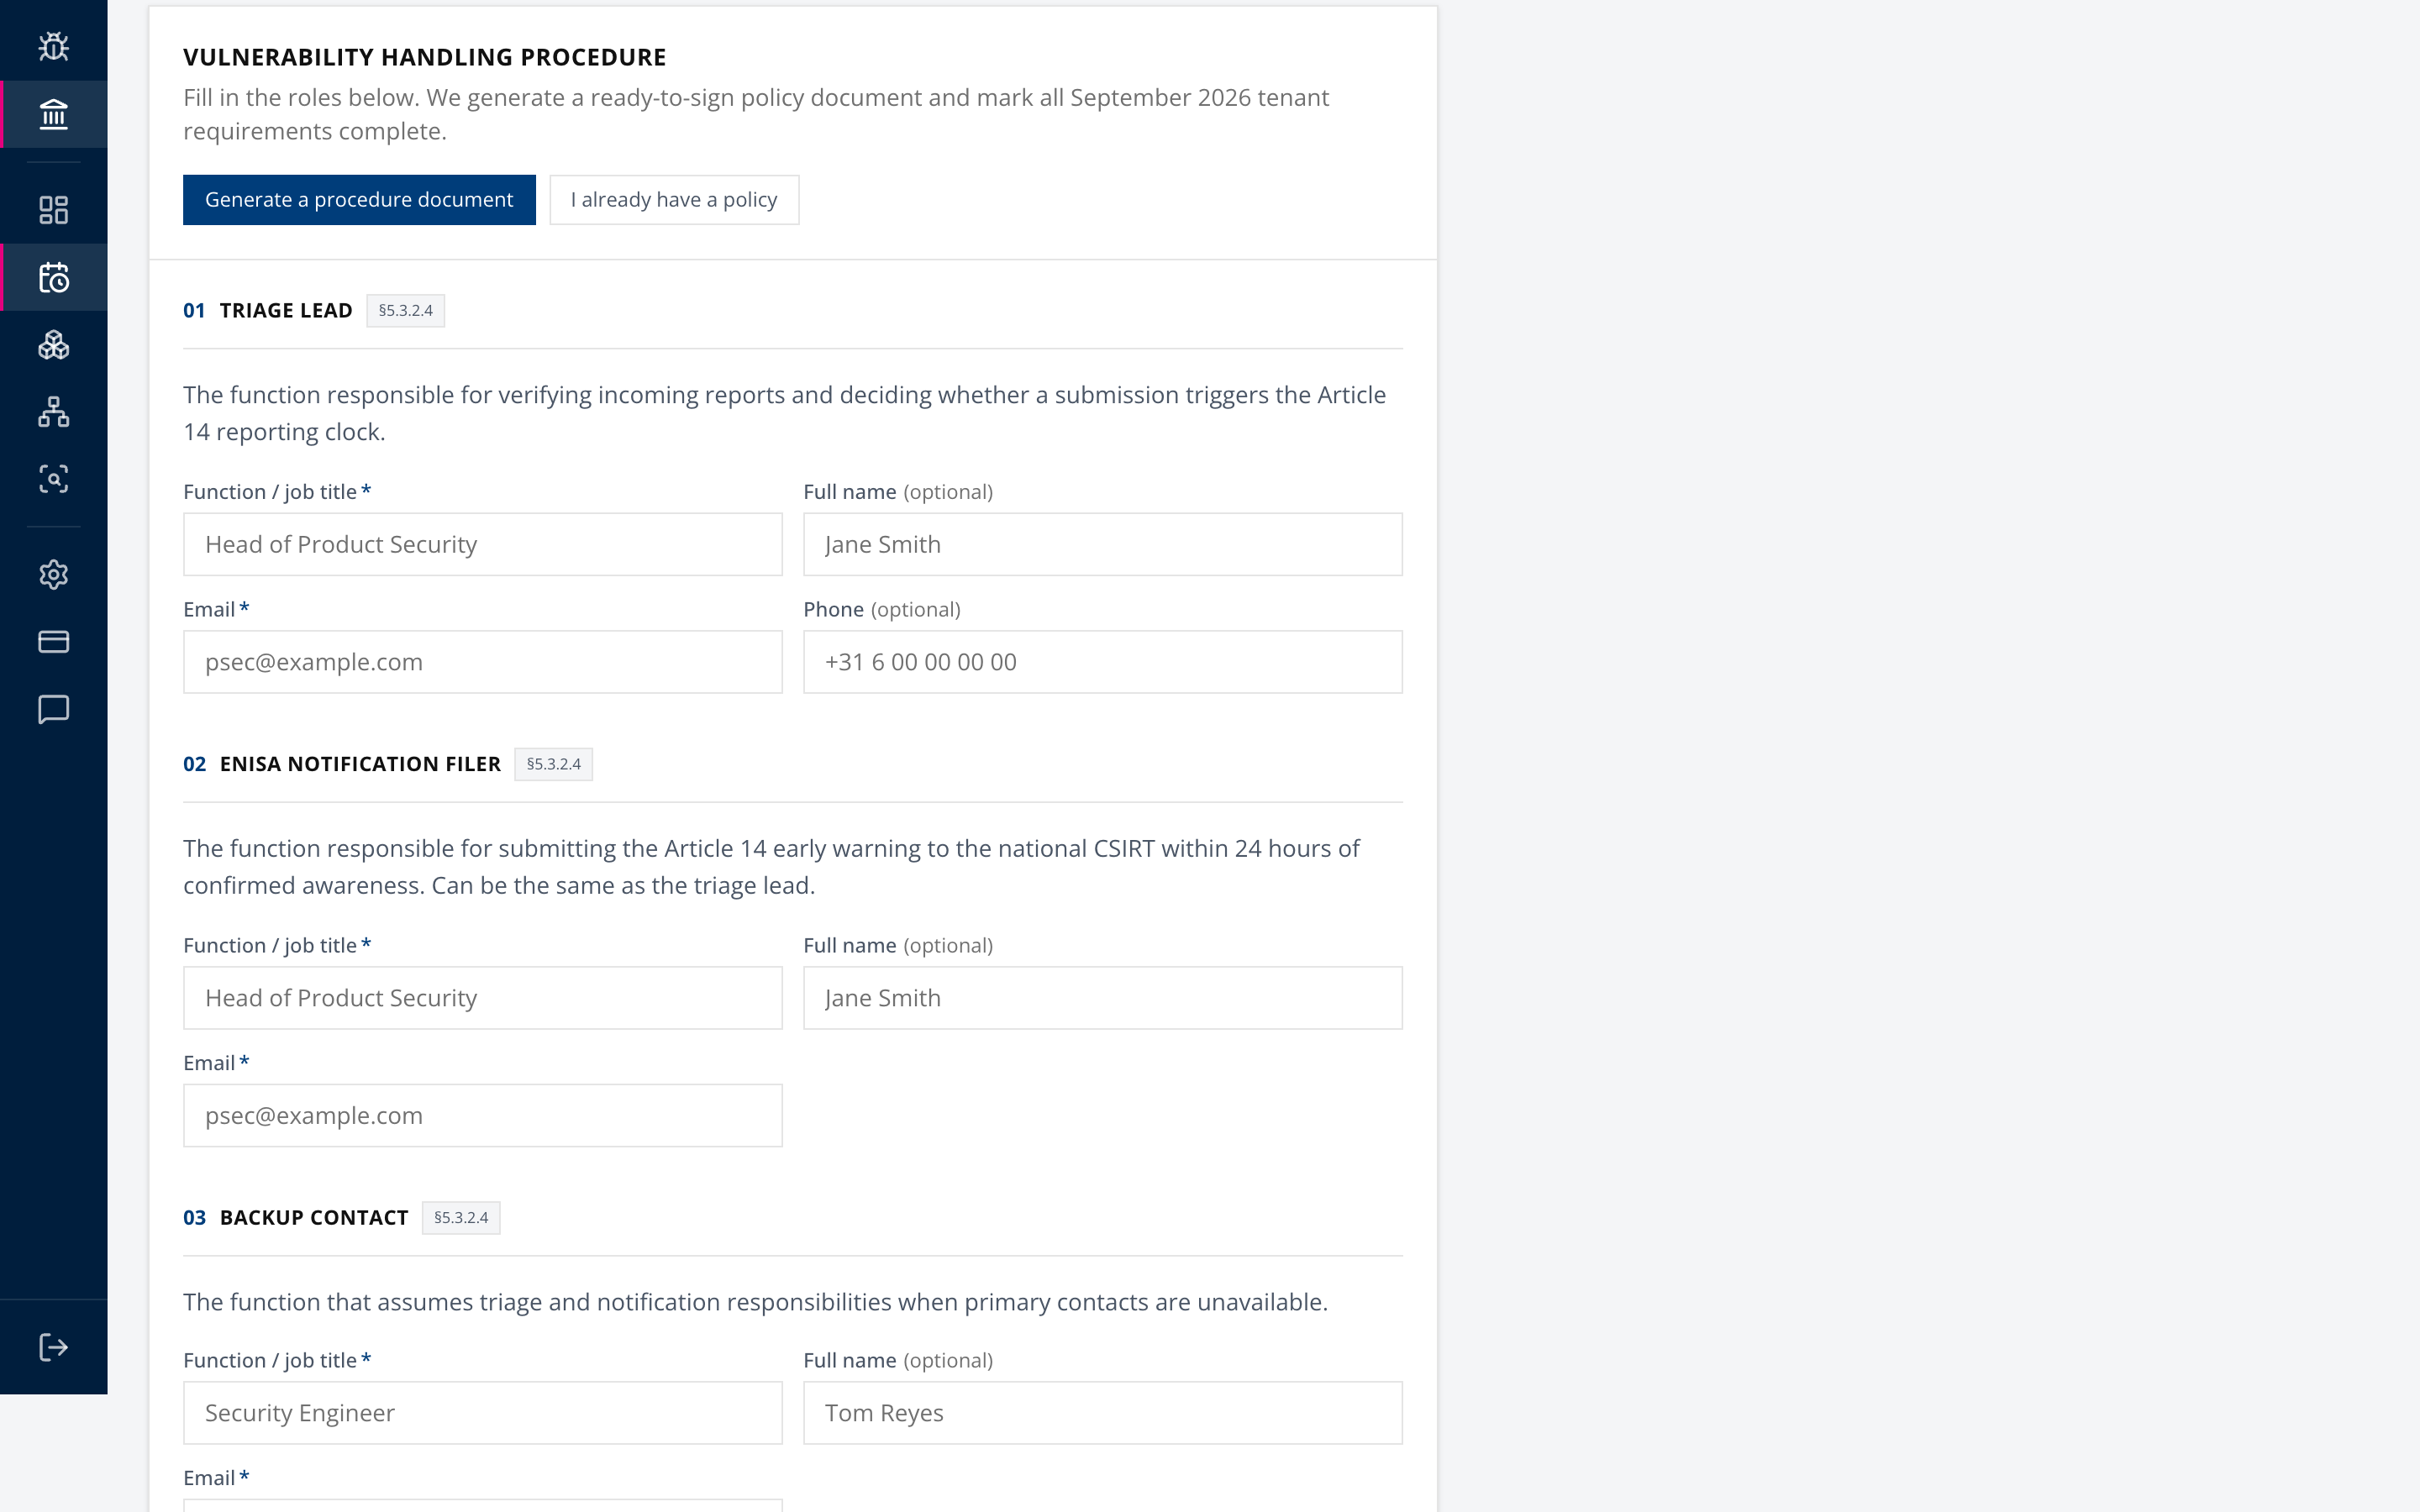
The generated document is a draft. Have whoever owns your security process review it before you treat it as your controlled procedure.
Step 8. Publish the reporting channel
In Publish Your Reporting Channel, link the portal from your corporate website and publish a security.txt file at /.well-known/security.txt per RFC 9116.
Use Verify my website to check that the channel is actually reachable from the public internet. Use Open Attestation Letter if you need a document evidencing the published channel.
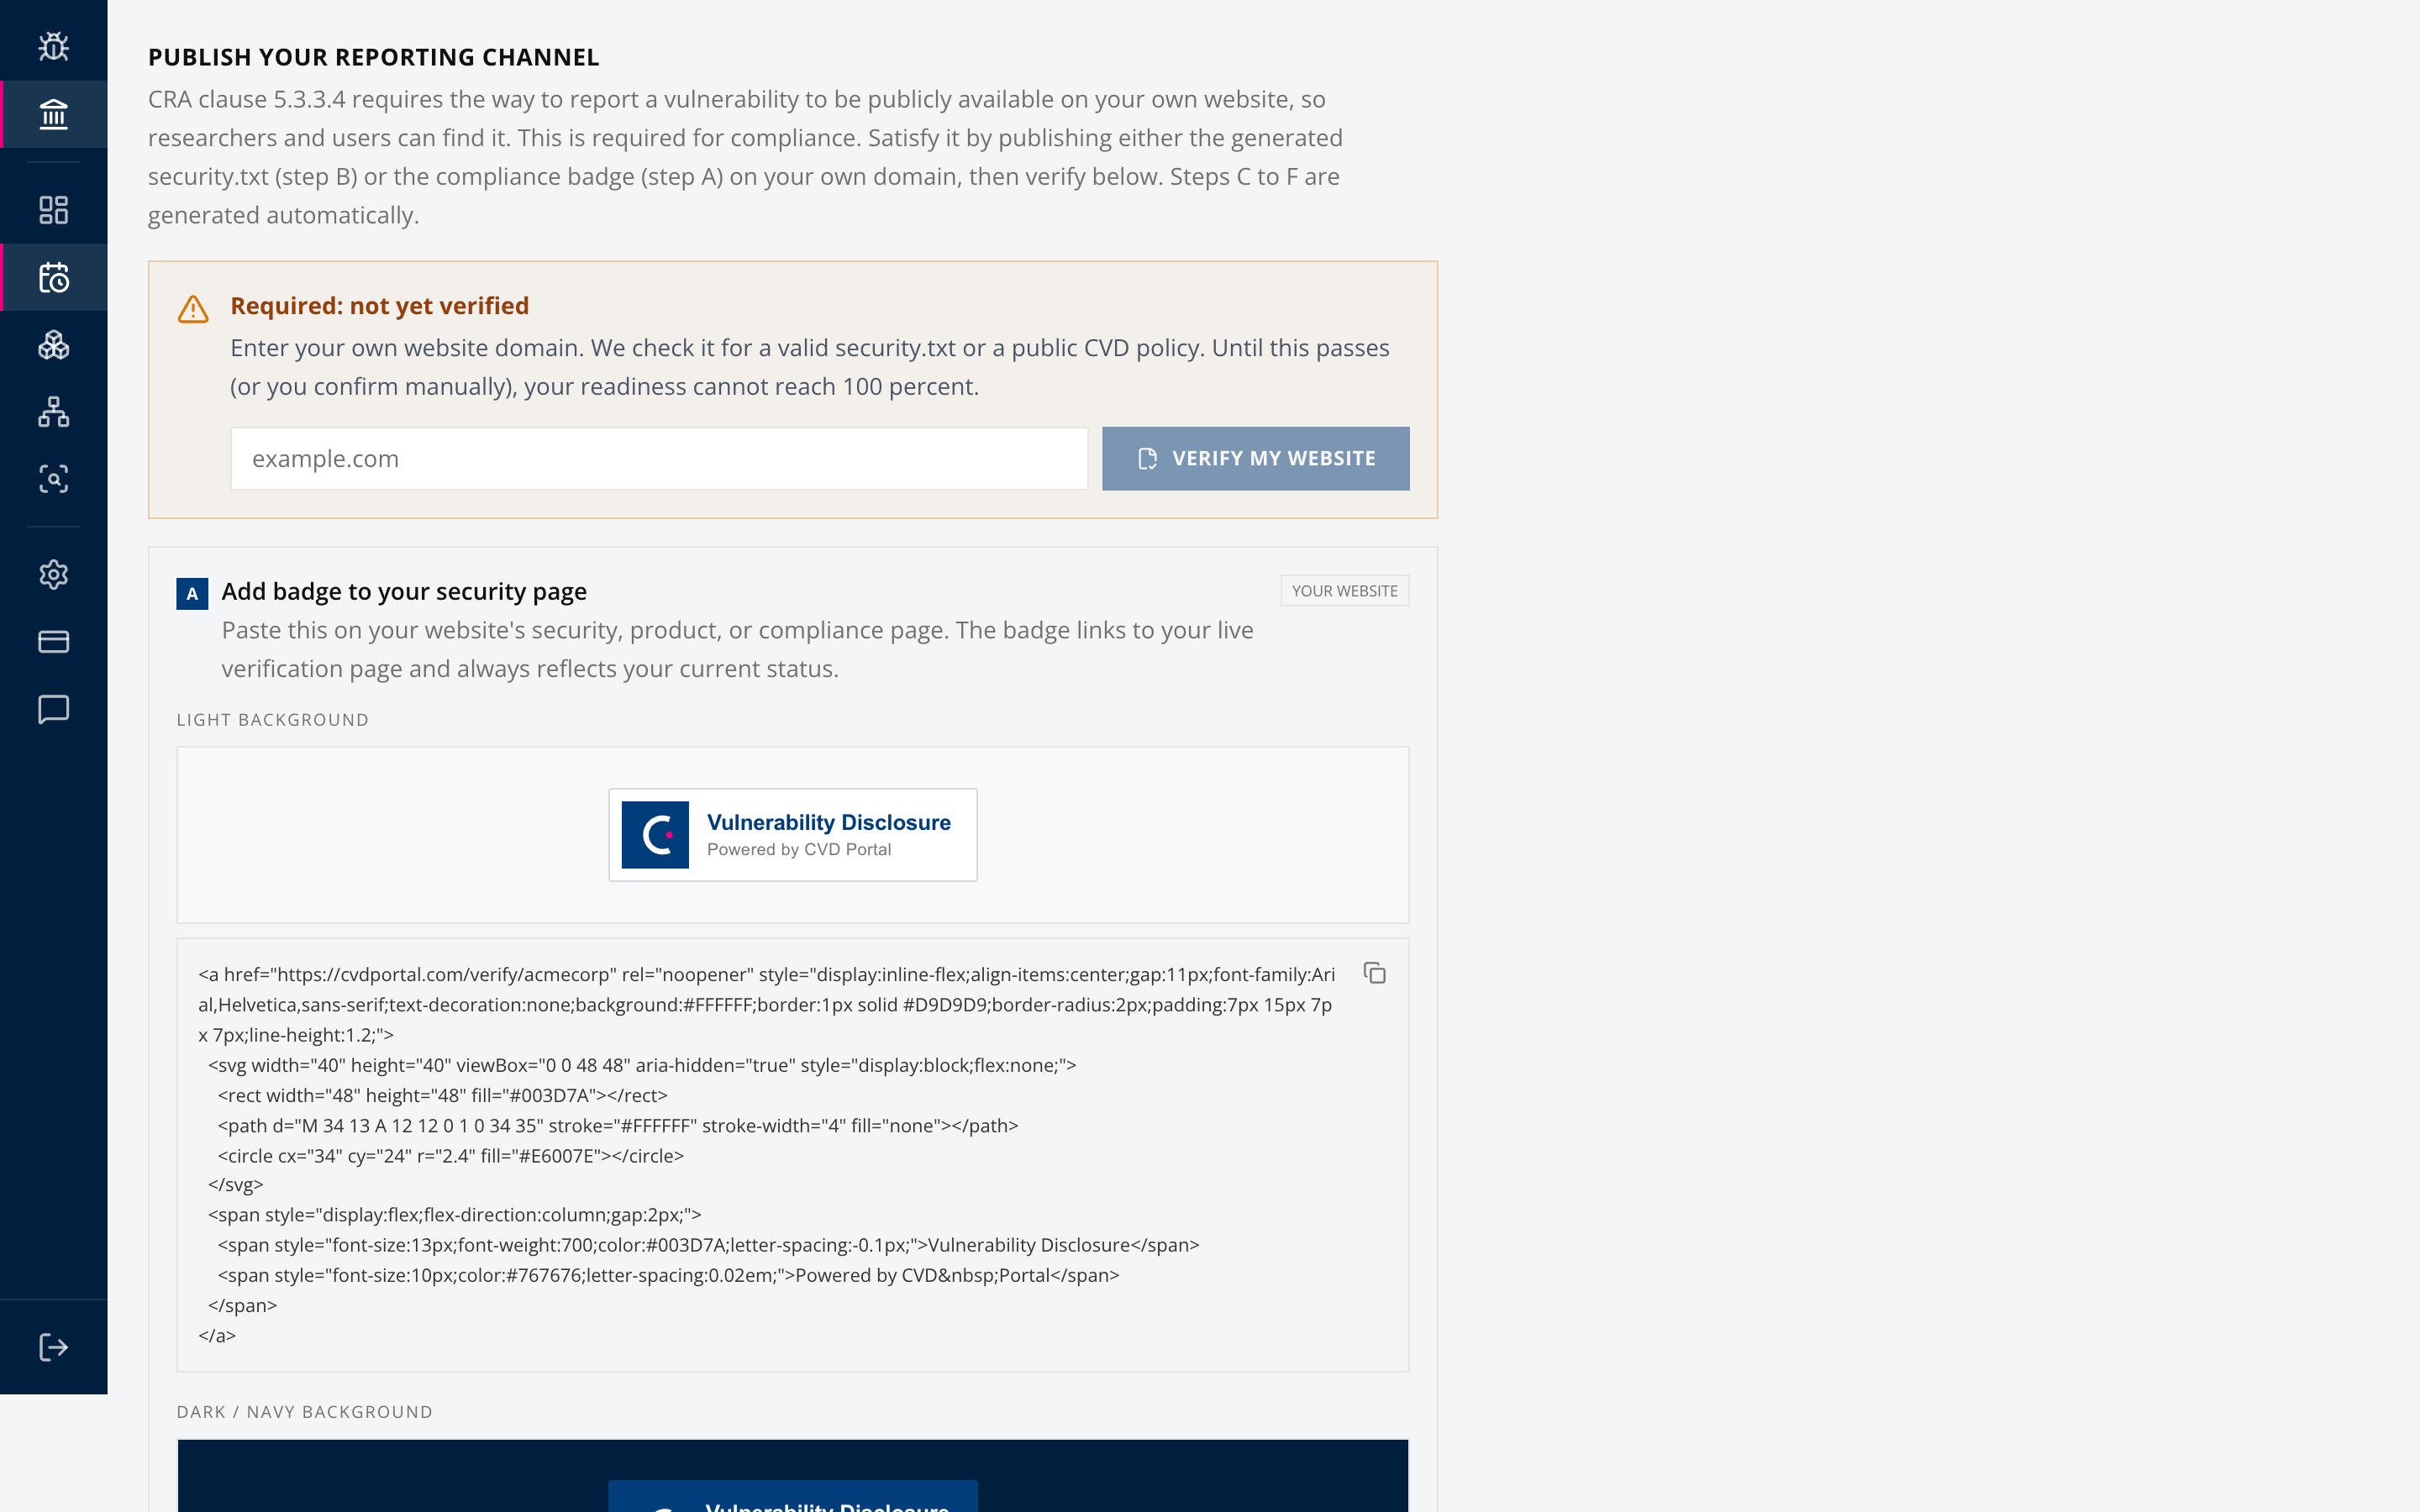
A channel that exists but is not discoverable does not satisfy the obligation. Verification is the step most often skipped.
Step 9. Add your team
Open Settings, then Team.
Invite the people who will triage reports. ADMIN has full write access. MEMBER can read and triage. Triage means status (not dismissal), severity, category, CVSS score, internal notes and affected components. Only an ADMIN can record Article 14 decisions or dismiss a report.
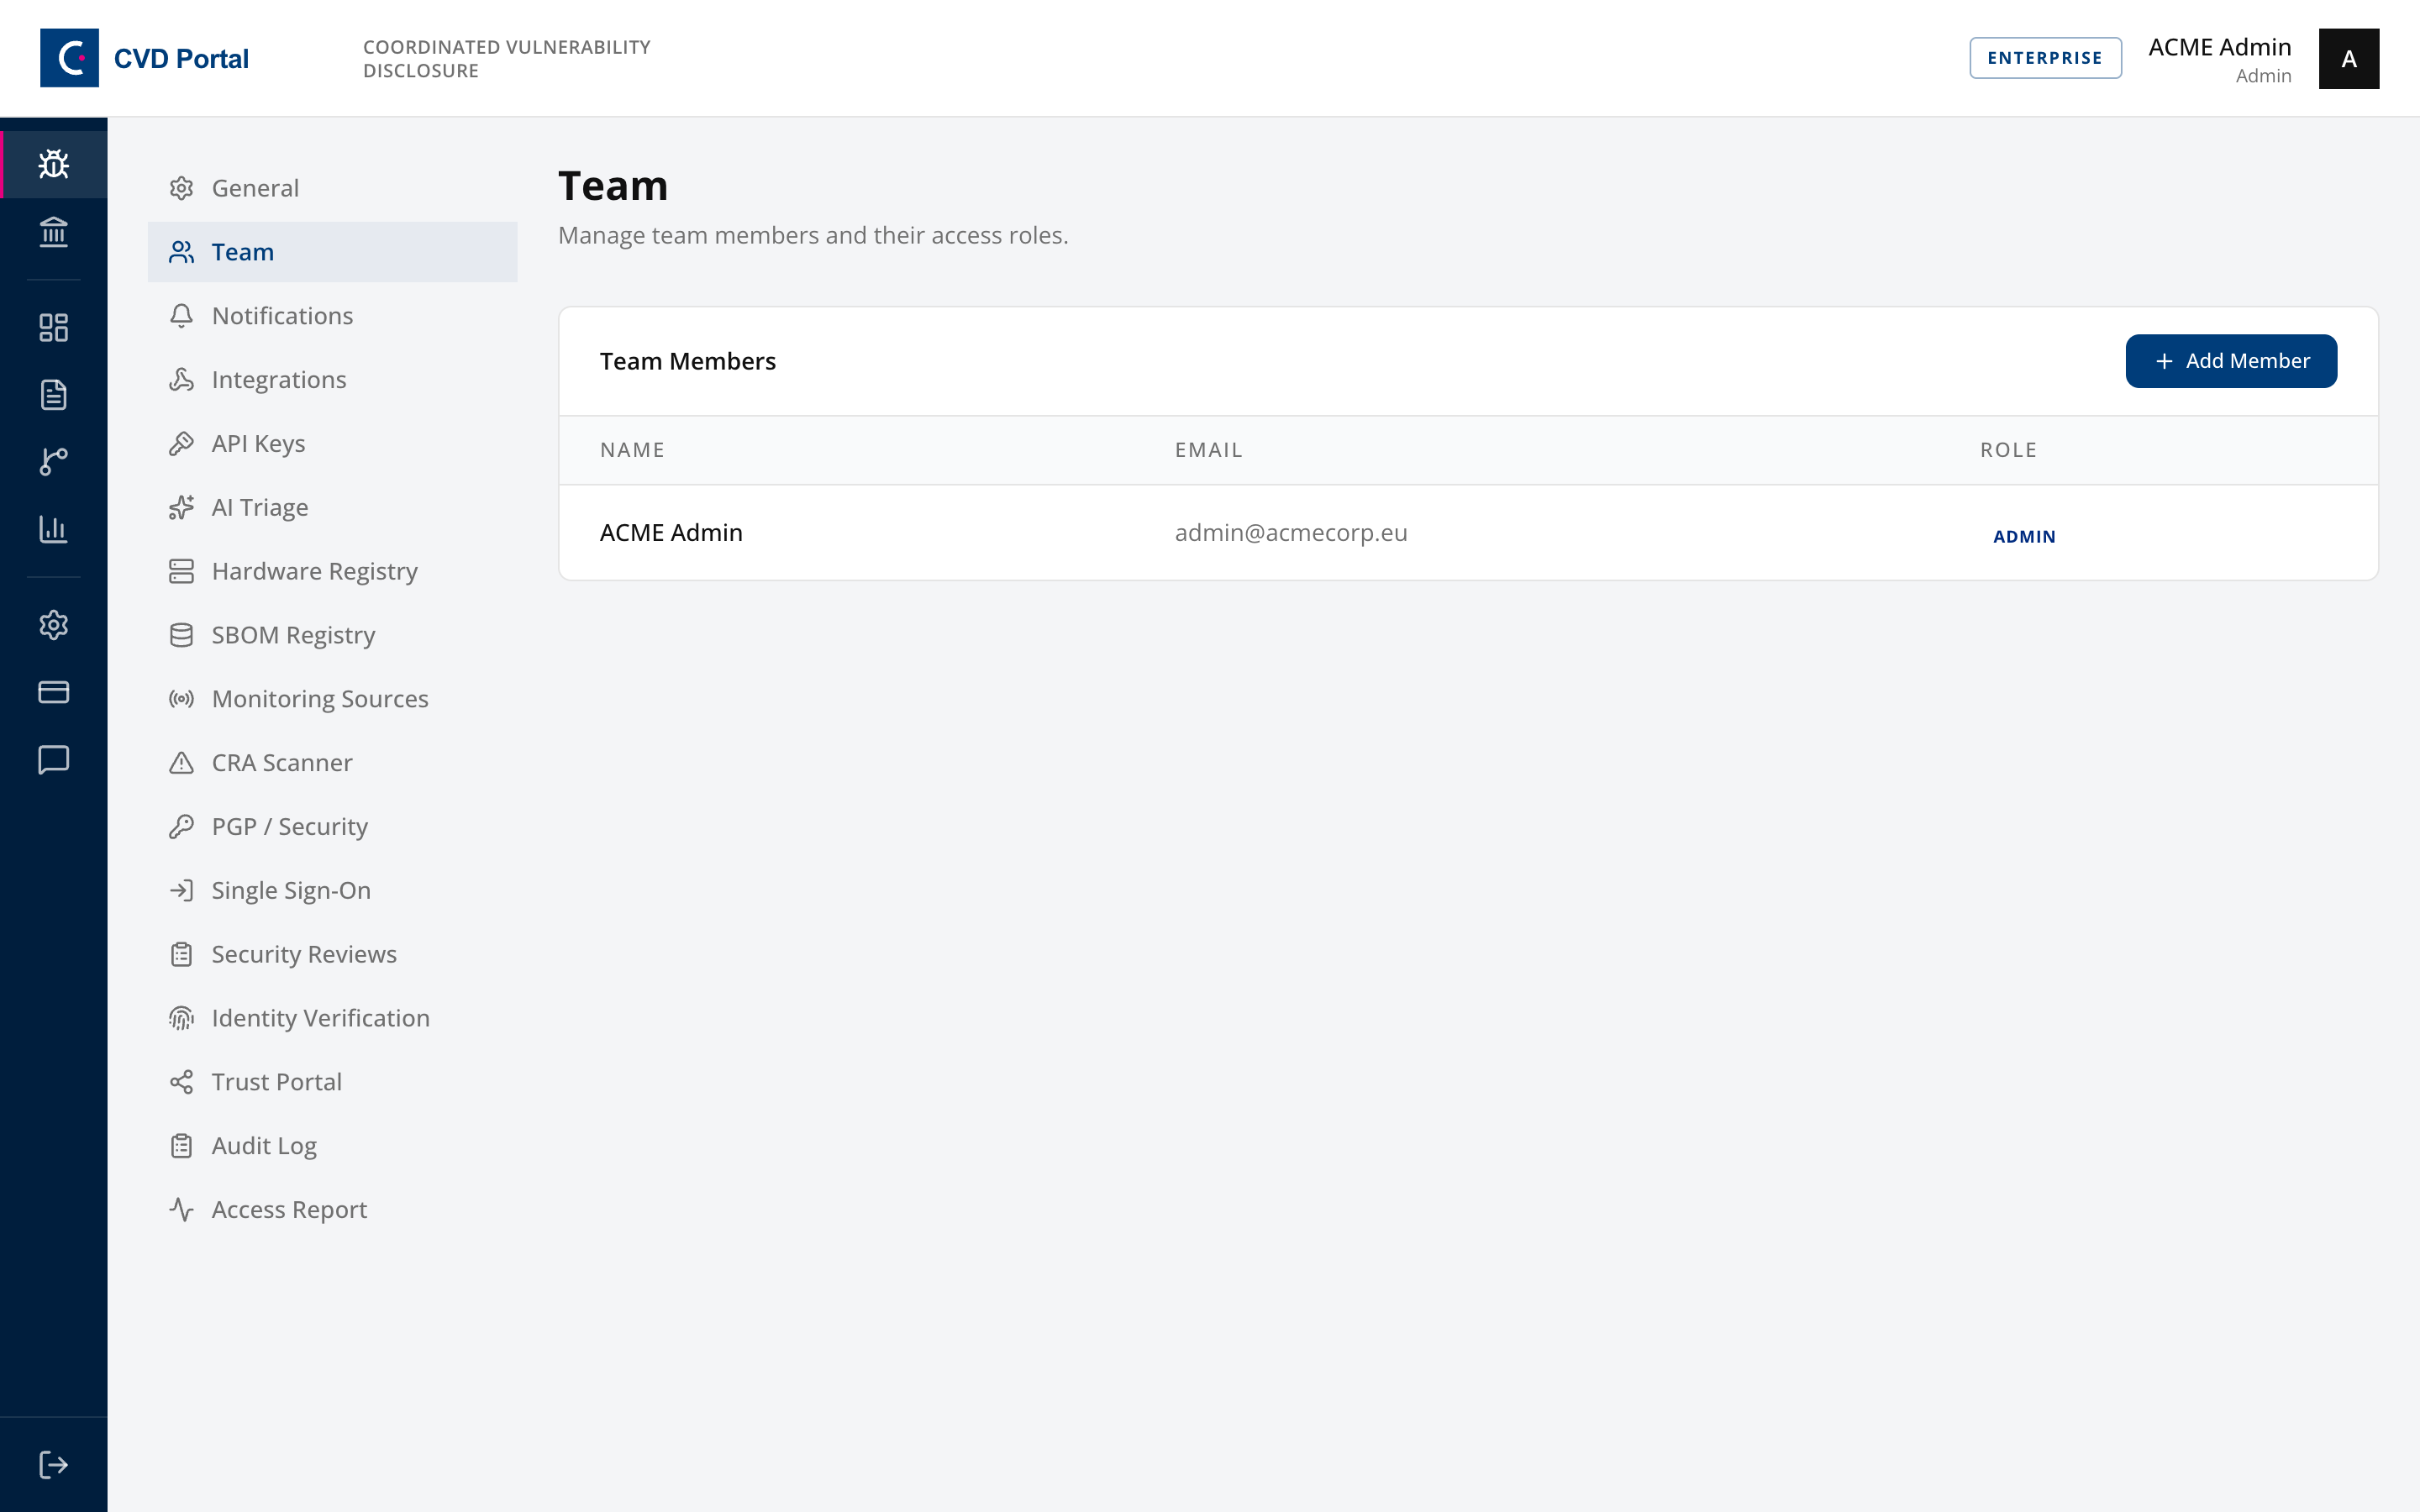
Team members are a Pro feature. On the Free plan the account owner works the inbox alone.
Step 10. Configure notifications
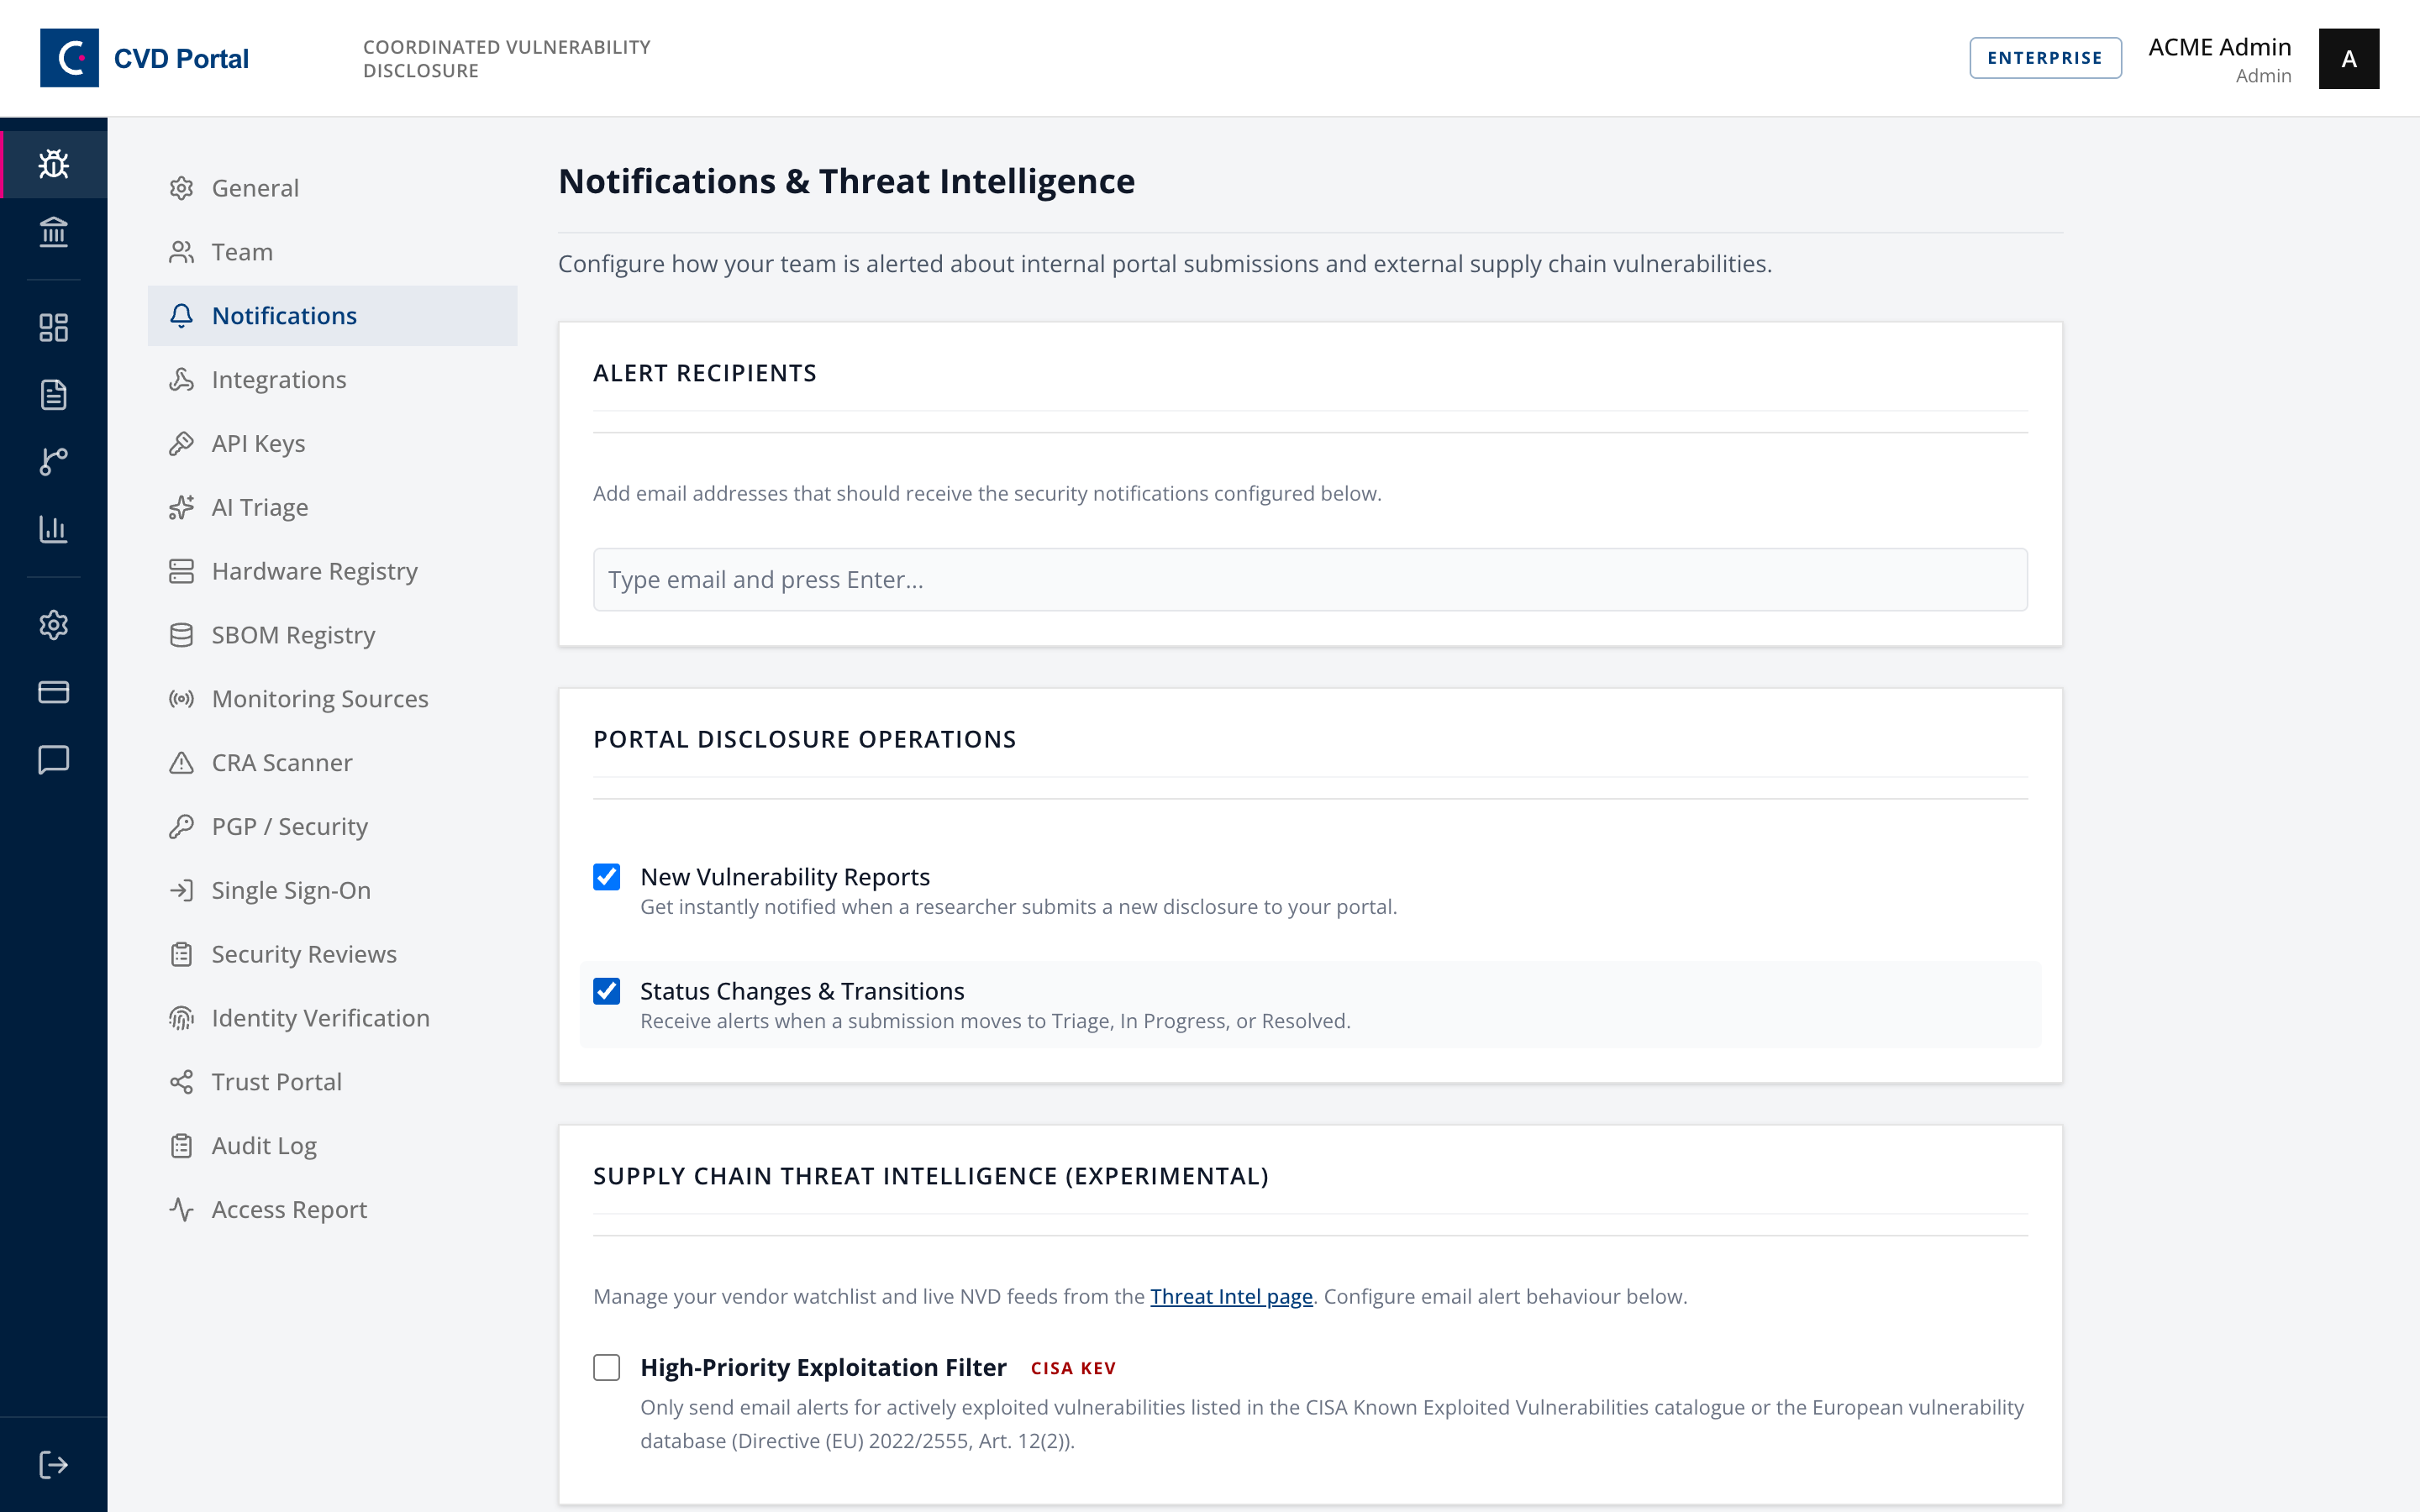
Open Settings, then Notifications.
Set where new submission alerts go. If nobody is notified, the acknowledgment SLA will breach regardless of how well the rest is configured.
Step 11. Publish a PGP key, optional
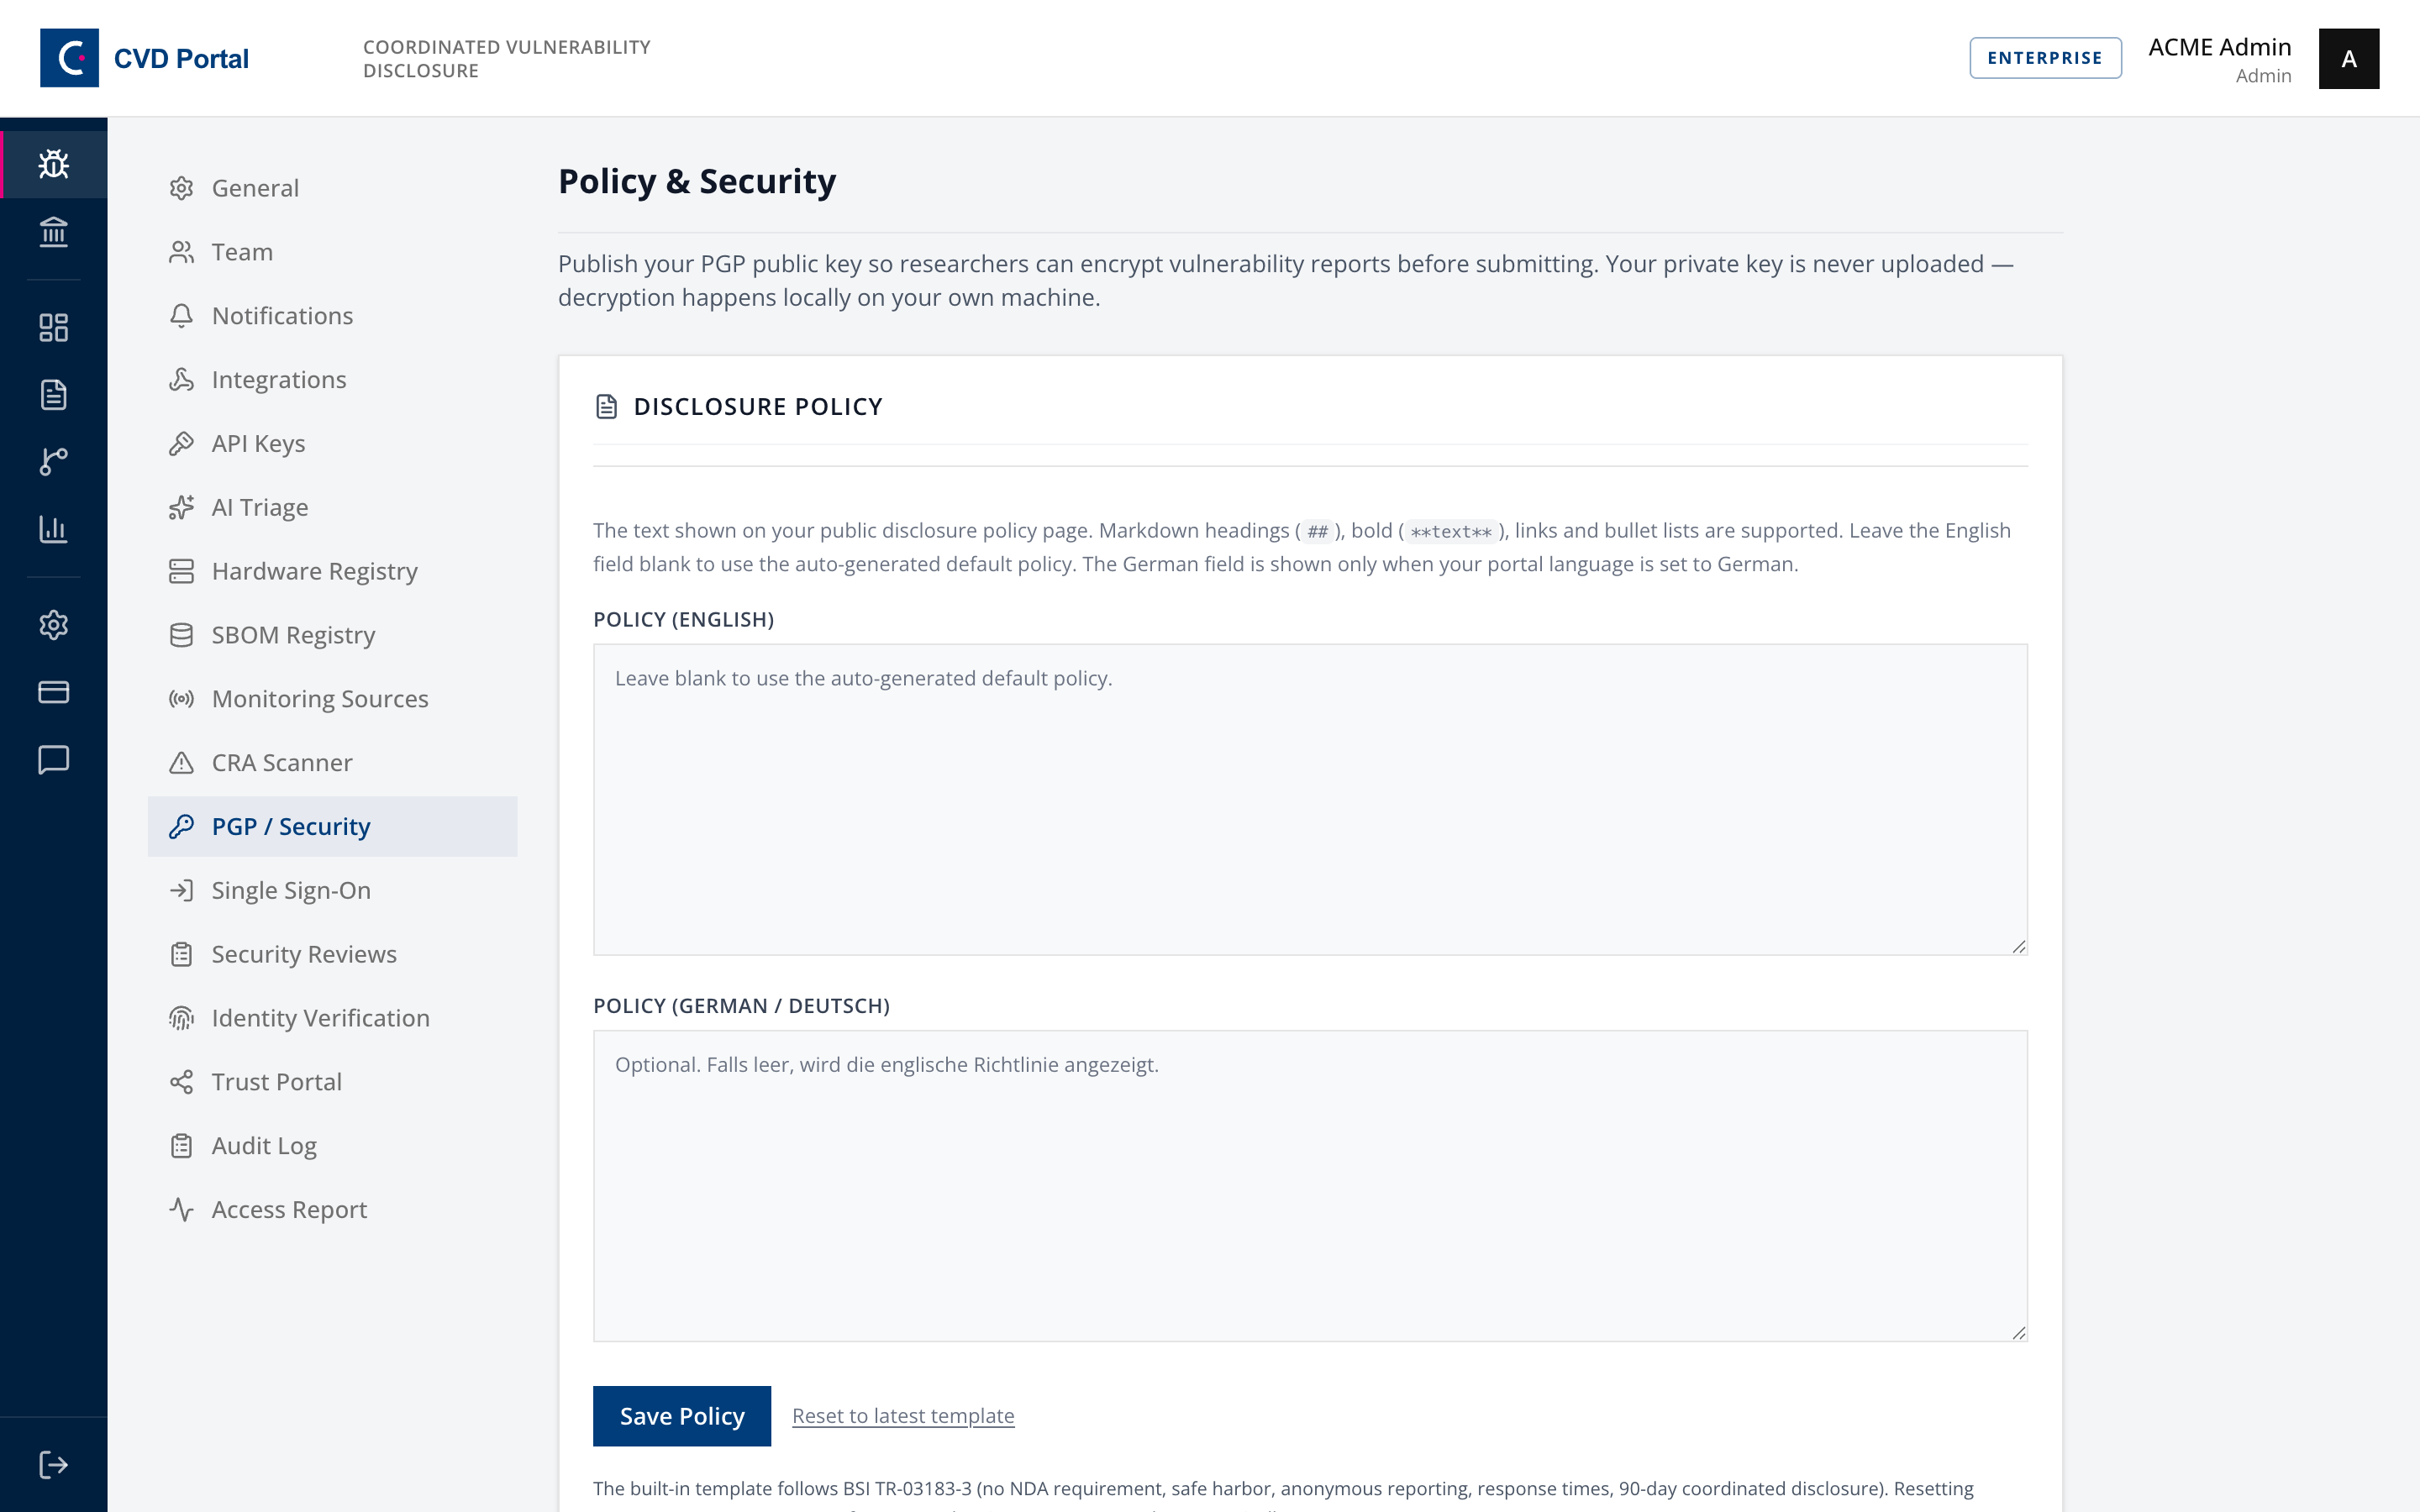
Open Settings, then PGP / Security.
Publishing a public key lets researchers encrypt report contents. It is optional but expected by experienced reporters handling sensitive findings.
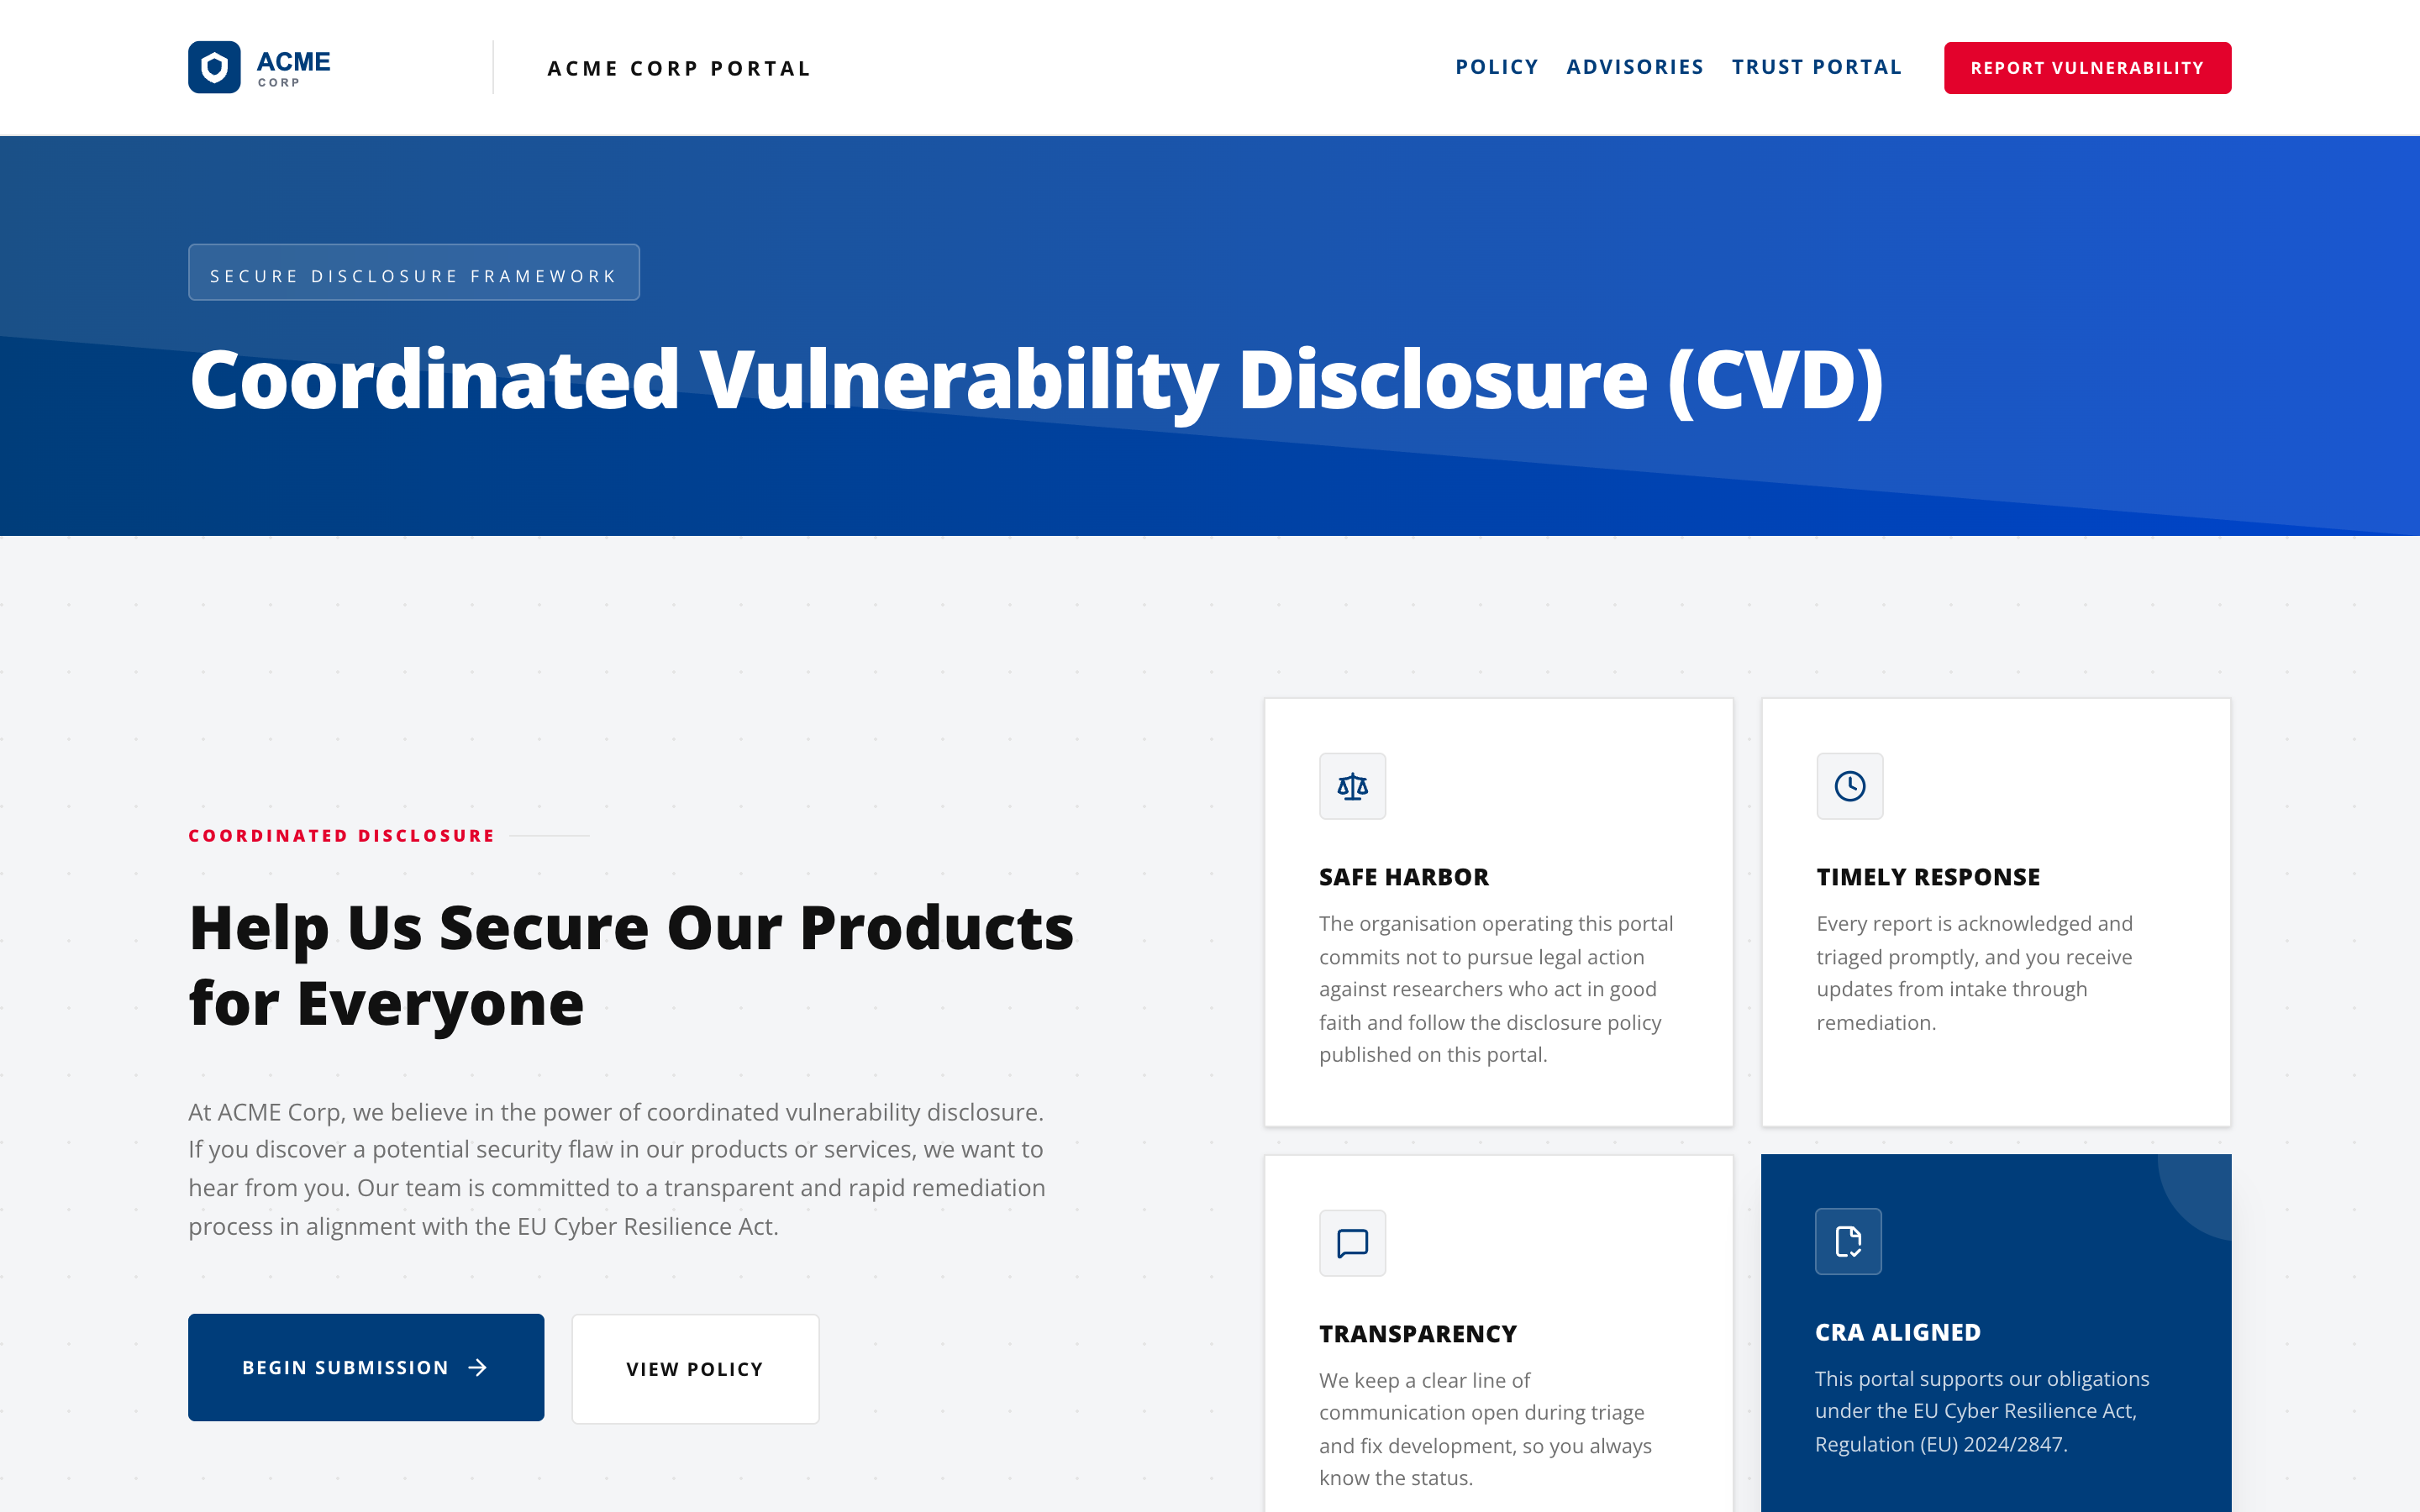
Step 12. Confirm the public portal
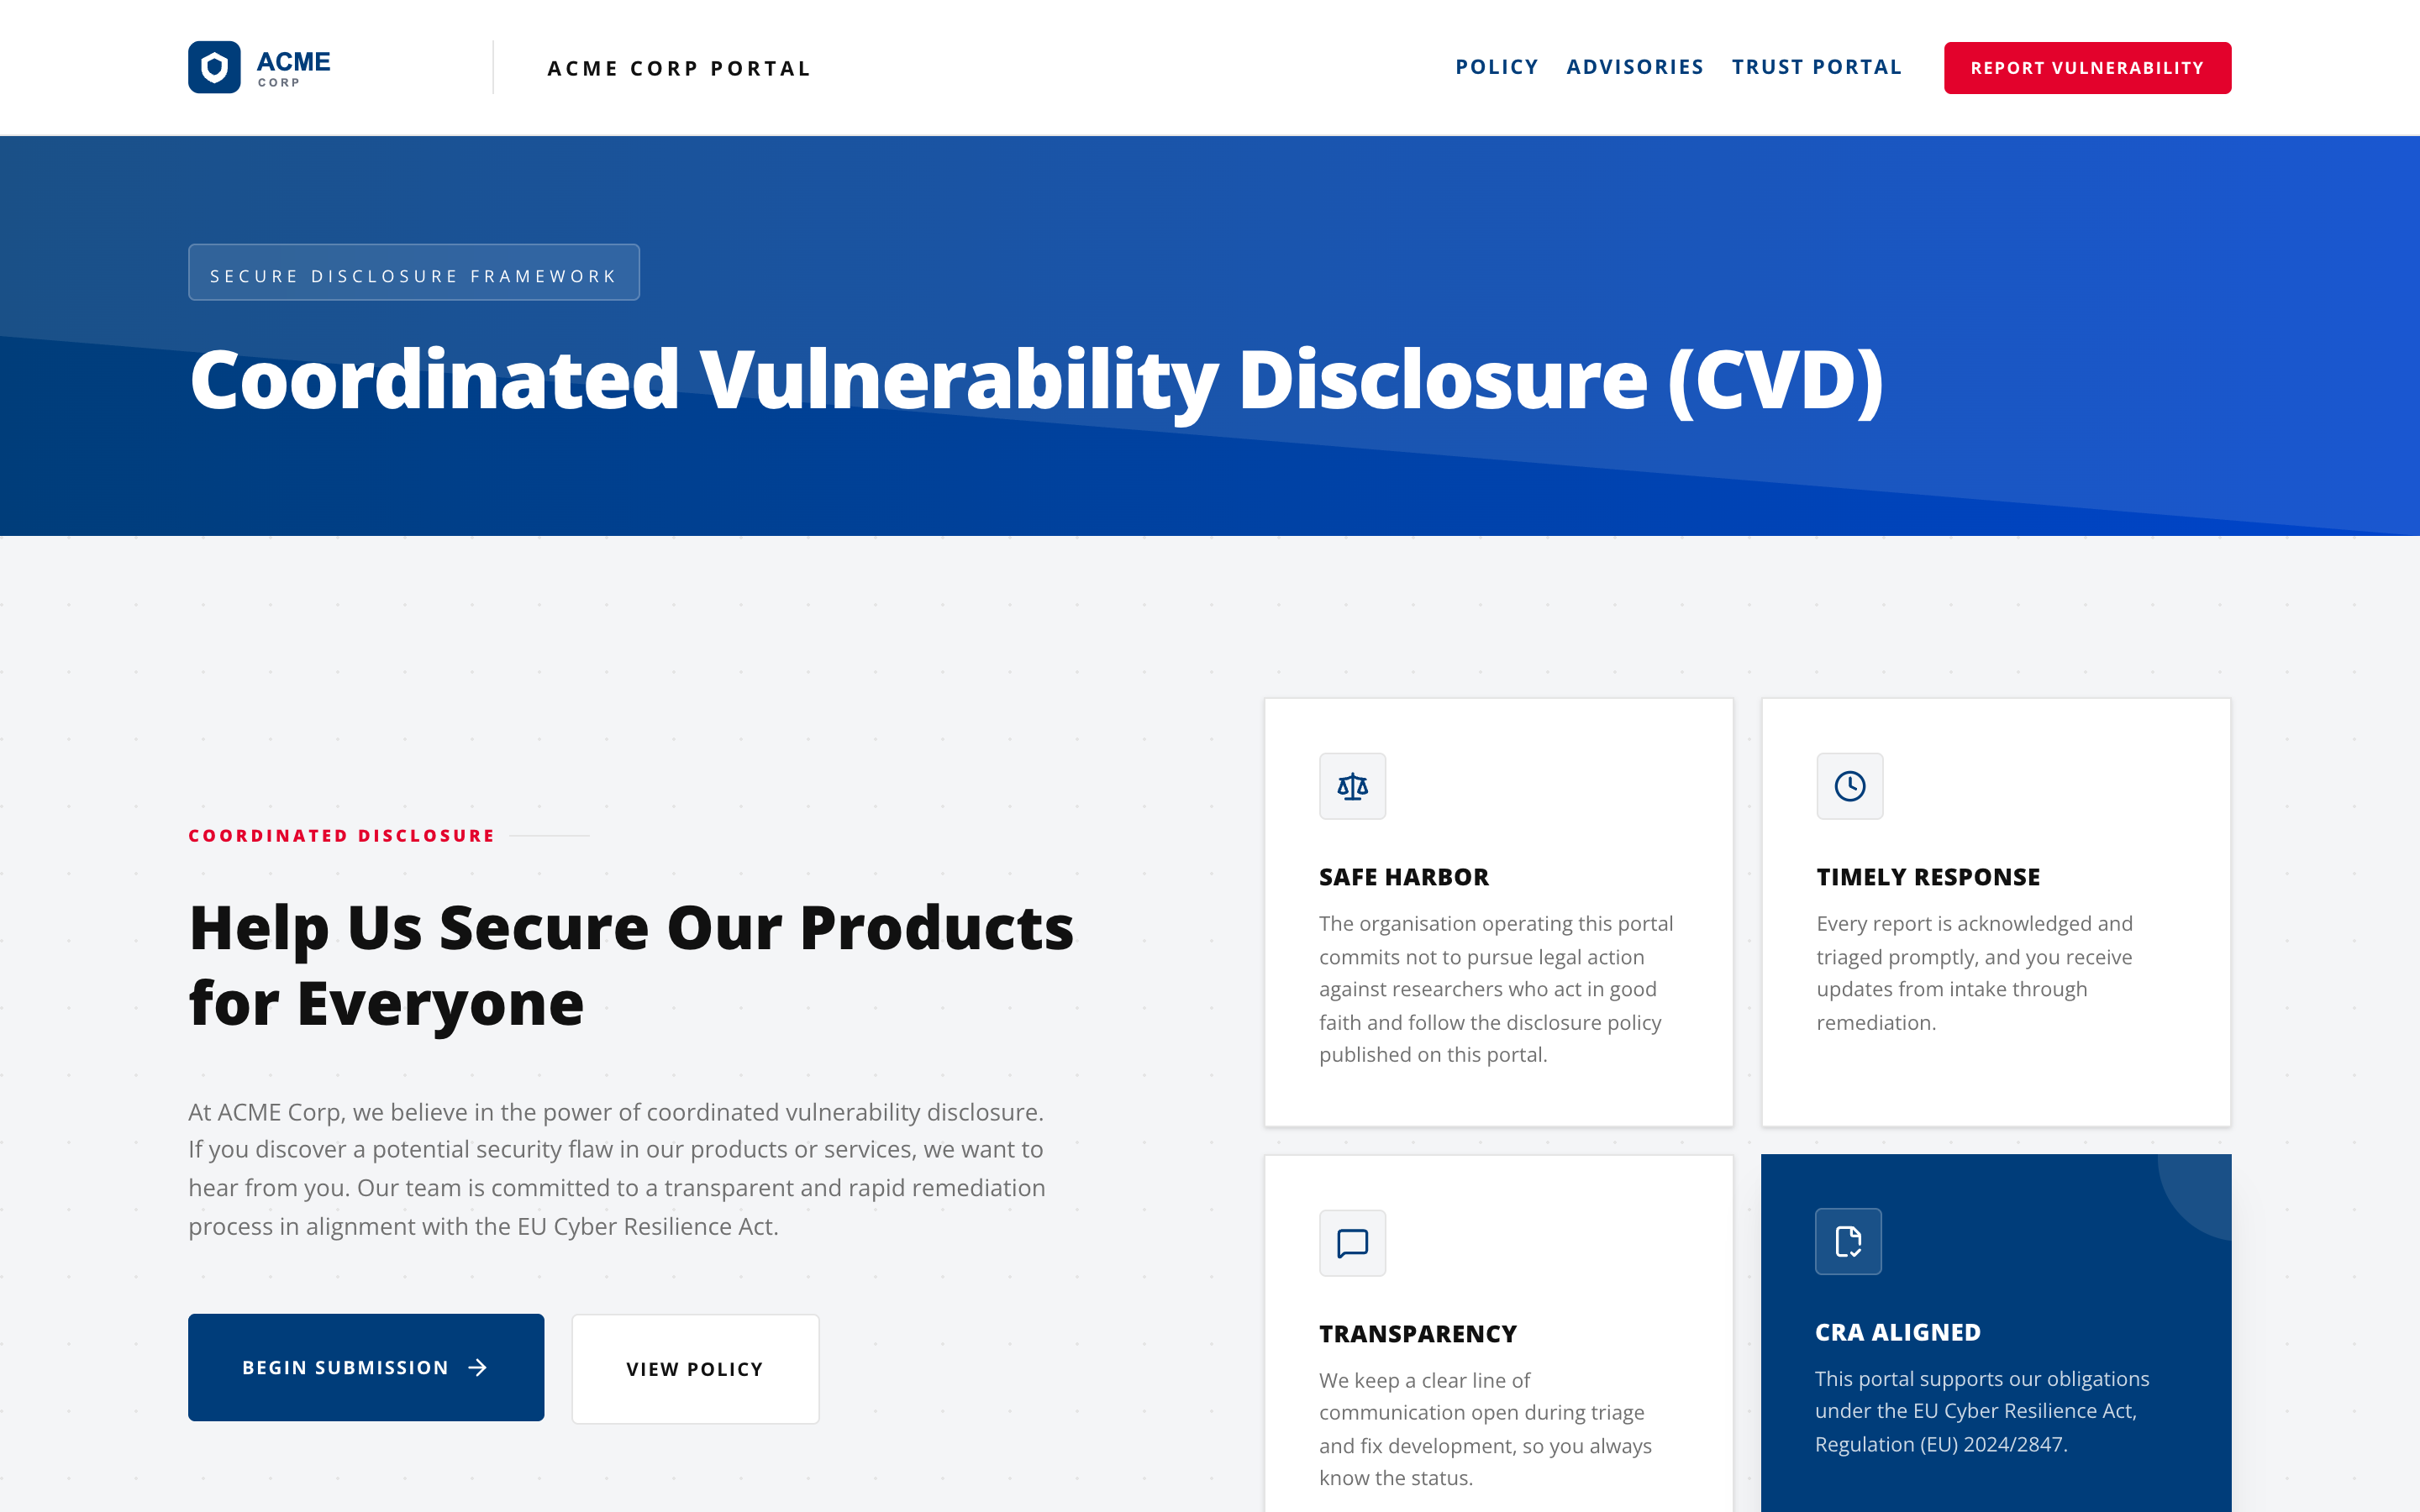
Open your portal at <your-slug>.cvdportal.com in a signed-out browser.
Check that the logo, company name and policy text are correct, and that Begin Submission opens the submission form.
Walk the submission form yourself before announcing the portal. It is the only way to confirm a researcher can actually complete a report.
Step 13. Learn the inbox
Open Submissions.
Every report lands here with product, type, reporter contact, status, age, SLA state and Article 14 state. Reports past the acknowledgment target are called out at the top of the page.
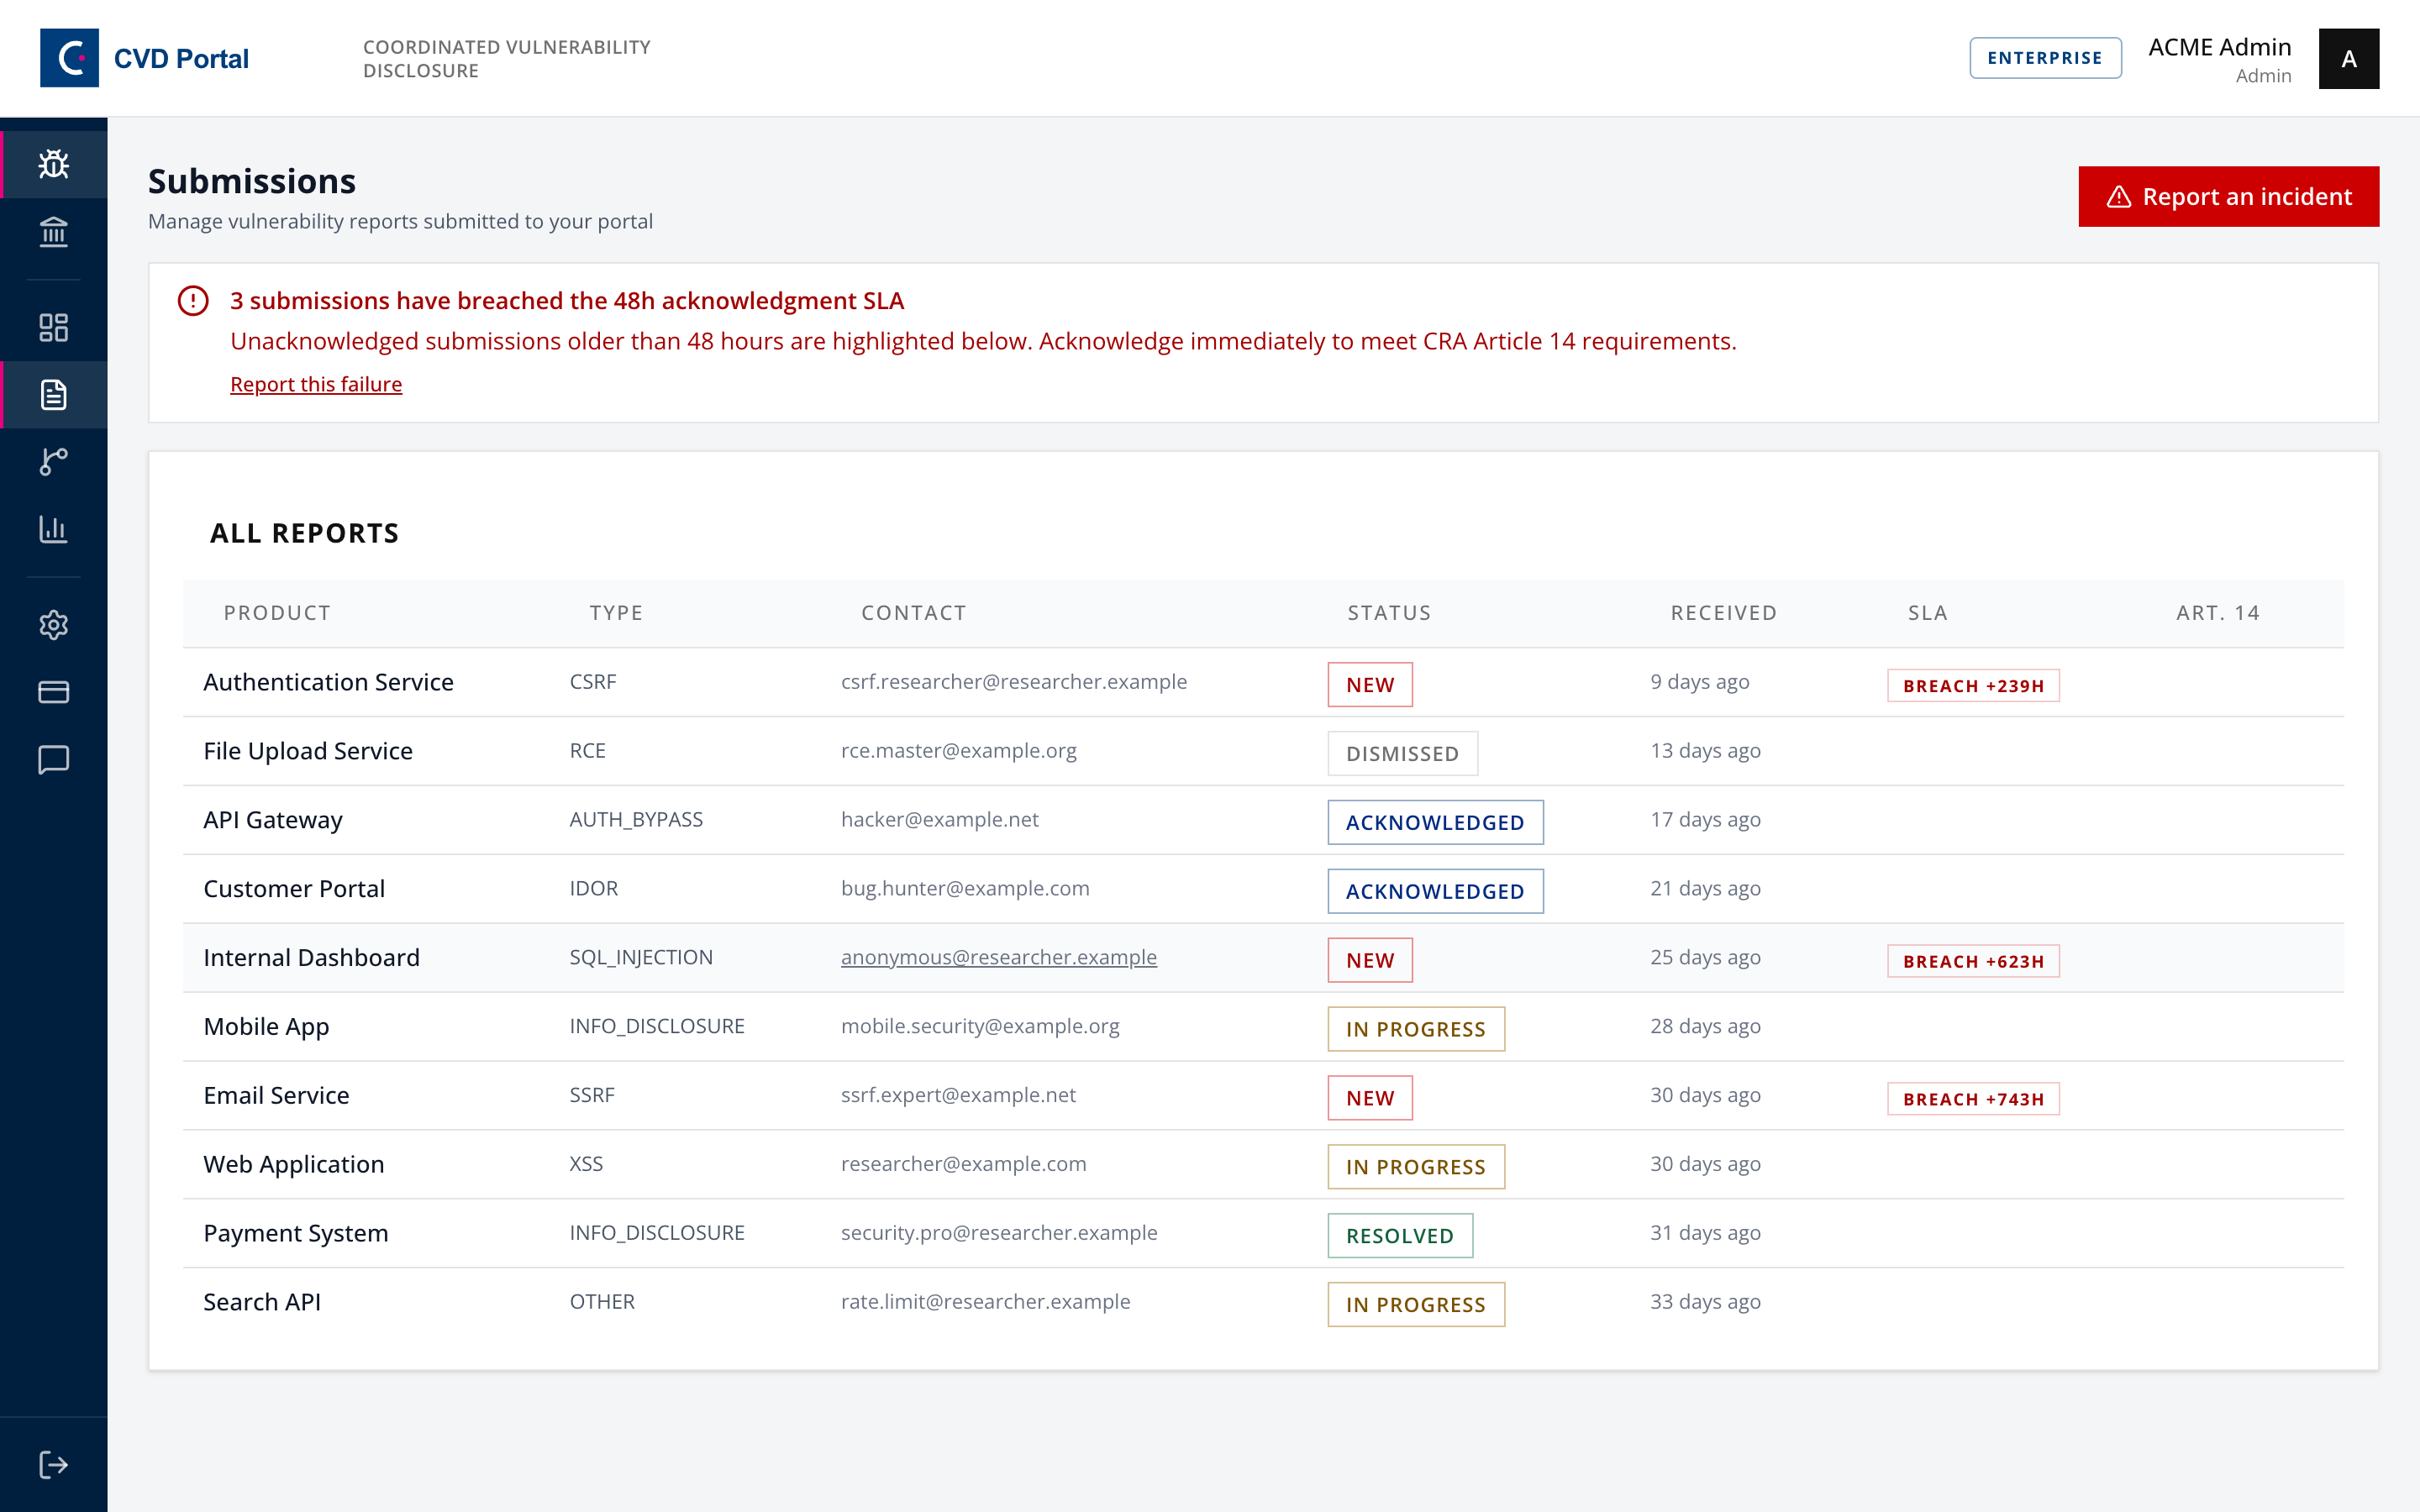
Acknowledge first, investigate second. The acknowledgment clock is what the SLA measures, and a breached acknowledgment is visible evidence of a process that is not working.
Step 14. Confirm the audit trail
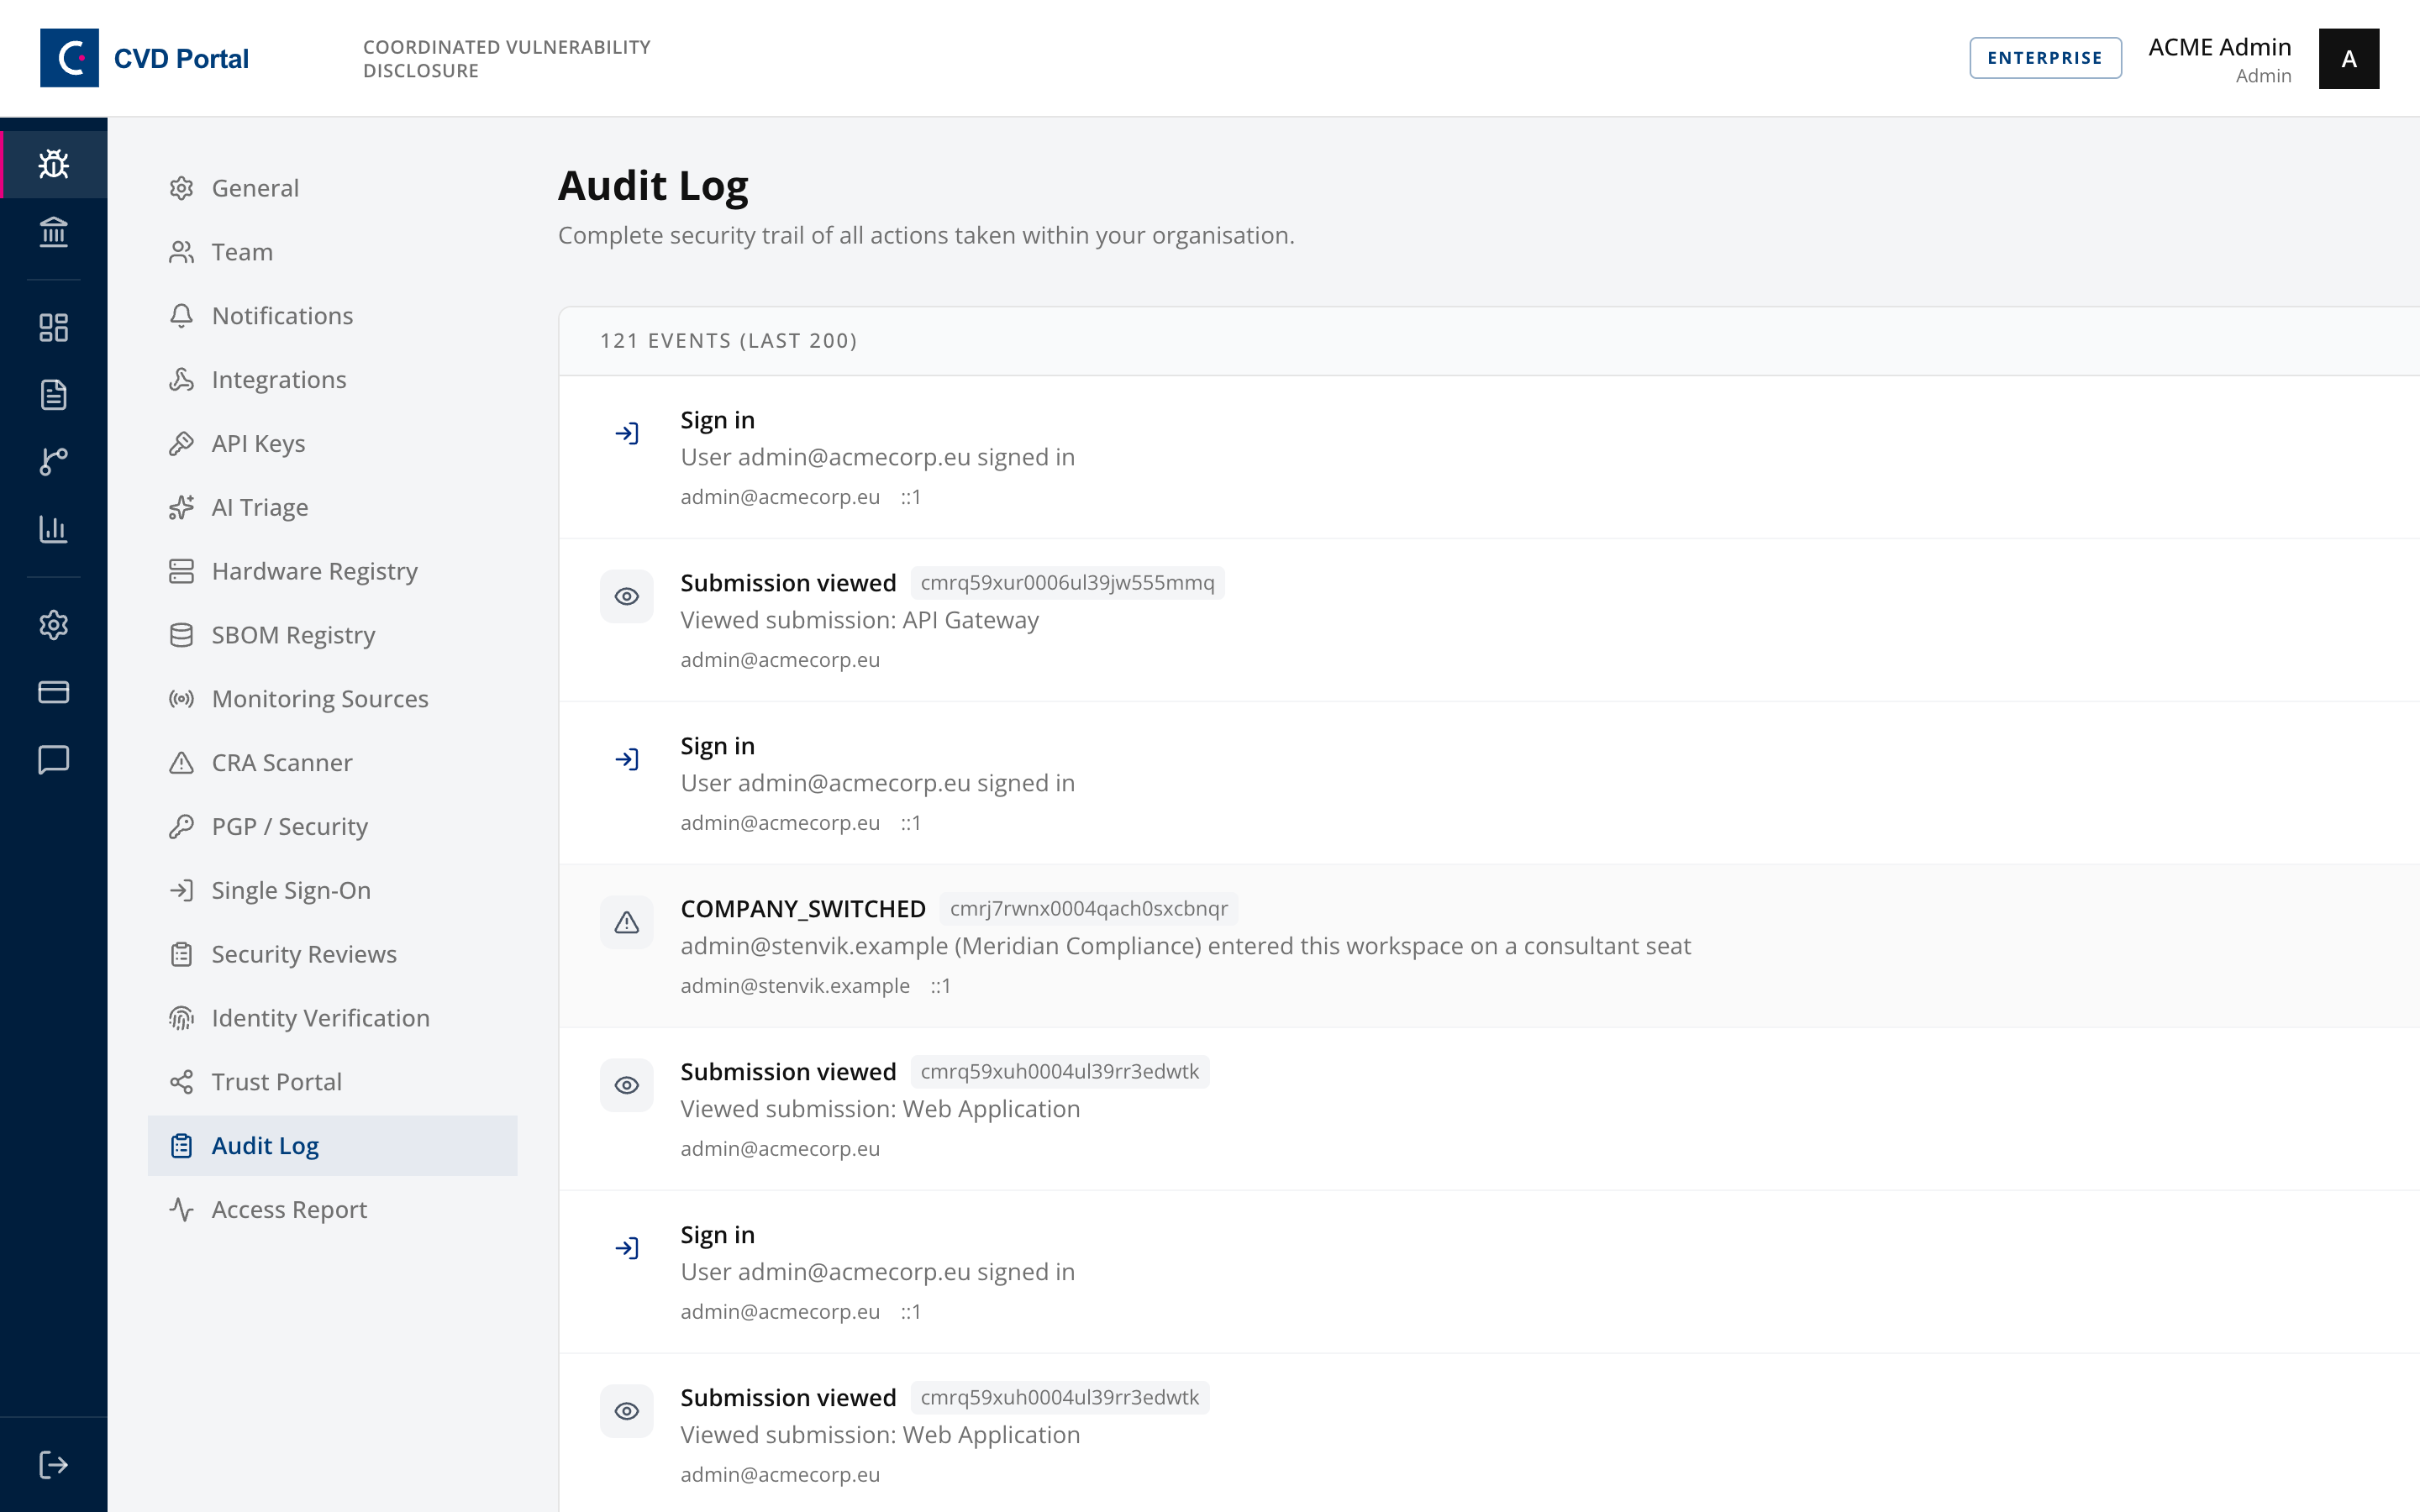
Open Settings, then Audit Log.
The log is append-only and hash chained. Entries cannot be edited or deleted, which is what makes it usable as compliance evidence.
Completion checklist
- Company verified and profile complete
- Member State of establishment set and a designated CSIRT resolved
- Member States of availability recorded
- Logo and portal branding applied
- Acknowledgment target and resolution SLAs set
- Vulnerability handling procedure generated or attached, and reviewed
- Portal linked from the corporate website
-
security.txtpublished and verified - Triage team invited with correct roles
- New submission notifications routed to a monitored destination
- Public portal and submission form walked end to end
- Audit log confirmed to be recording
What comes next
The portal covers vulnerability intake and handling. It does not by itself make a product conformant. To take a product through classification, Annex I self-assessment and the Declaration of Conformity, follow SOP-02, Taking a Product Through CRA Compliance.
Short how-to videos
Single-task walkthroughs drawn from this procedure: