Triaging a Vulnerability Report
Audience. Whoever works the submissions inbox day to day.
Outcome. Every report acknowledged inside the SLA, scored, assigned, decided on, and closed with an evidence trail that stands up to inspection.
Why it matters. SOP-01 gets reports arriving. This is what happens next, and it is where the CRA vulnerability-handling requirements in Annex I Part II are actually met or missed. Several panels here carry their clause reference on screen, so the trail assembles itself if you use them.
Time required. Acknowledgment takes under a minute and should never wait. The rest follows the vulnerability.
Step 1. Work the inbox by SLA, not by arrival
Open Submissions.
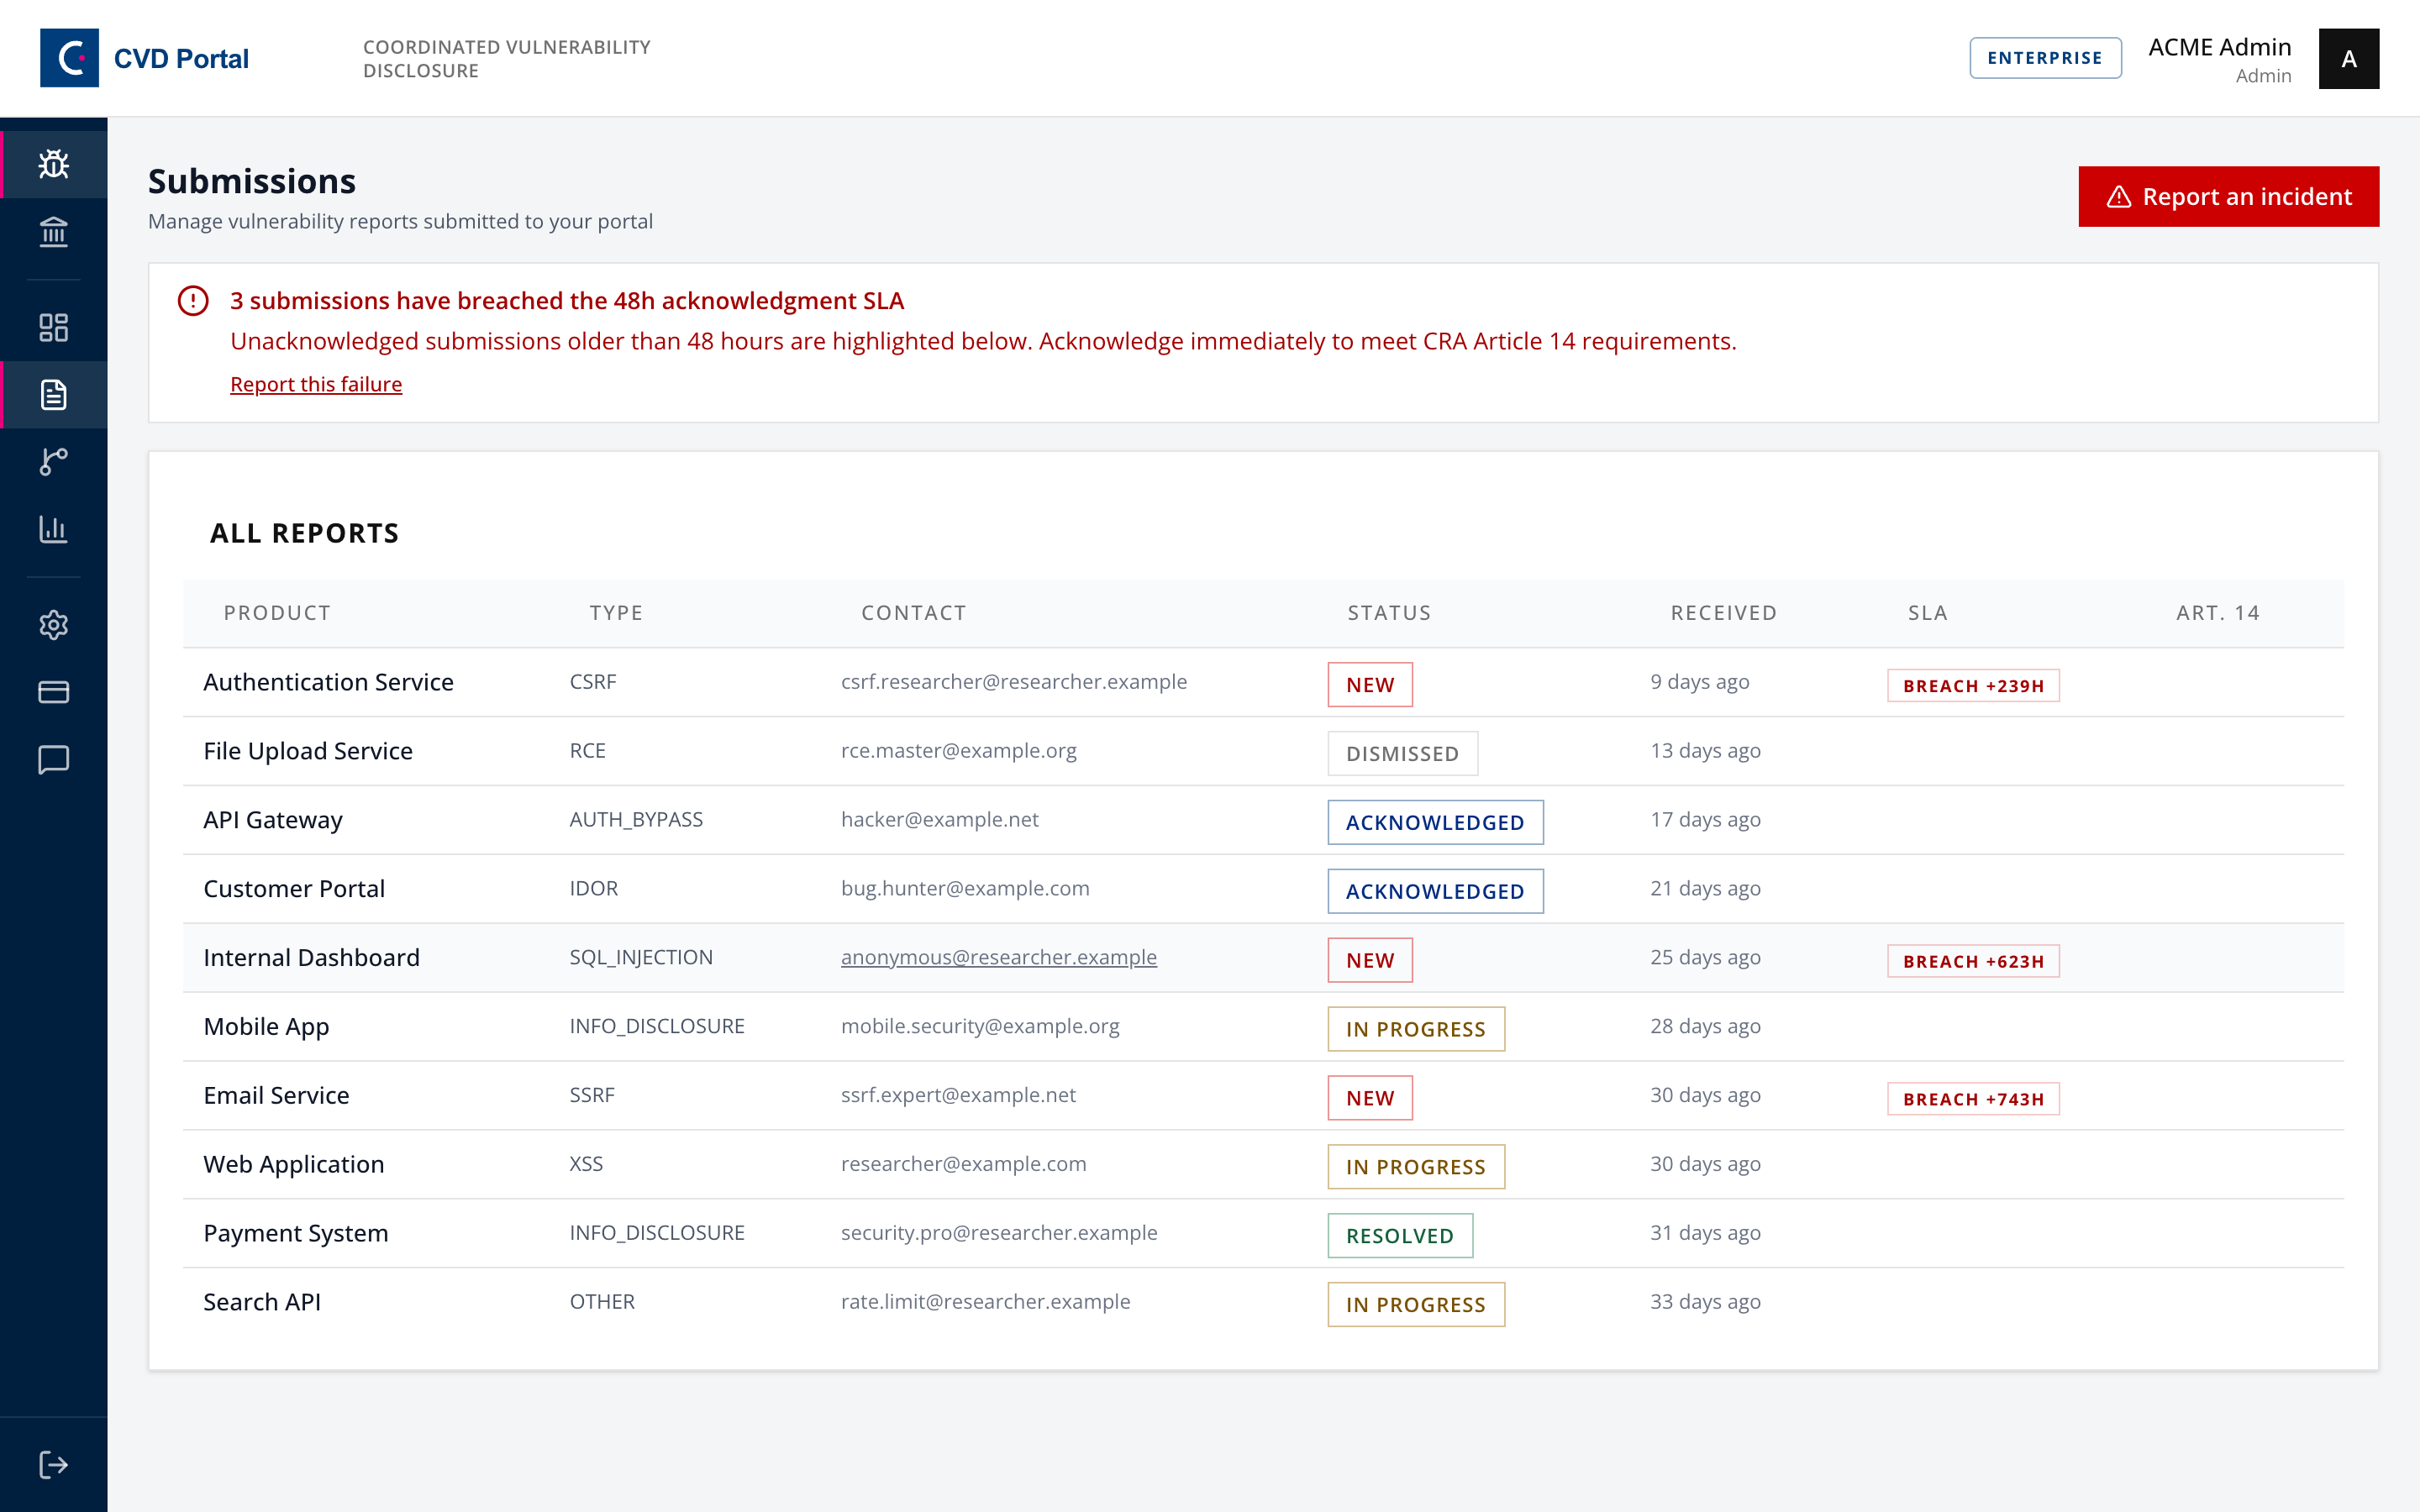
Every report shows product, type, reporter contact, status, age, SLA state and Article 14 state. Anything past the acknowledgment target is called out at the top of the page and flagged in the SLA column.
Sort your attention by the SLA column, not the date. A breached acknowledgment is the one thing on this screen that is visible evidence of a process not working.
Step 2. Acknowledge first, investigate second
Open the report and acknowledge it. The Acknowledge button sits inside the acknowledgment alert at the top of the report, beside the time the acknowledgment is due.
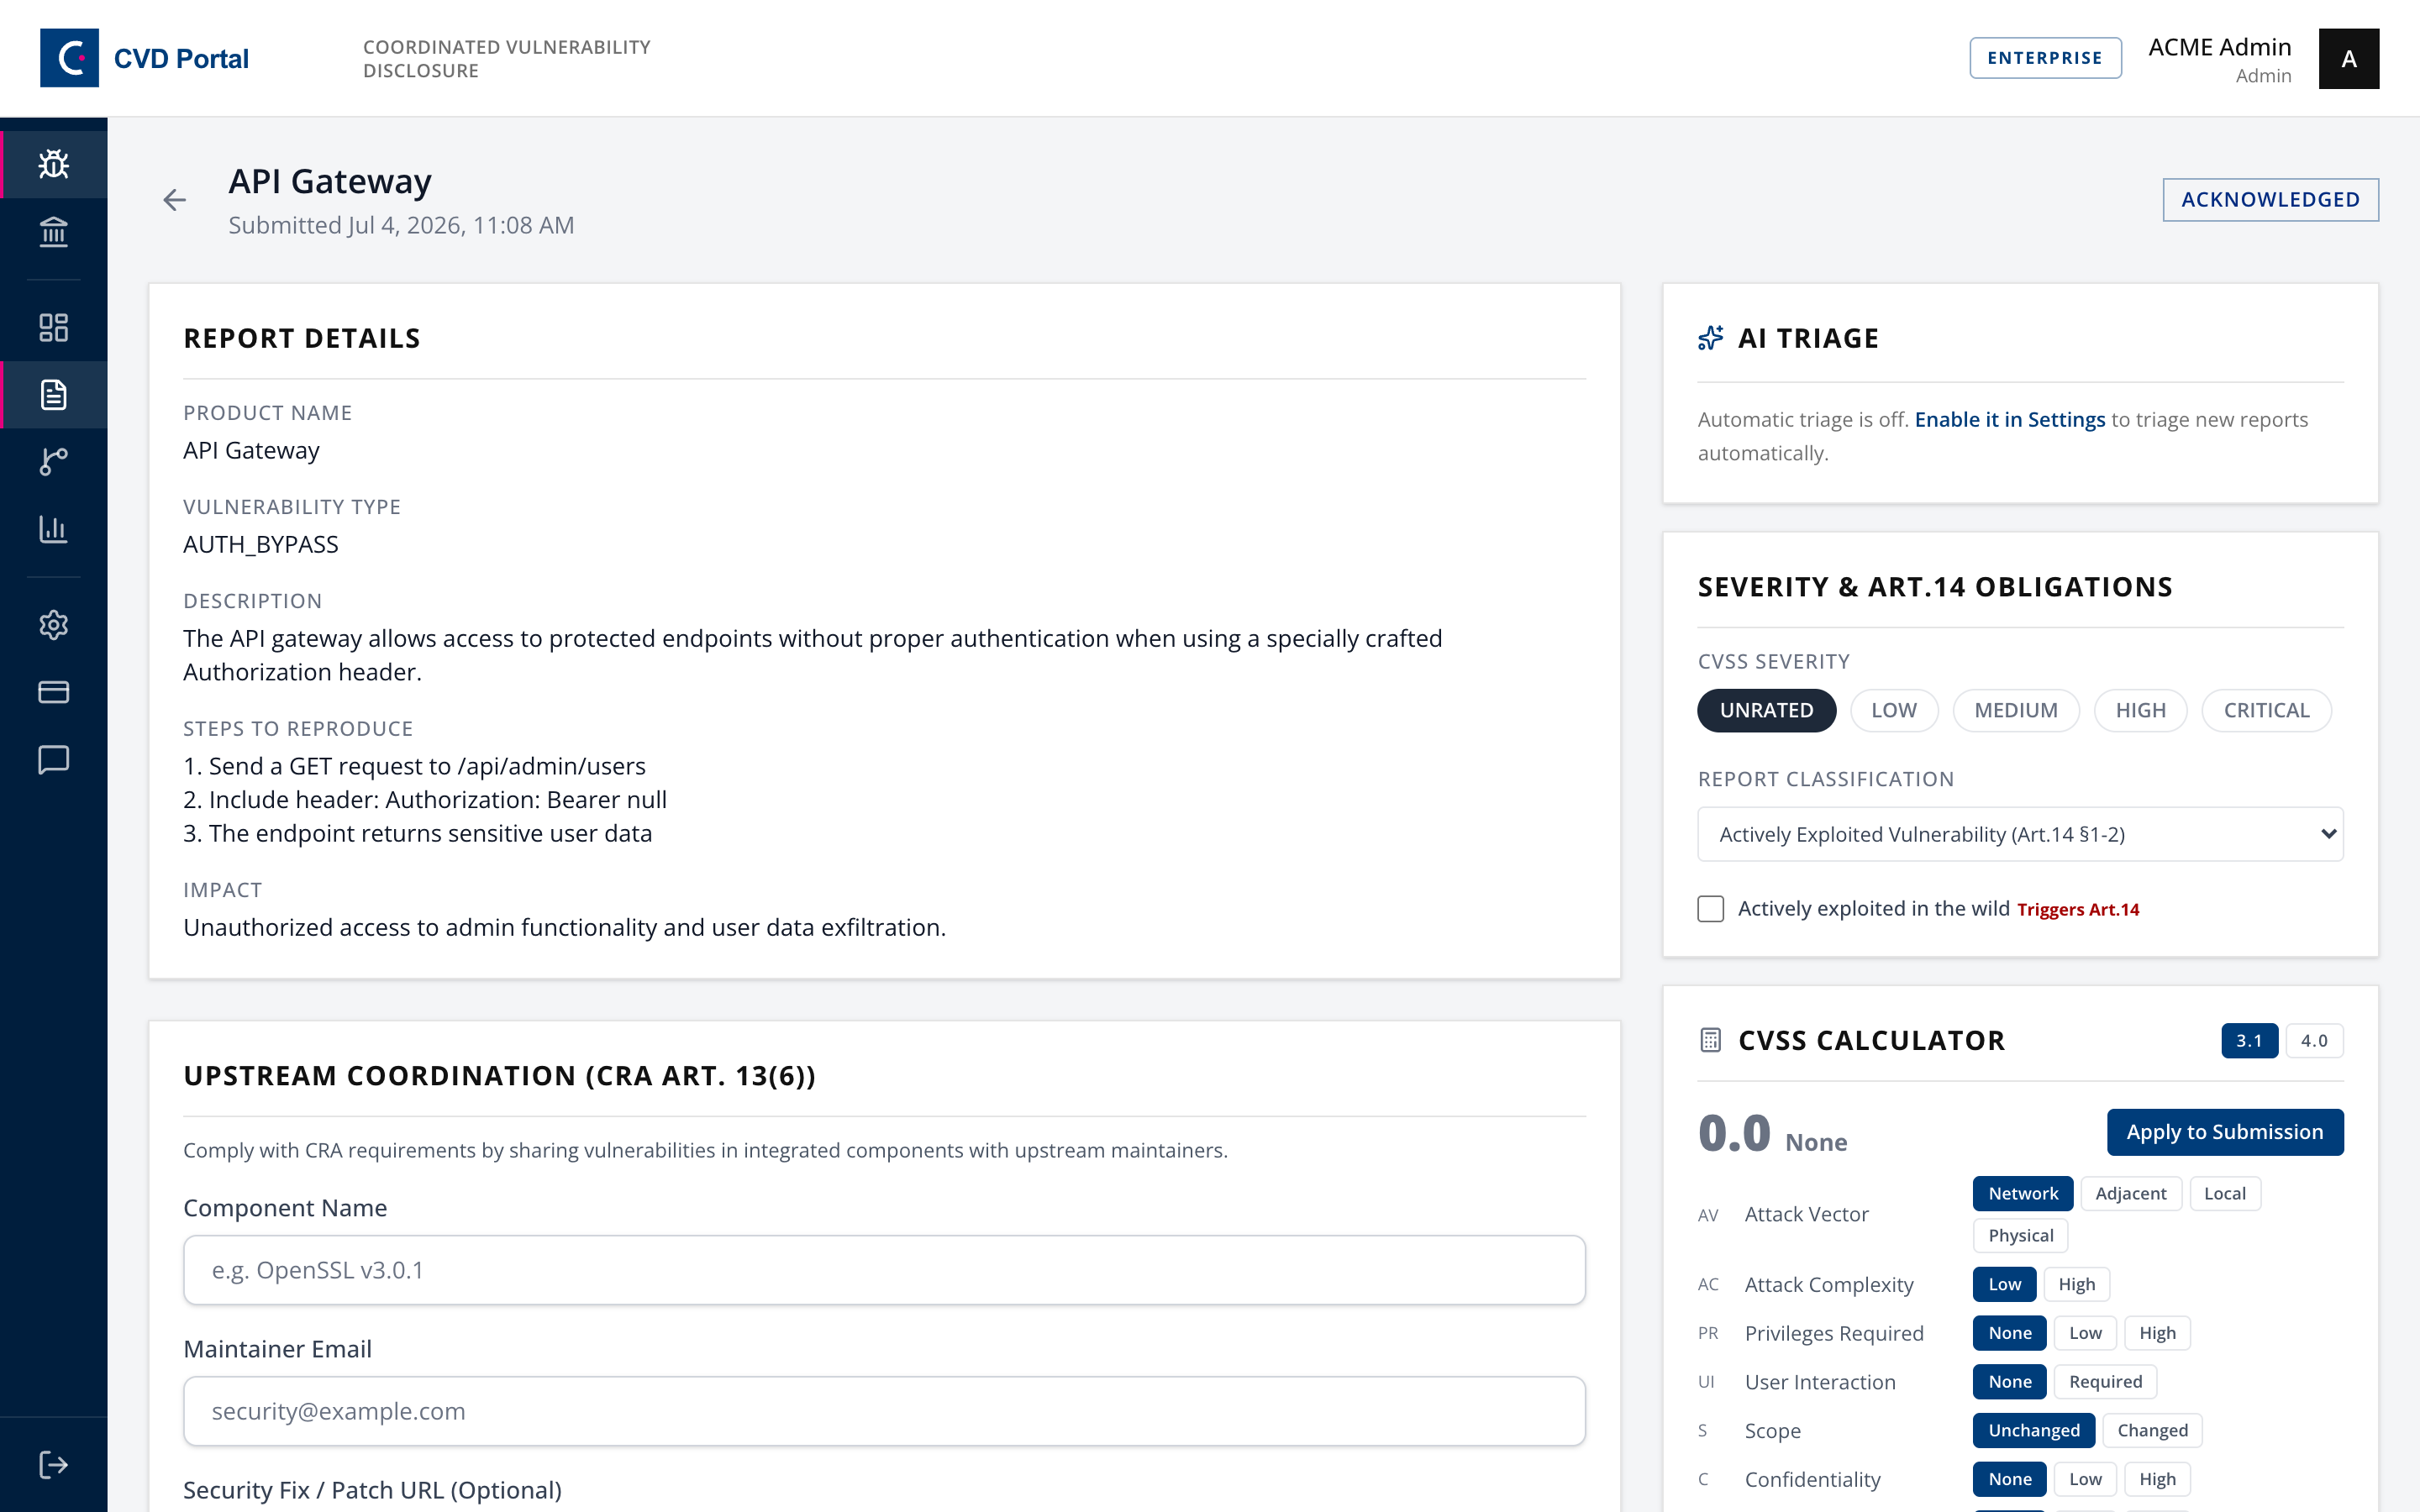
The acknowledgment clock is what the SLA measures. It is not a claim that you understand or agree with the report, only that a human has it. Acknowledging in sixty seconds and investigating for a week is a working process. Investigating for a week and then acknowledging is a breach.
Step 3. Score it
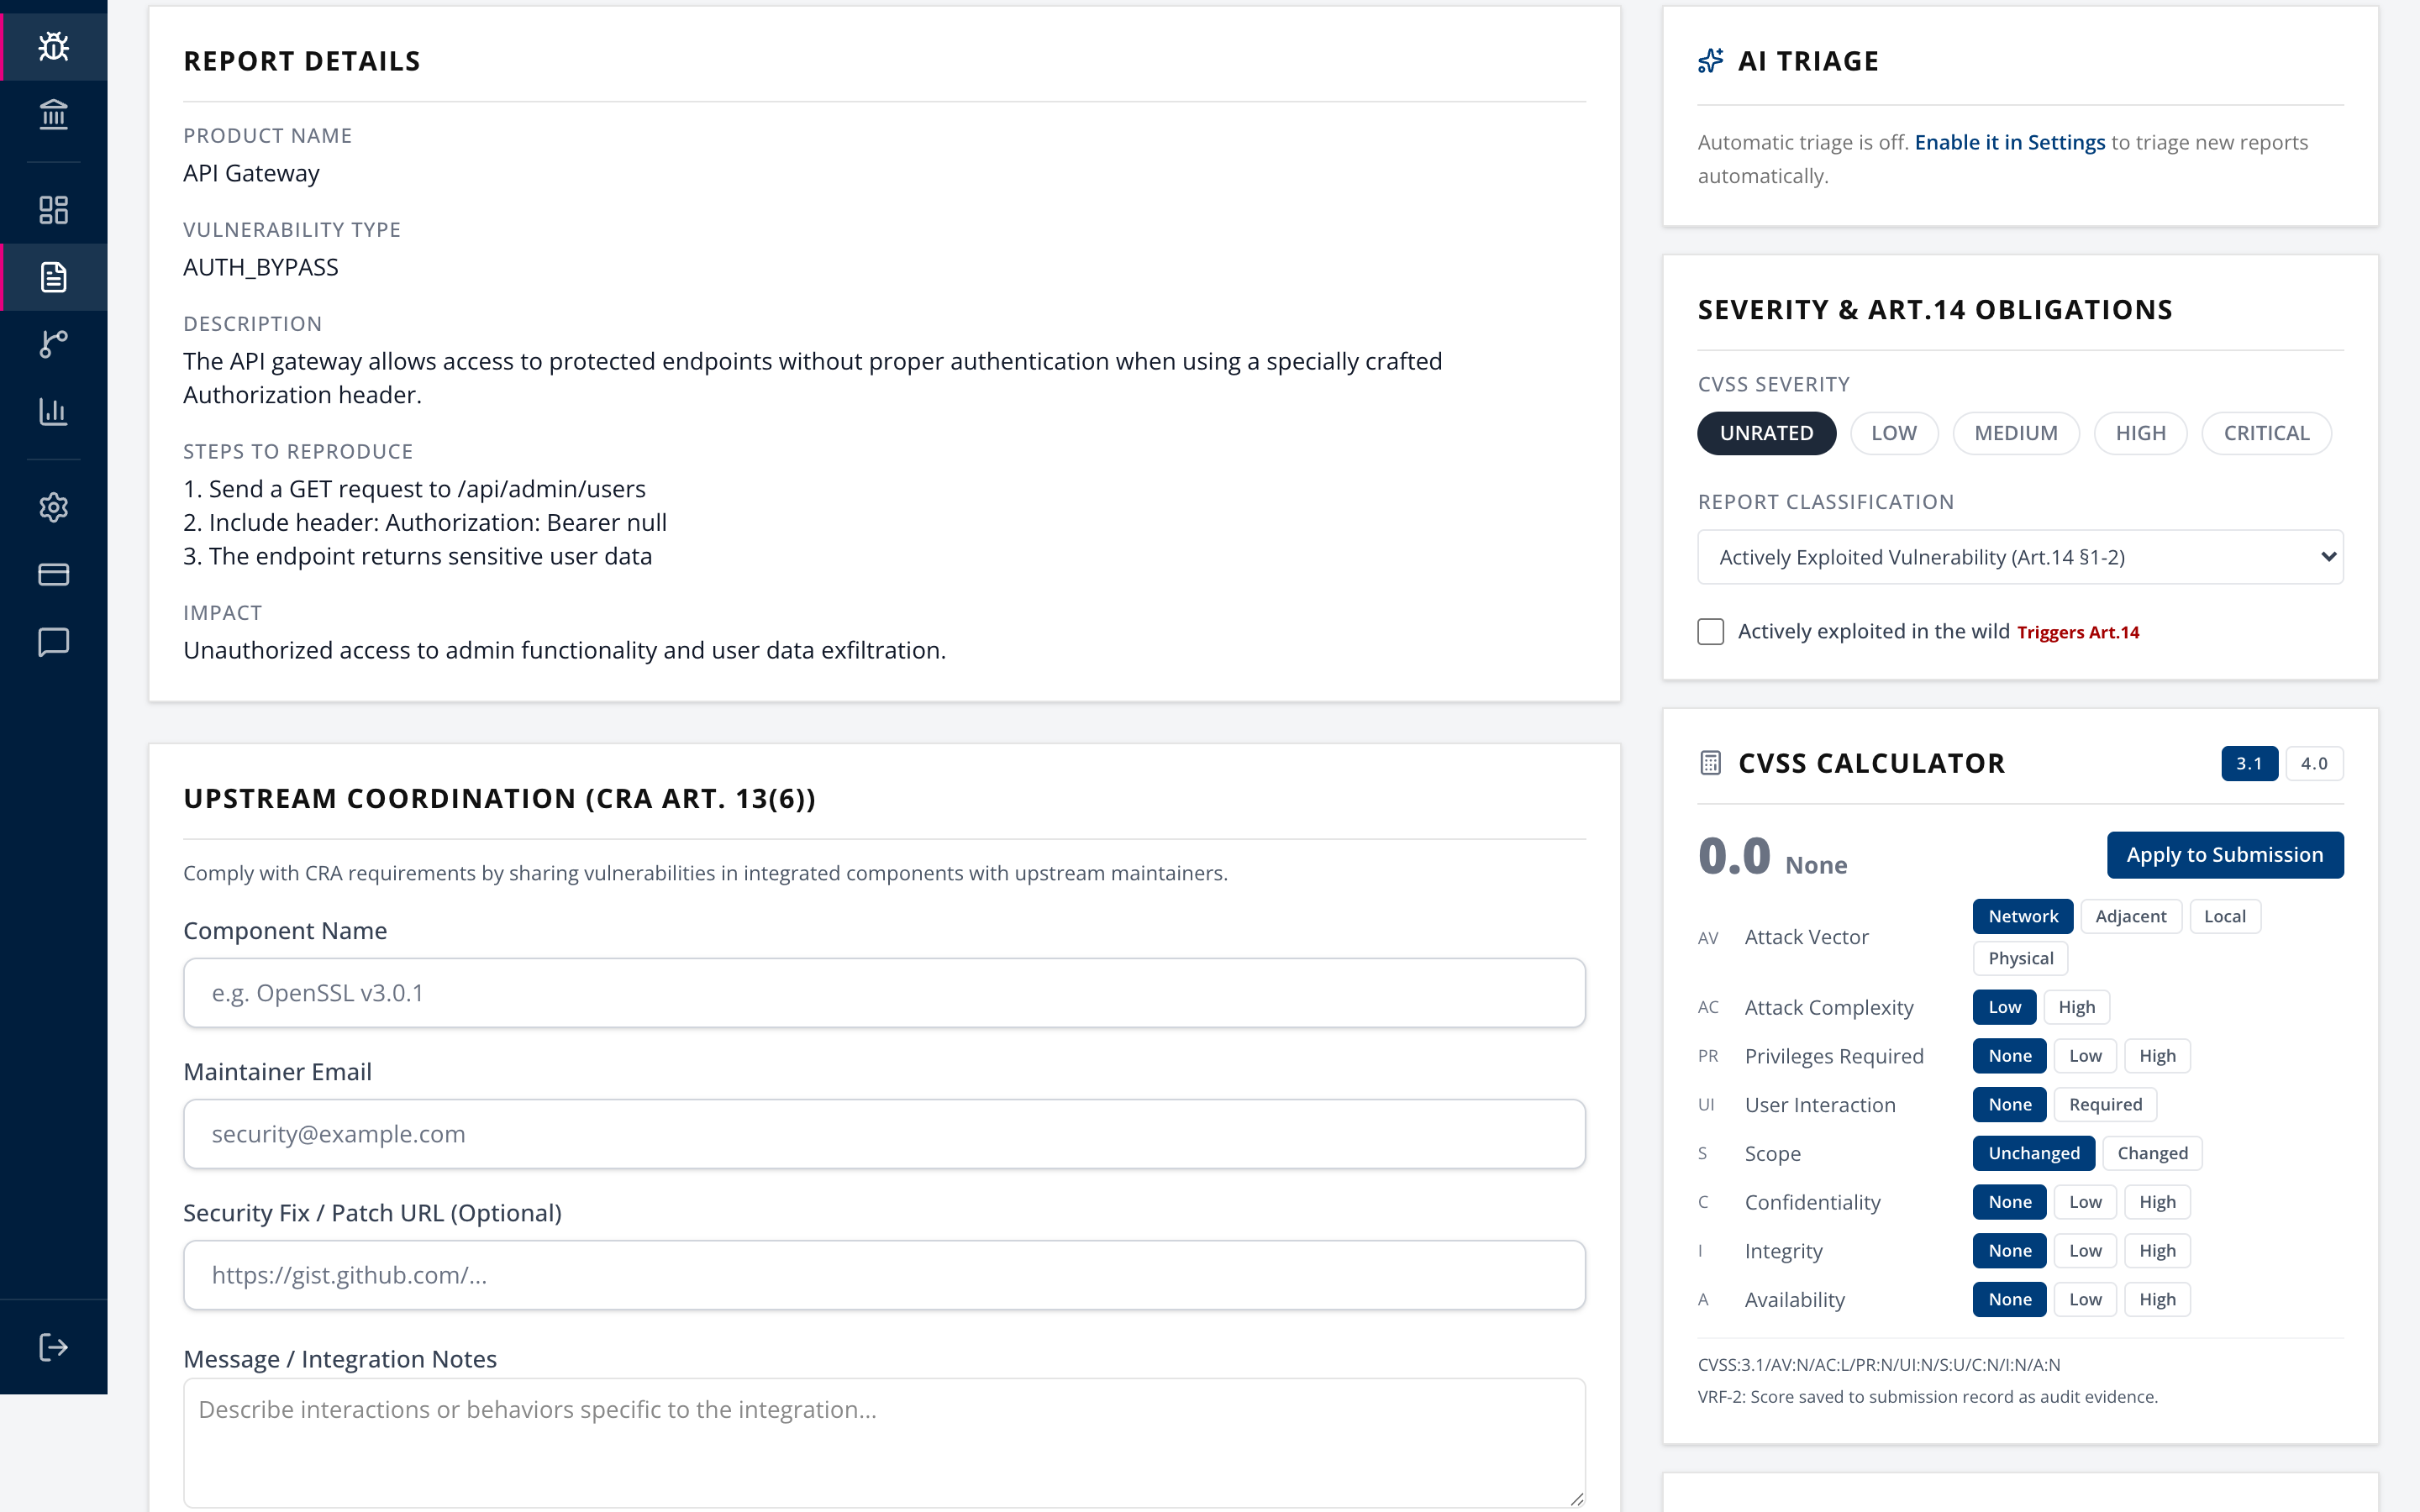
Use the CVSS Calculator panel. Both 3.1 and 4.0 are available.
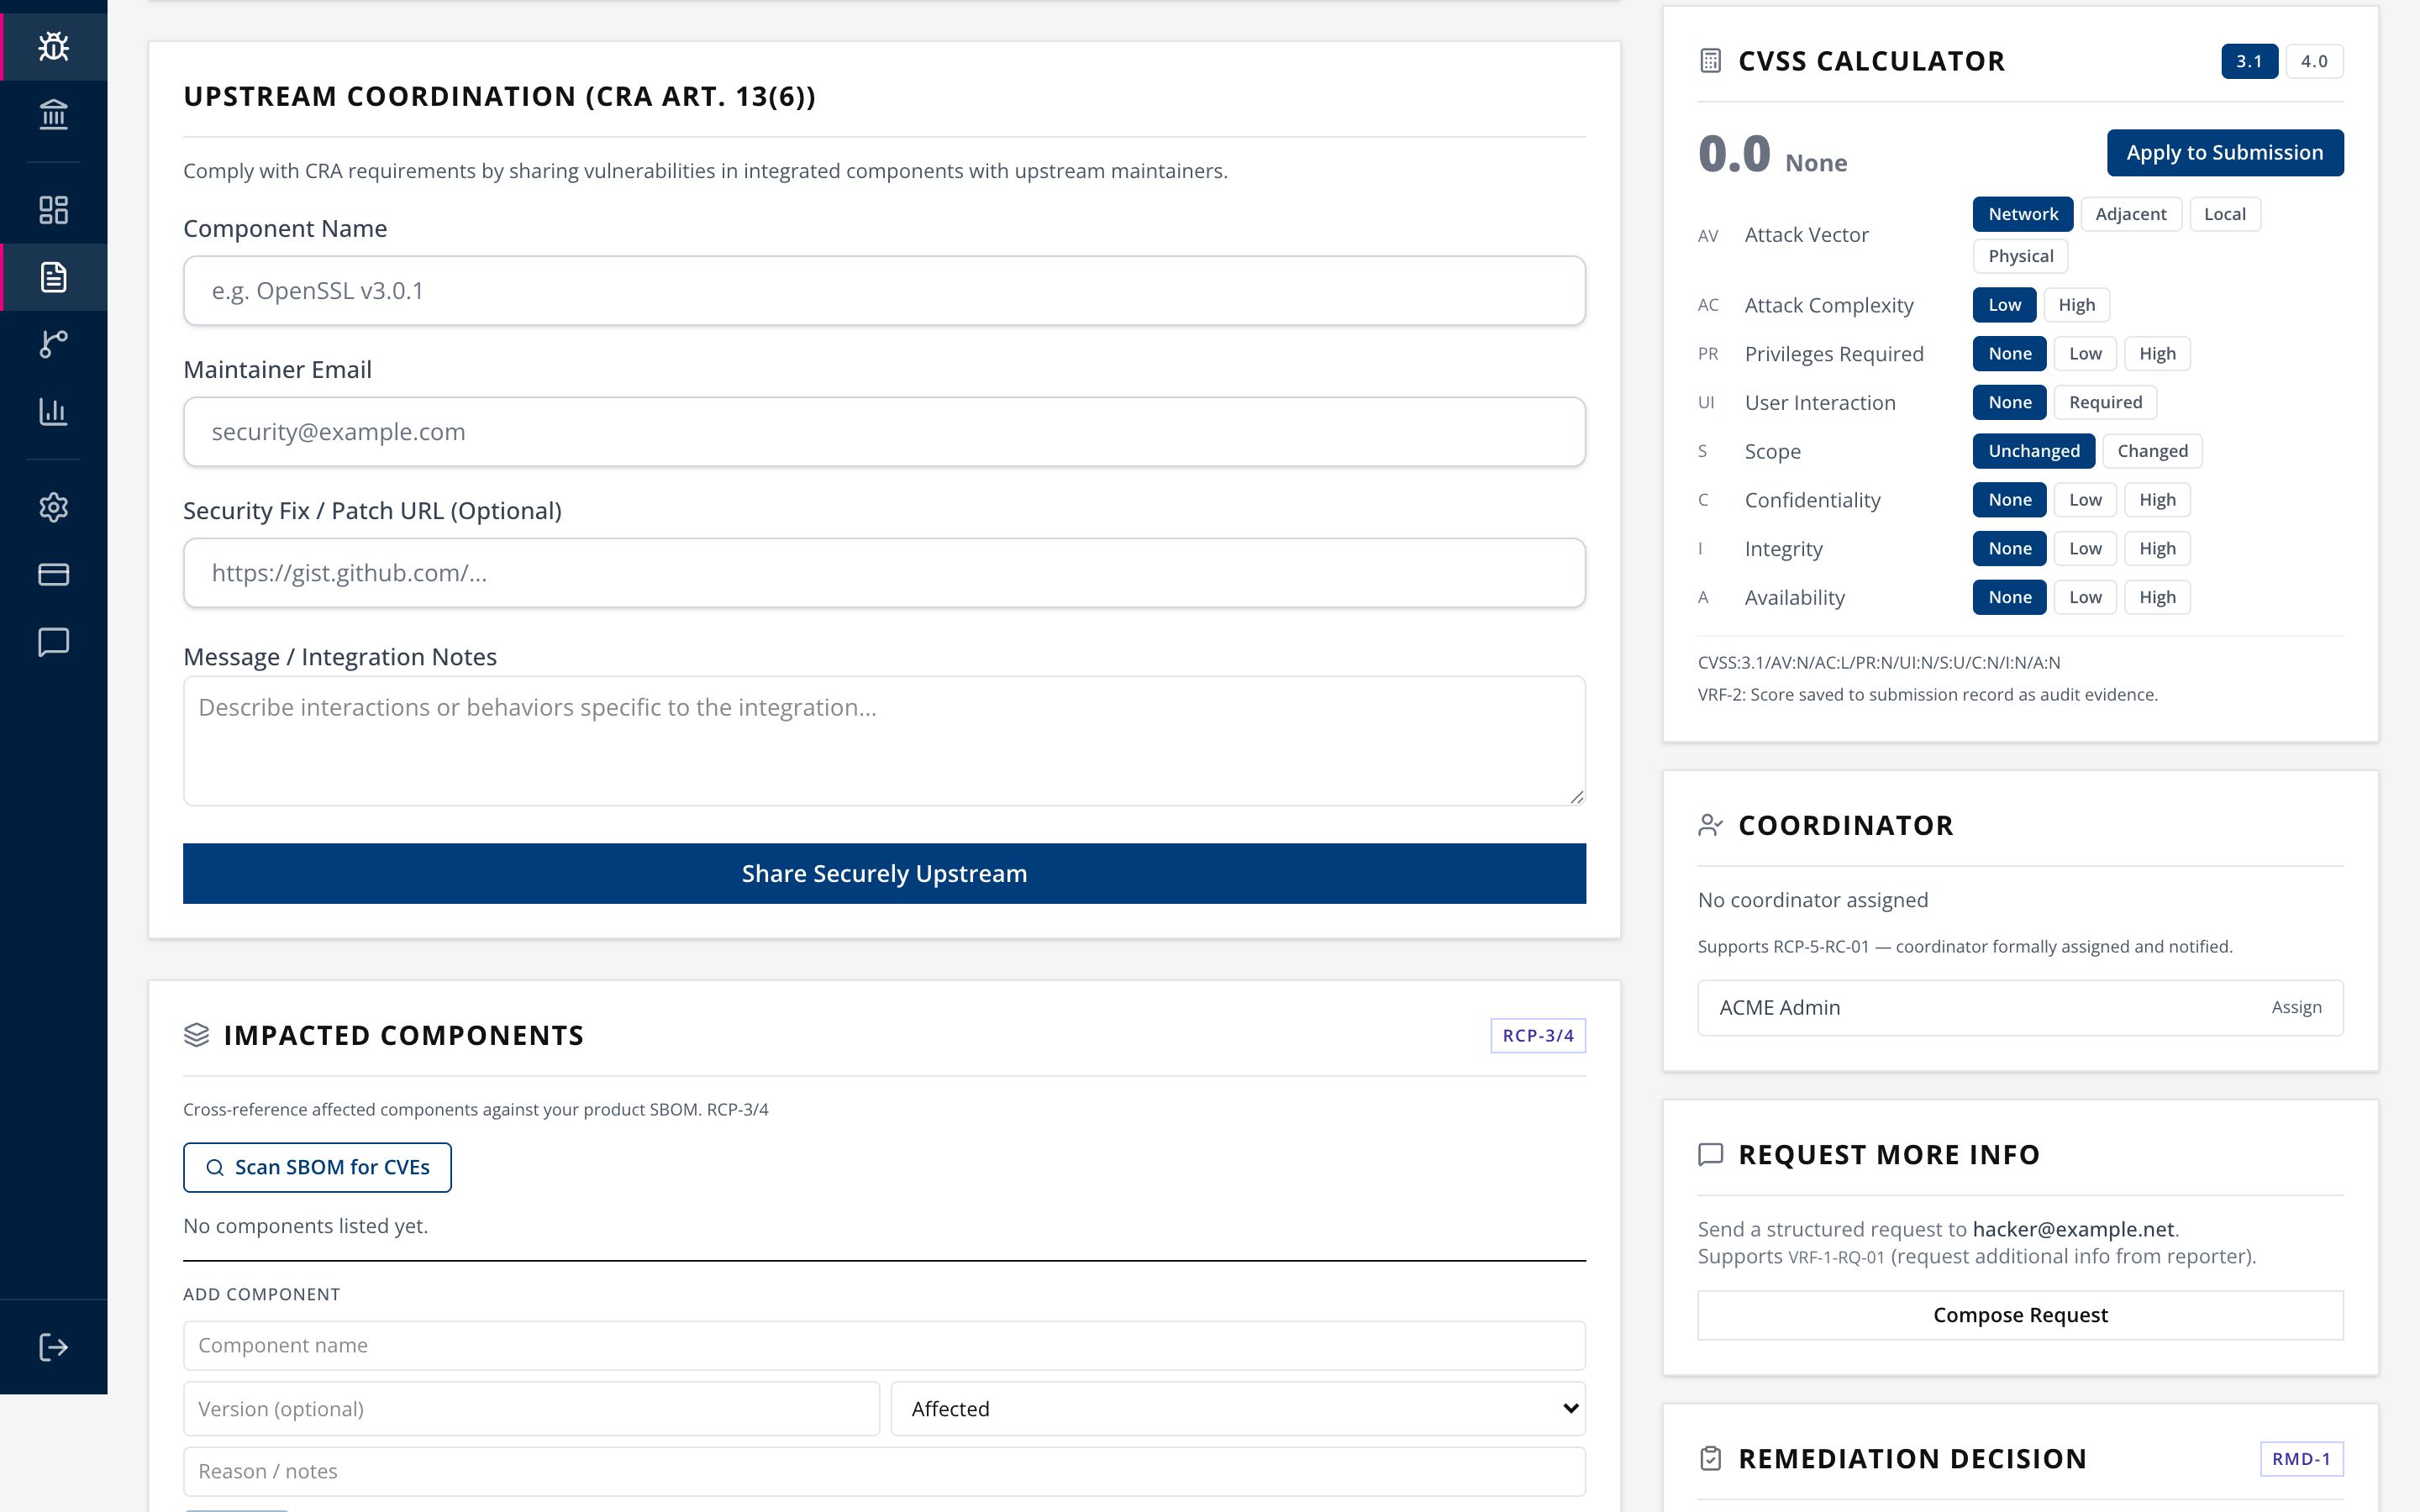
Set the vector, then Apply to Submission. The score is saved to the submission record as audit evidence, labelled VRF-2.
Score from the reporter's evidence, not from your first instinct about severity. The score drives the Article 14 severity gate later, and a HIGH you talked yourself out of is the one that becomes a problem.
Step 4. Assign a coordinator
In the Coordinator panel, assign the person who owns this report through to closure.
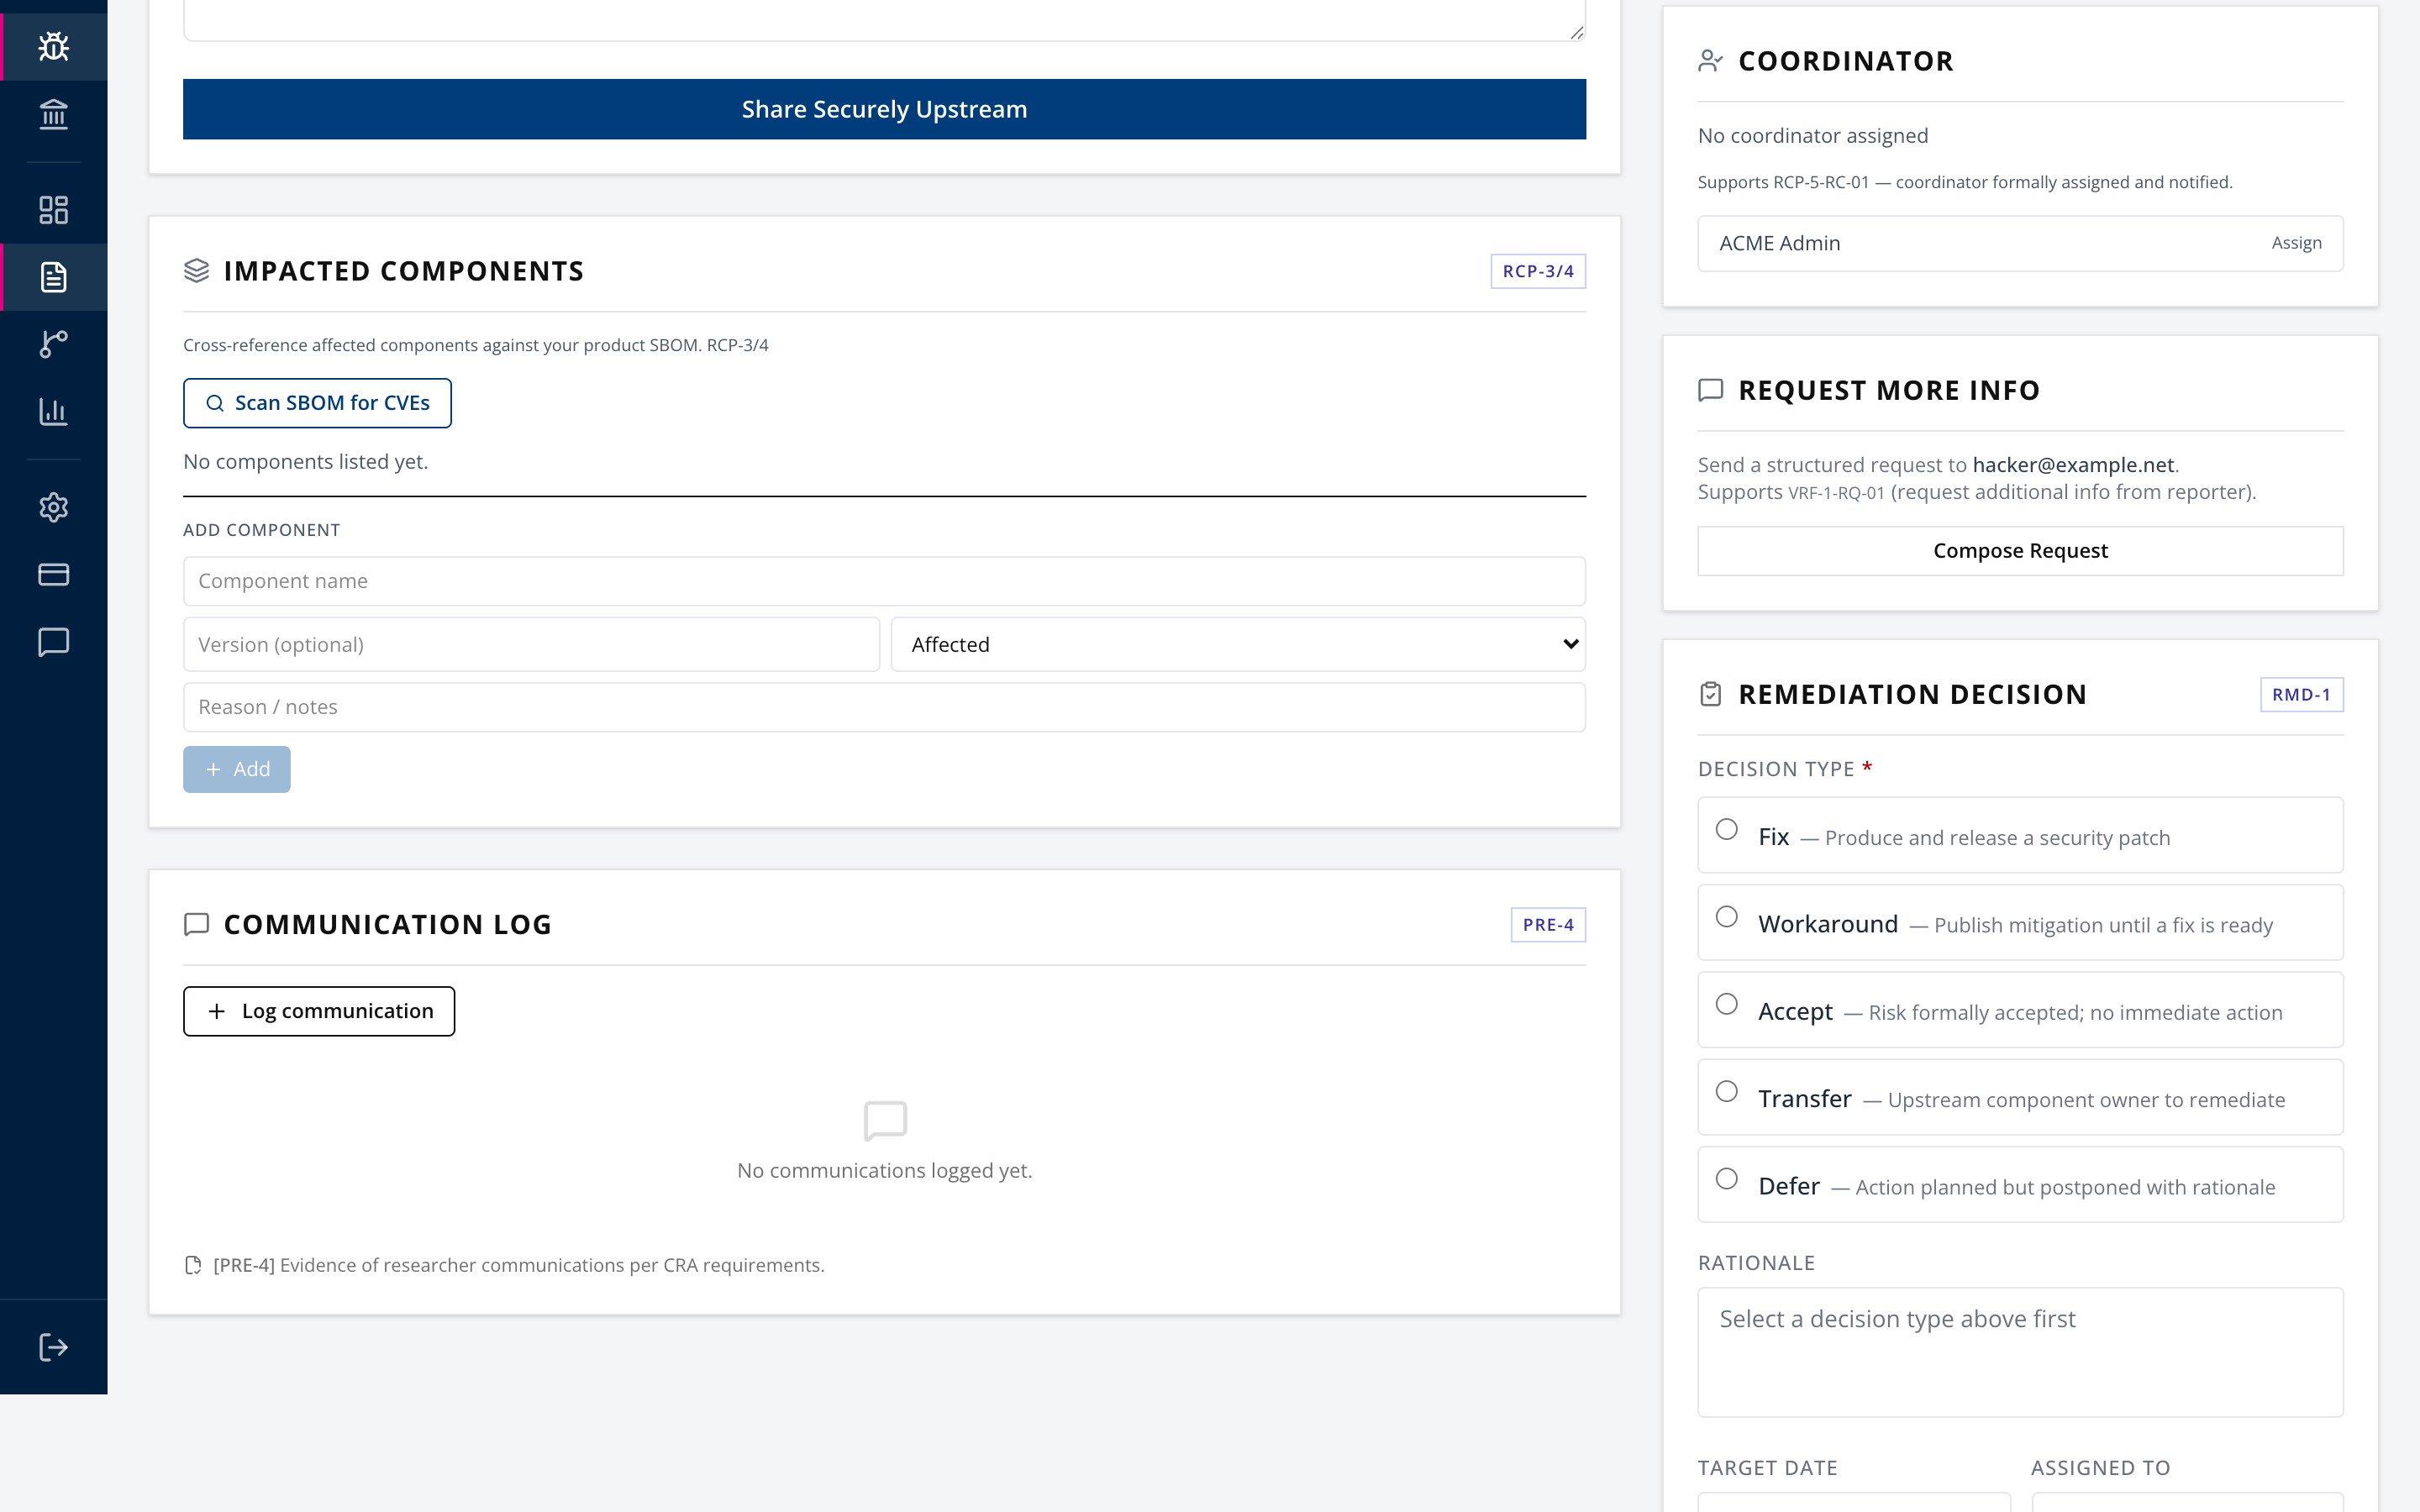
Supports RCP-5-RC-01, coordinator formally assigned and notified. An unassigned report has no route to resolution and no one to chase.
Step 5. Request more information, where needed
Use Request more info to send a structured request to the reporter.
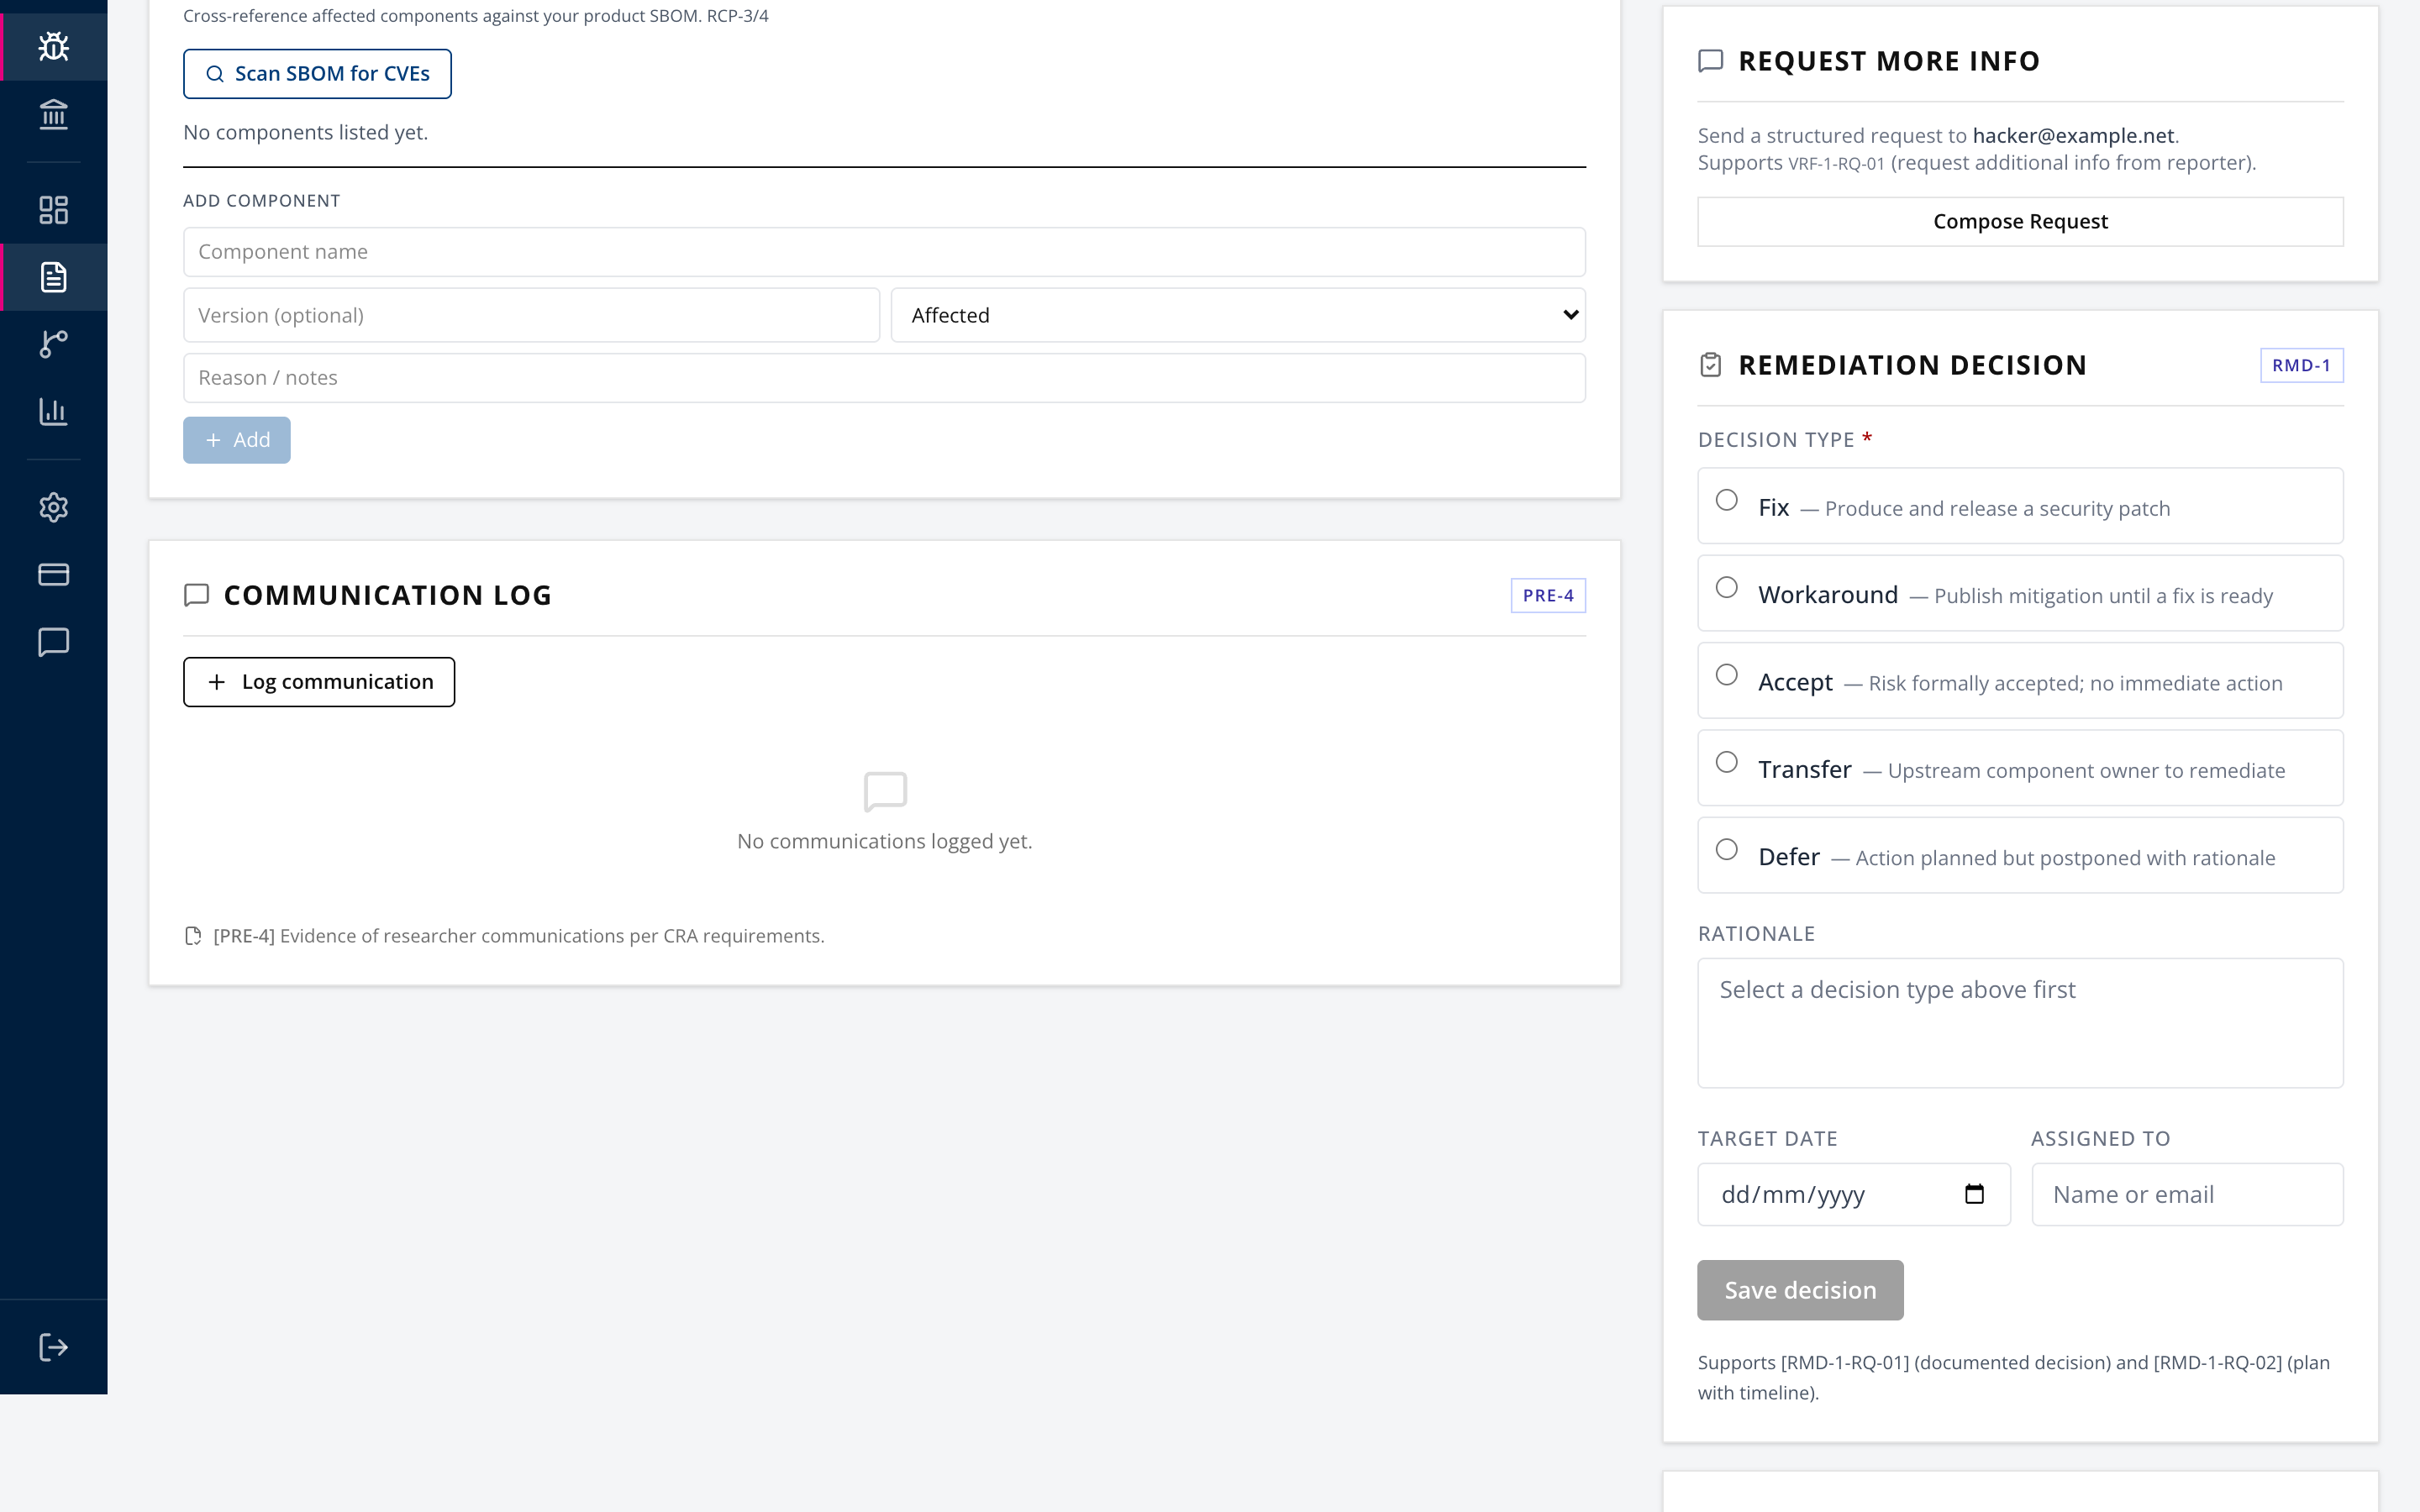
Supports VRF-1-RQ-01. The exchange is recorded, which matters more than the convenience.
Step 6. Establish which components are affected
Open Impacted components.
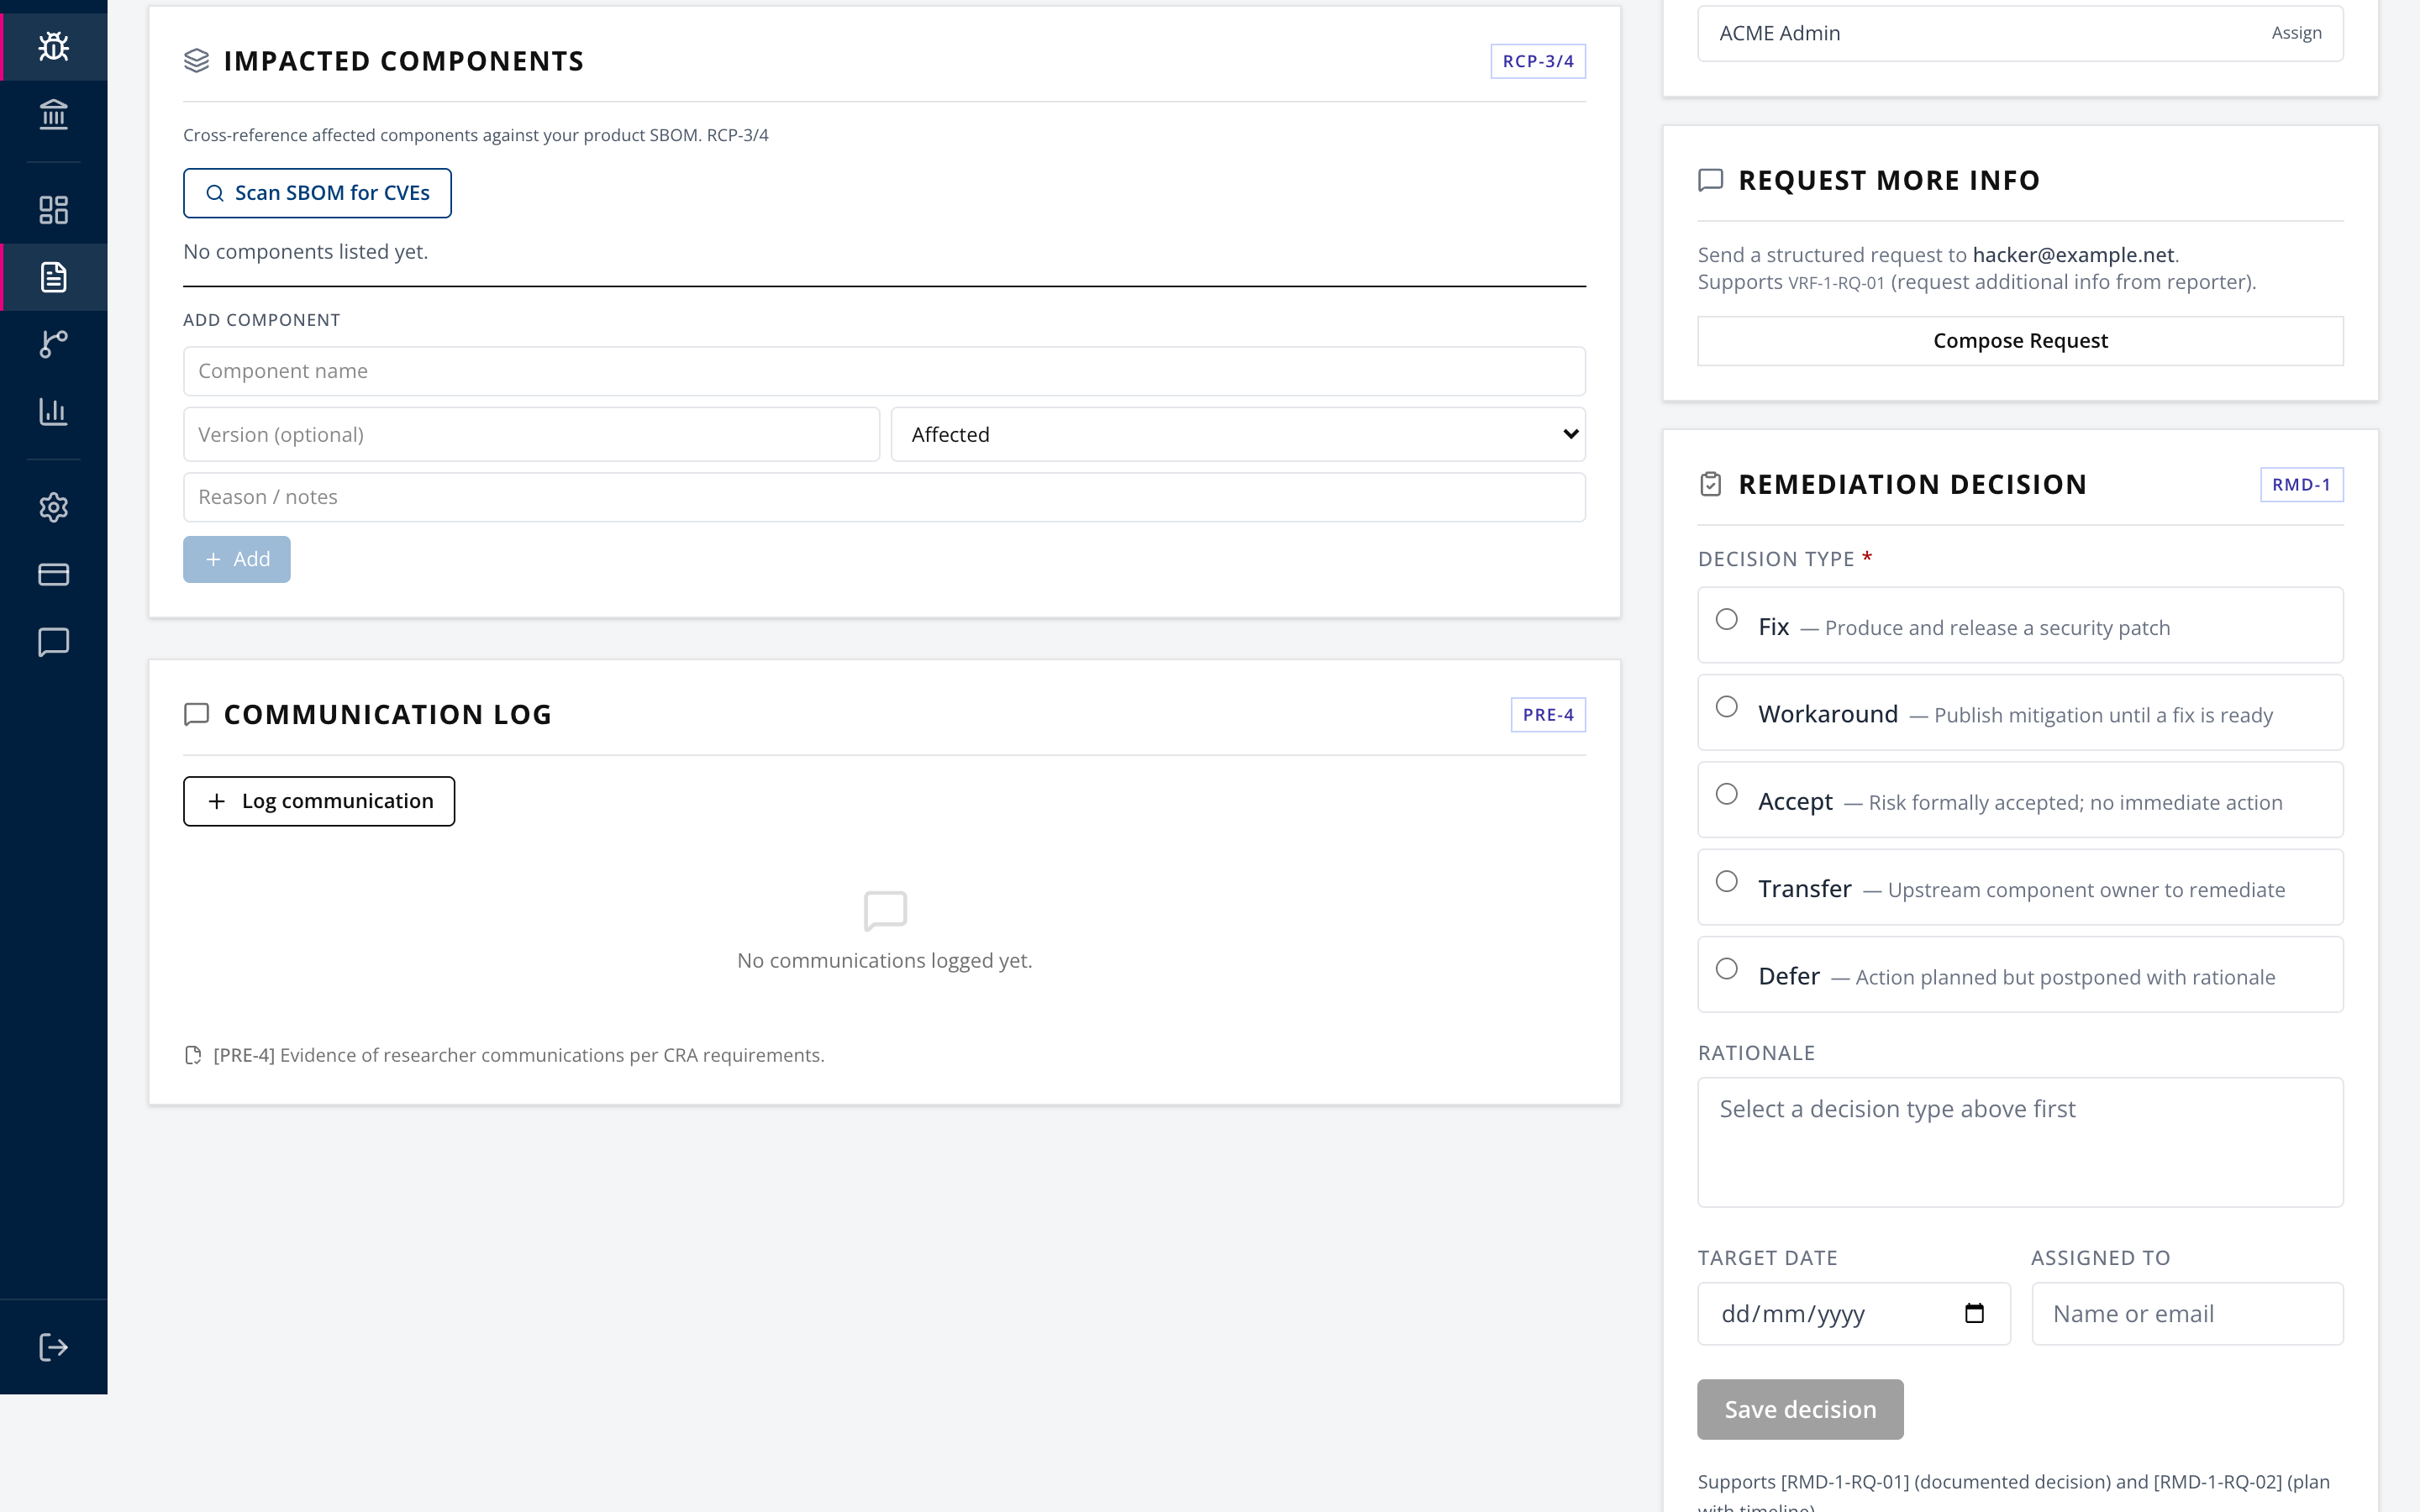
Add components manually, or use Scan SBOM for CVEs to cross-reference against your uploaded SBOM. Mark each as affected or not affected with a reason. Labelled RCP-3/4.
Two limits worth knowing. The scan matches each component by vendor and product name (CPE) through GCVE. If GCVE is not available, it uses an NVD keyword search. It does not match on the package version, so it over-reports and every hit needs review. It also caps how many components it checks in one run and tells you when it did, so a partial scan is never presented as a clean result. For version-accurate matching, use SBOM Exposure on the Supply Chain Intelligence page, which is covered in SOP-06.
Step 6b. Confirm the CRA product link
Check the CRA product panel. A report whose product name matched exactly one active product was linked at intake, and anything ambiguous arrived unlinked. When no product carries the reported name, the panel says so and offers to create that product with the name already filled in.
Correct it now rather than later. If this report ever escalates to Article 14, the link is what fills the ENISA SRP product type and Annex III/IV category from the classification you already made, instead of asking someone to recall the tier while a 24-hour clock runs. Only admins can change it. See SOP-04.
Step 7. Coordinate upstream where the flaw is not yours
If the vulnerability is in a component you integrate rather than code you wrote, use Upstream coordination.
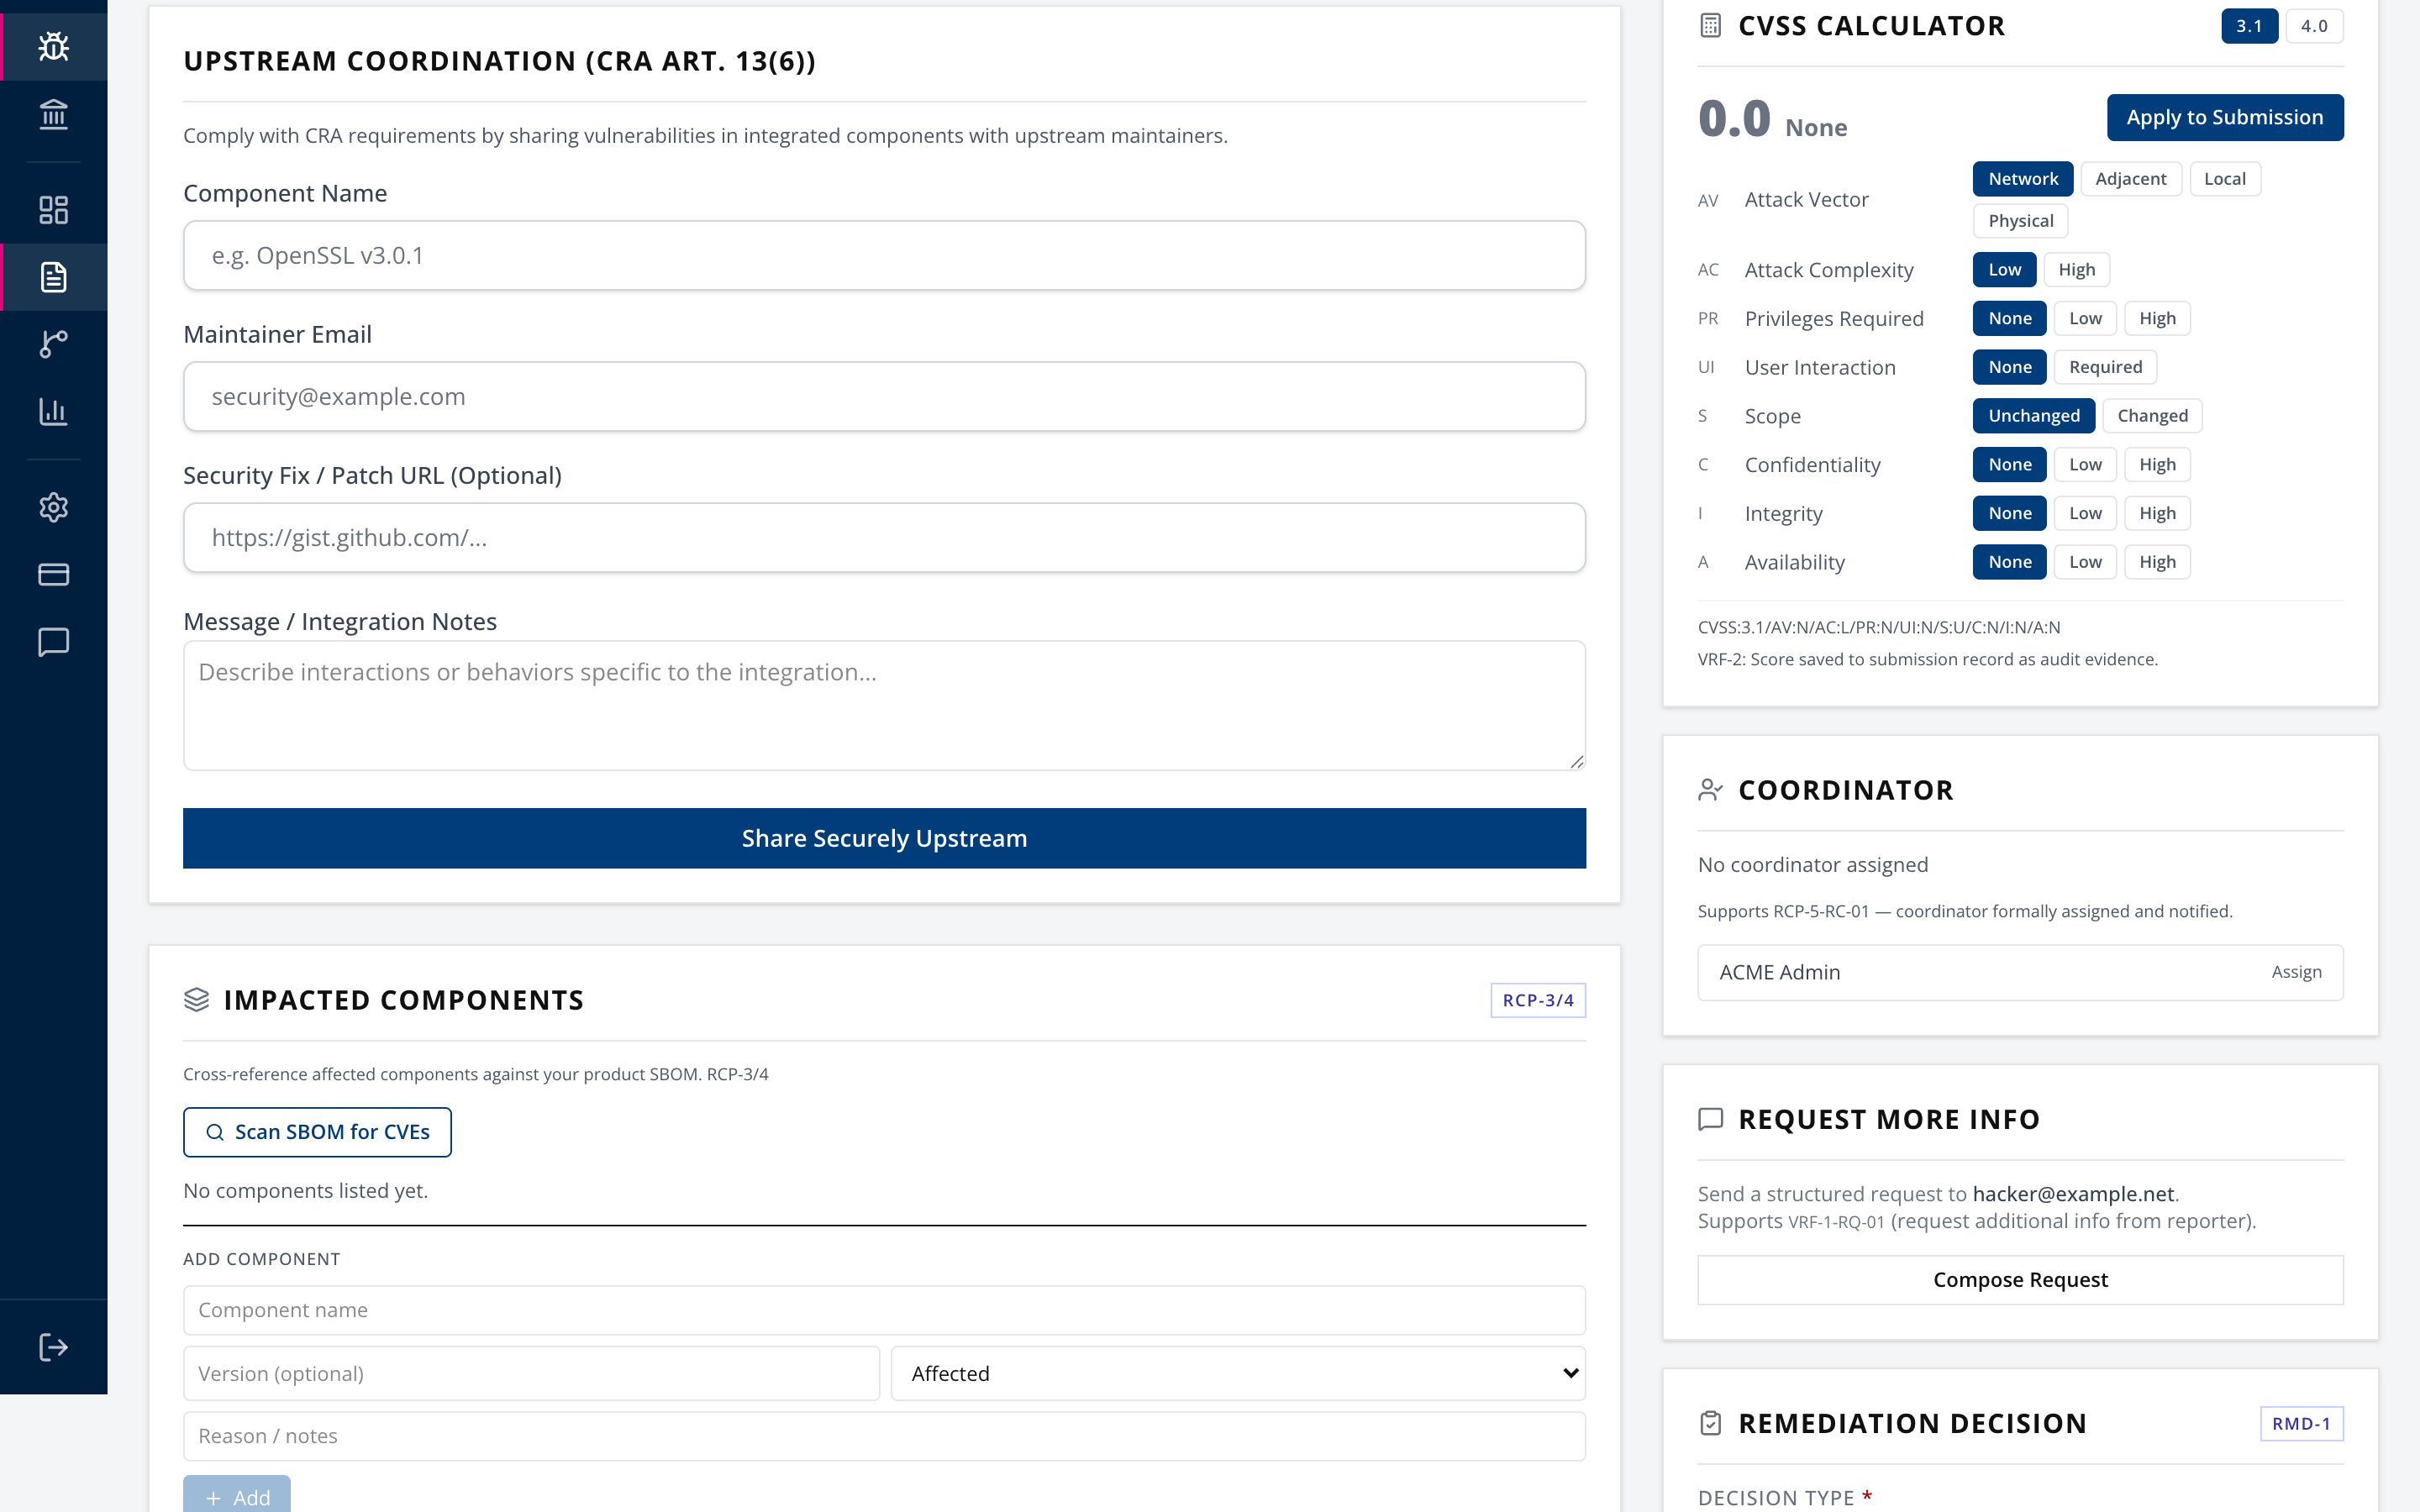
This satisfies CRA Article 13(6), which requires you to report a vulnerability in an integrated component to the person or entity maintaining it. Record the component, the maintainer contact, and any patch reference.
This obligation is easy to overlook because the flaw is not yours. The obligation to report it upstream still is.
Step 8. Keep the communication log current
Log every substantive exchange with the reporter in the Communication log.
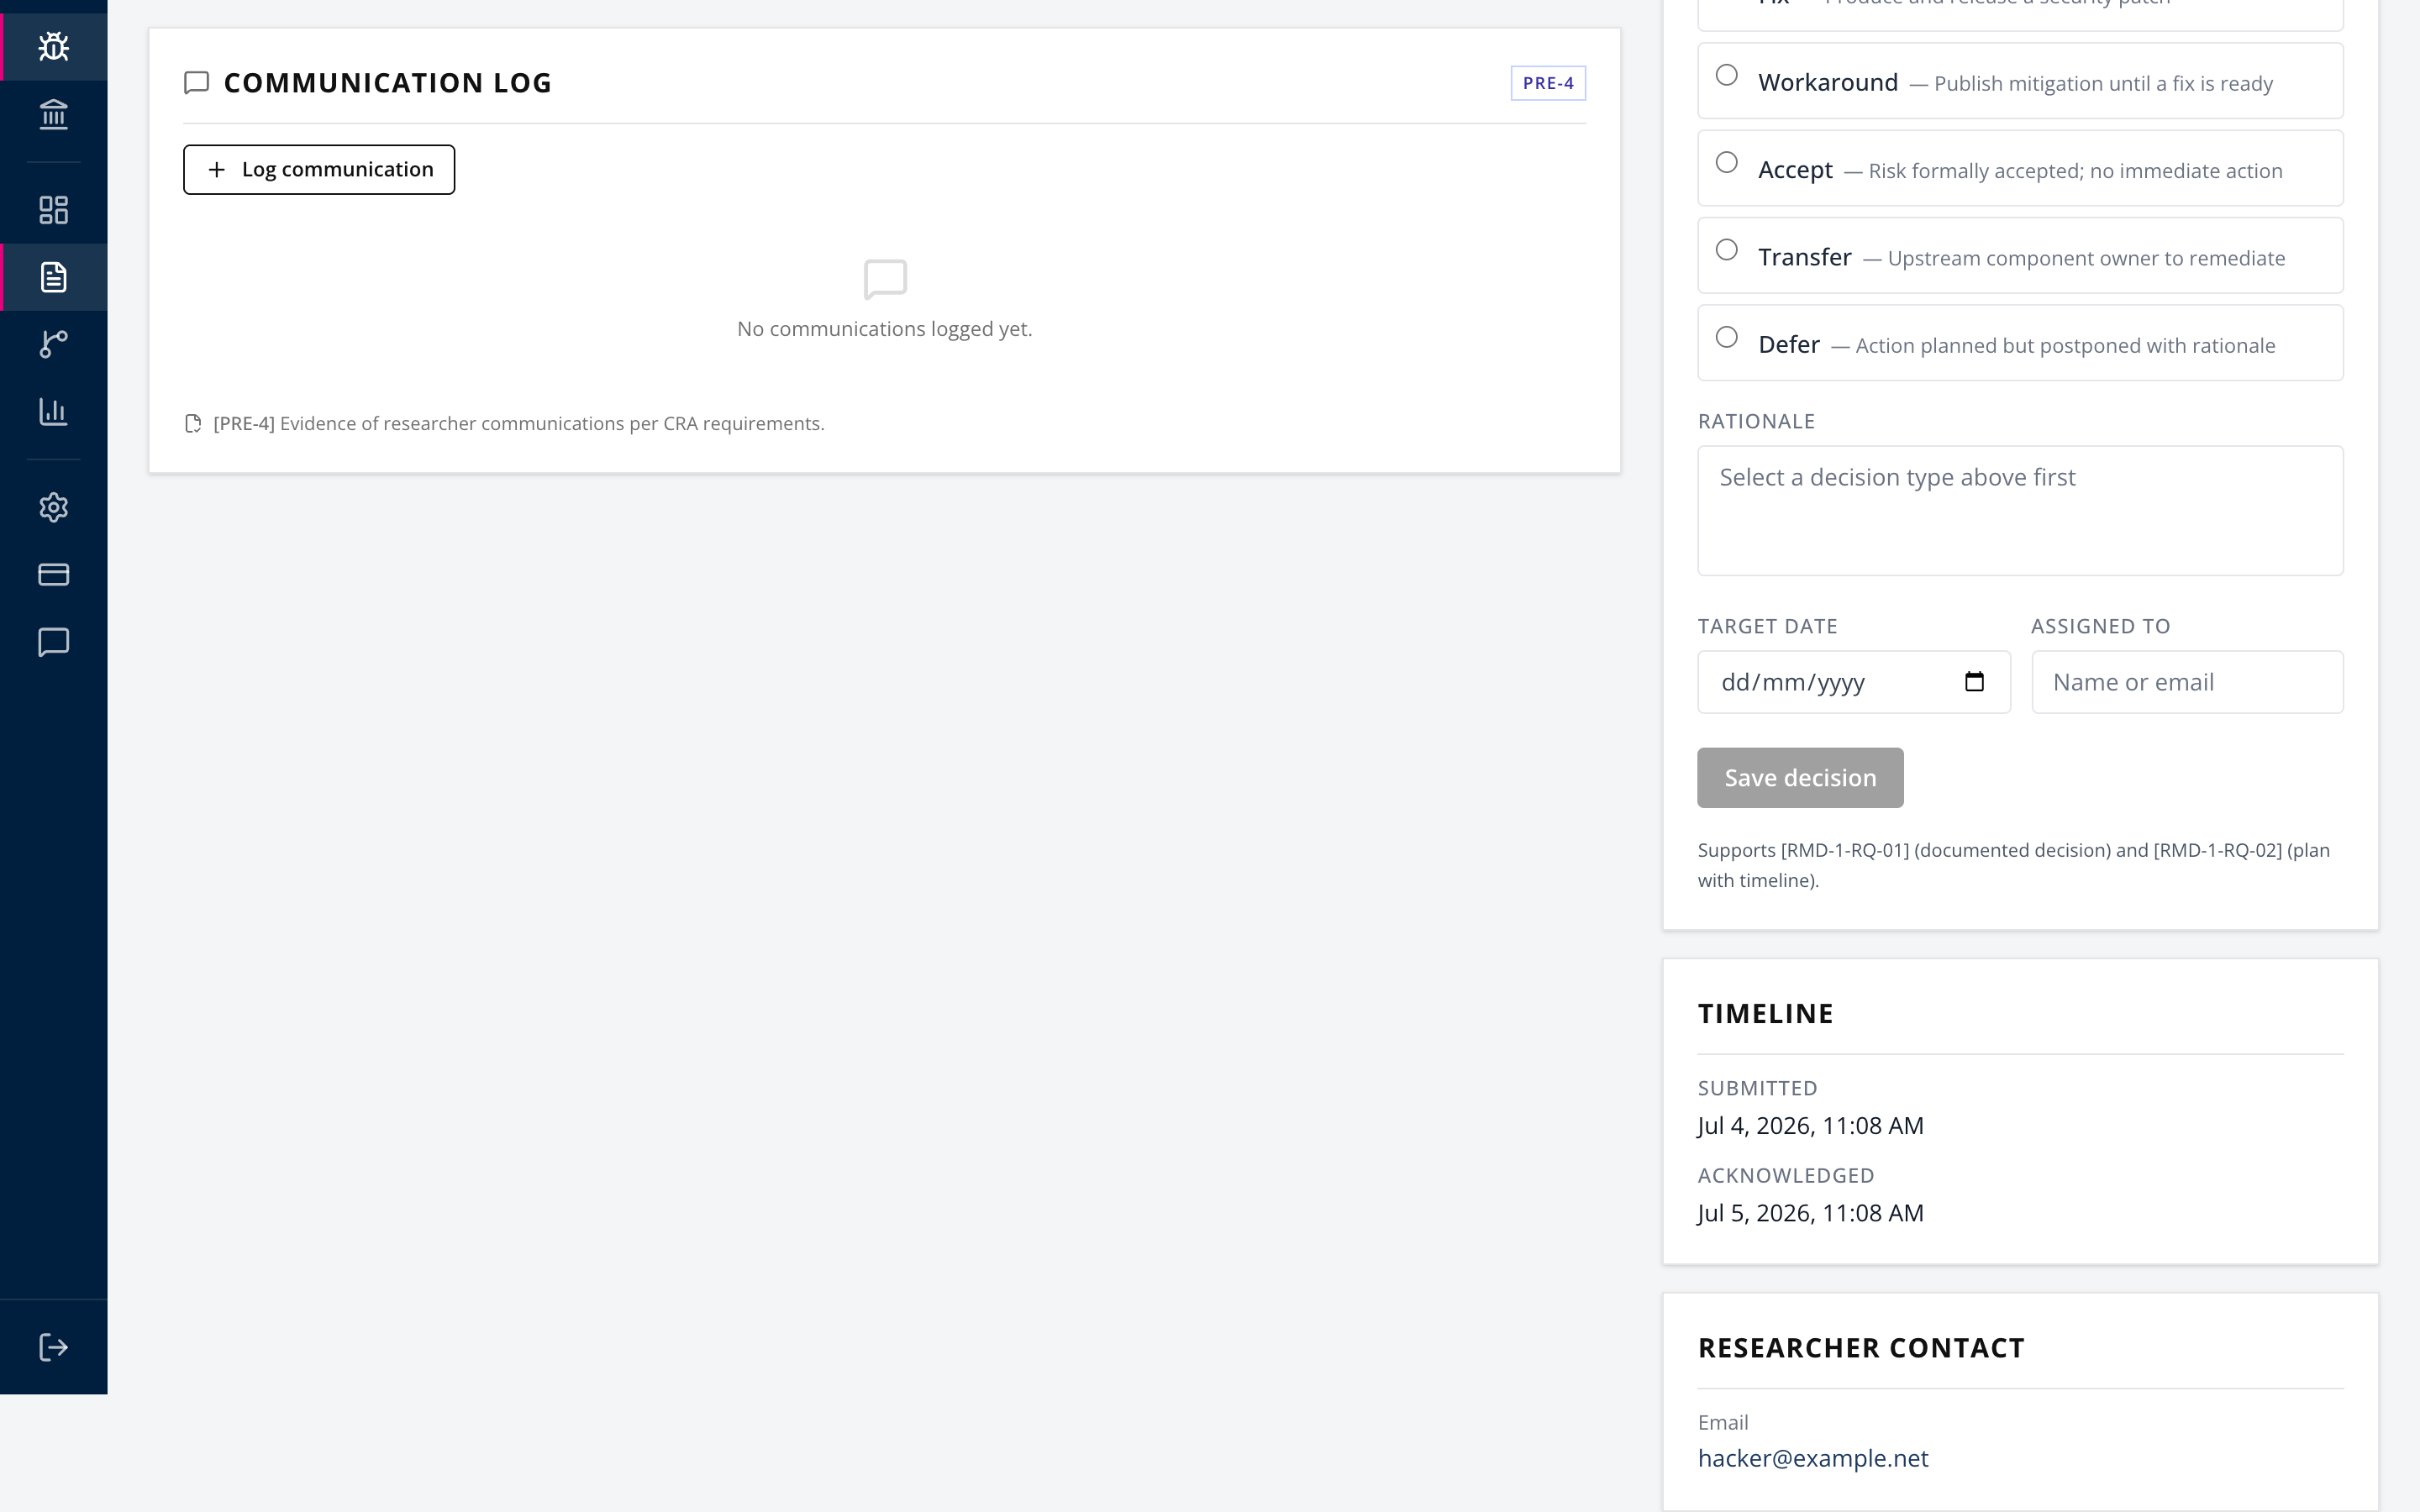
Labelled PRE-4, evidence of researcher communications. Automated notifications land here on their own. Anything you send out of band, a call or a direct email, has to be logged by hand or the trail has a hole in it.
Step 9. Record the remediation decision
Open Remediation decision and pick one.
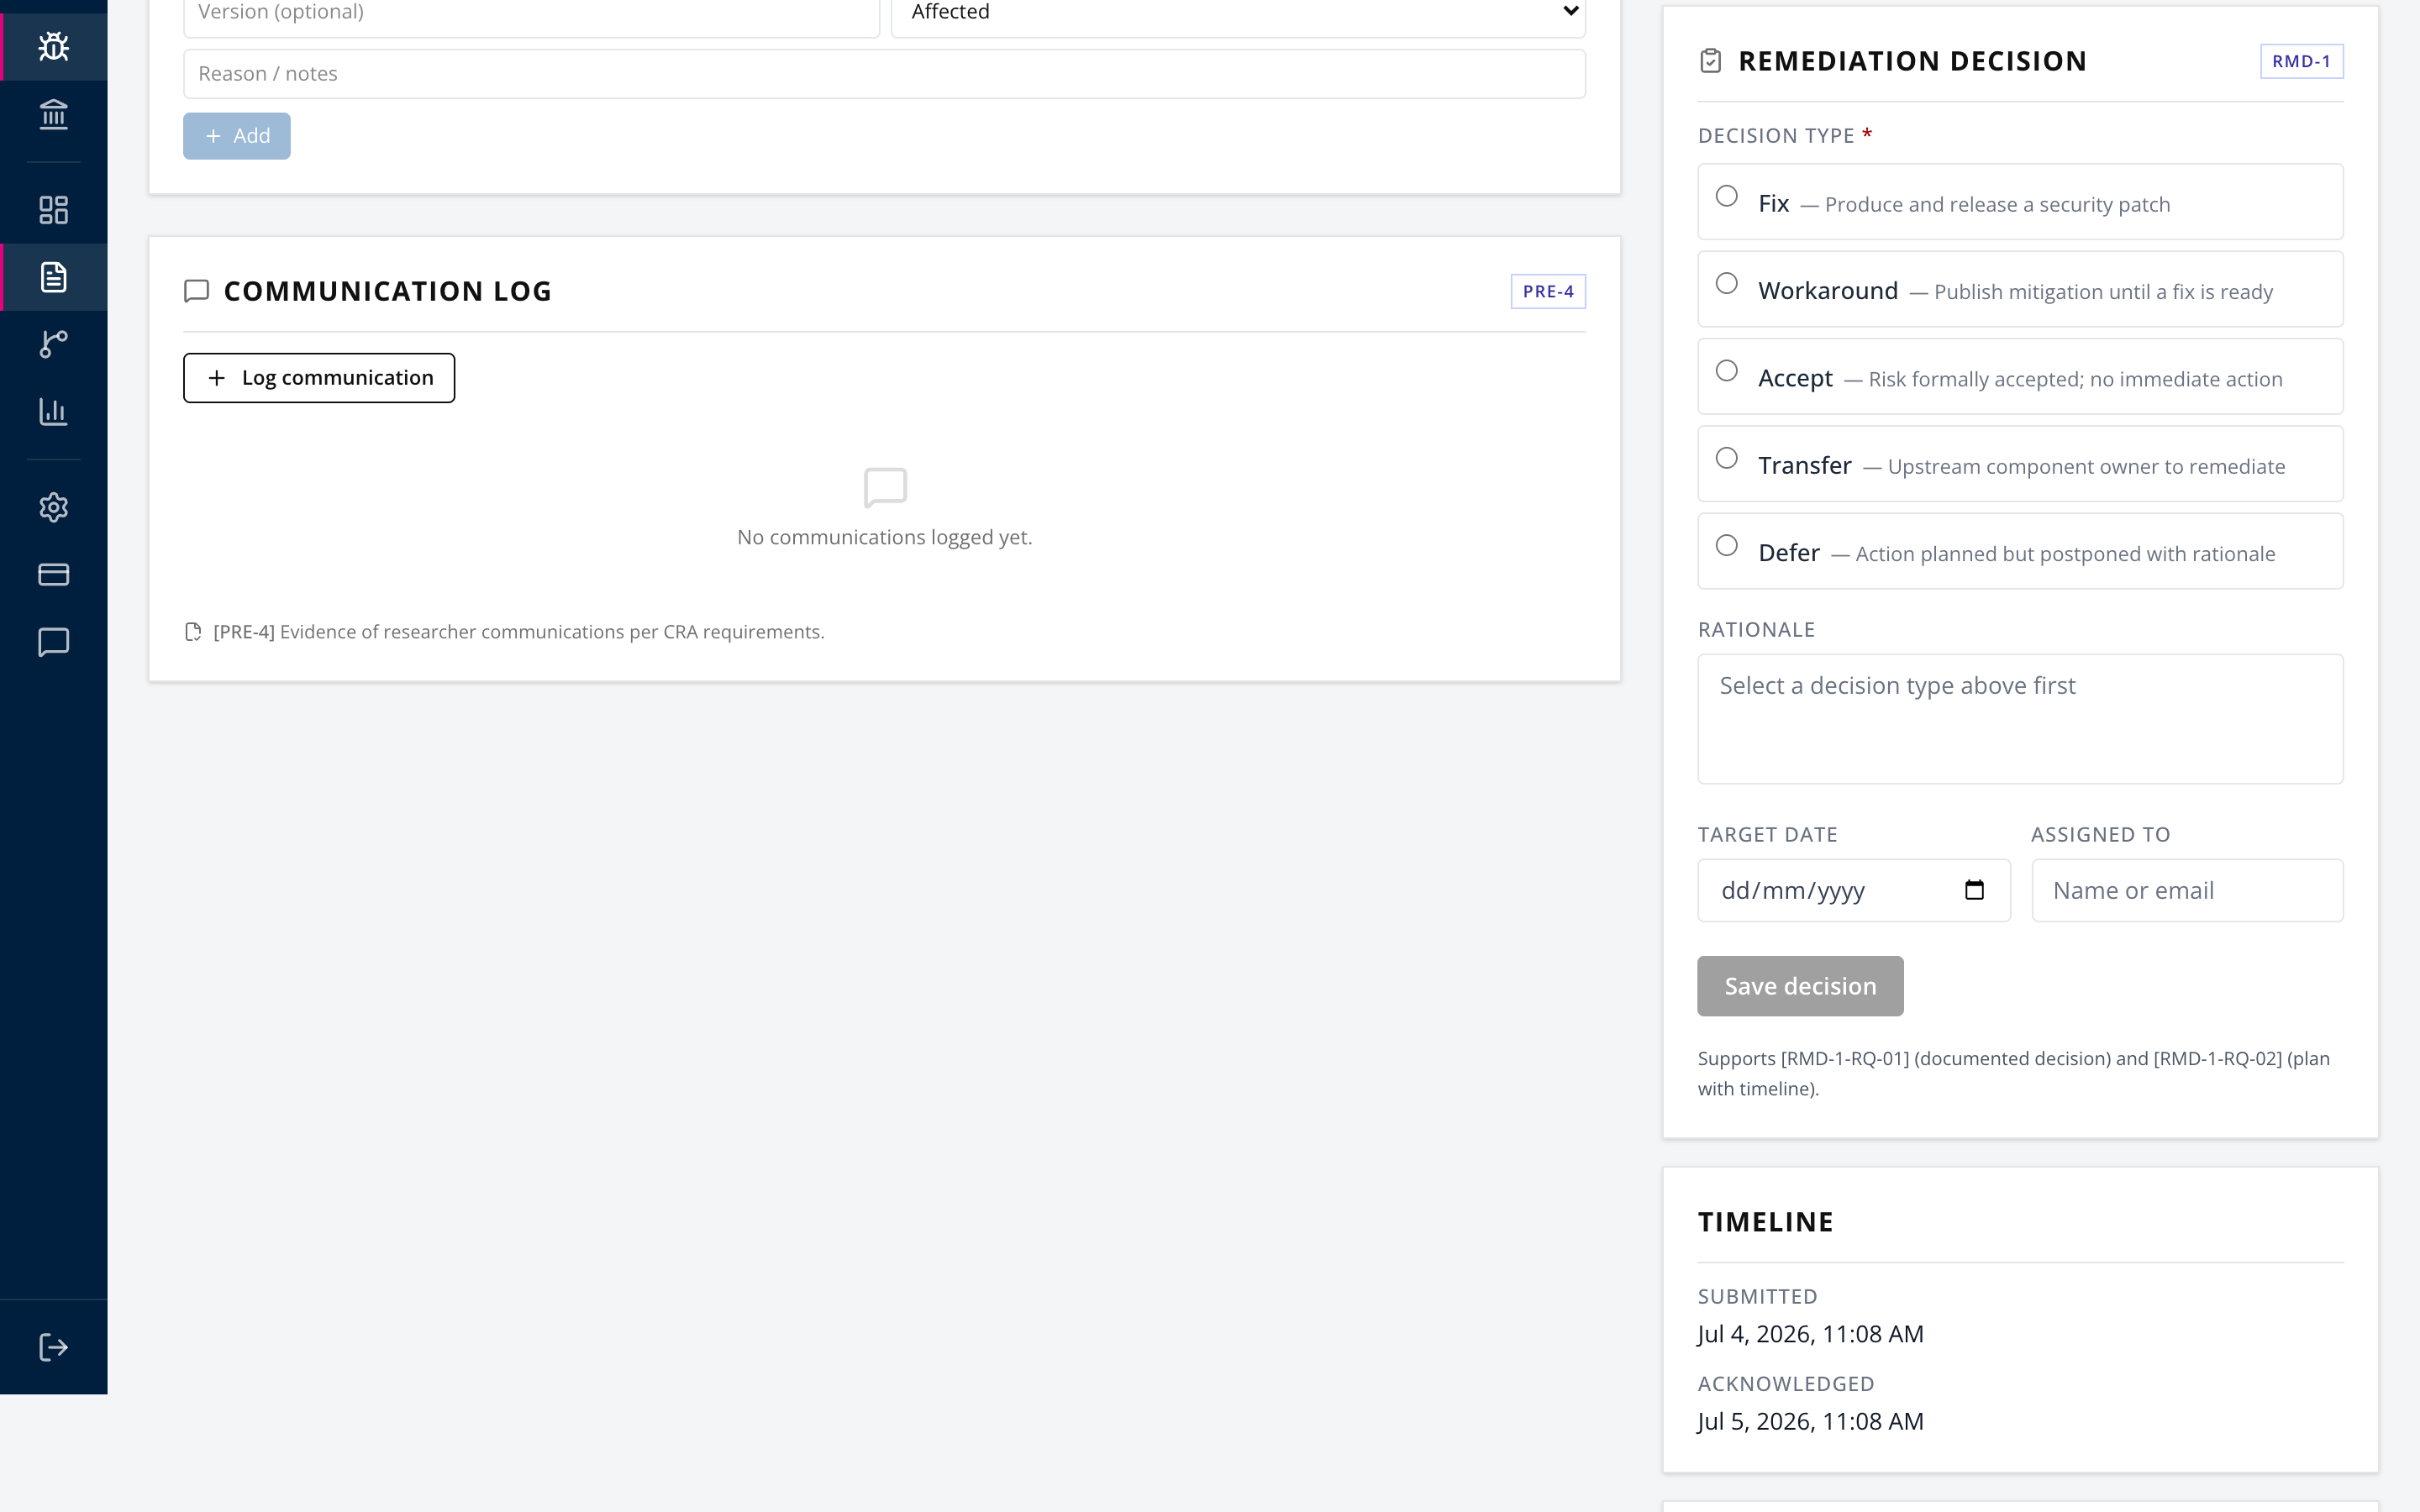
| Decision | Meaning |
|---|---|
| Fix | Produce and release a security patch |
| Workaround | Publish mitigation until a fix is ready |
| Accept | Risk formally accepted, no immediate action |
| Transfer | Upstream component owner to remediate |
| Defer | Action planned but postponed with rationale |
Add the rationale, target date and owner. Supports RMD-1-RQ-01, a documented decision, and RMD-1-RQ-02, a plan with a timeline.
Accept and Defer are legitimate outcomes, and both are only defensible with a written rationale. The field exists for that reason. Use it properly, because an unexplained Accept is the entry an auditor will stop on.
Step 10. Escalate to Article 14 if it qualifies
If the vulnerability is actively exploited, or the incident is severe, stop here and follow SOP-04, Filing an Article 14 Report. The clock started when you became aware, not when you finished triage.
Step 11. Consider AI triage for volume
AI triage is an Enterprise feature and is off by default. Enable it under Settings, then AI Triage.
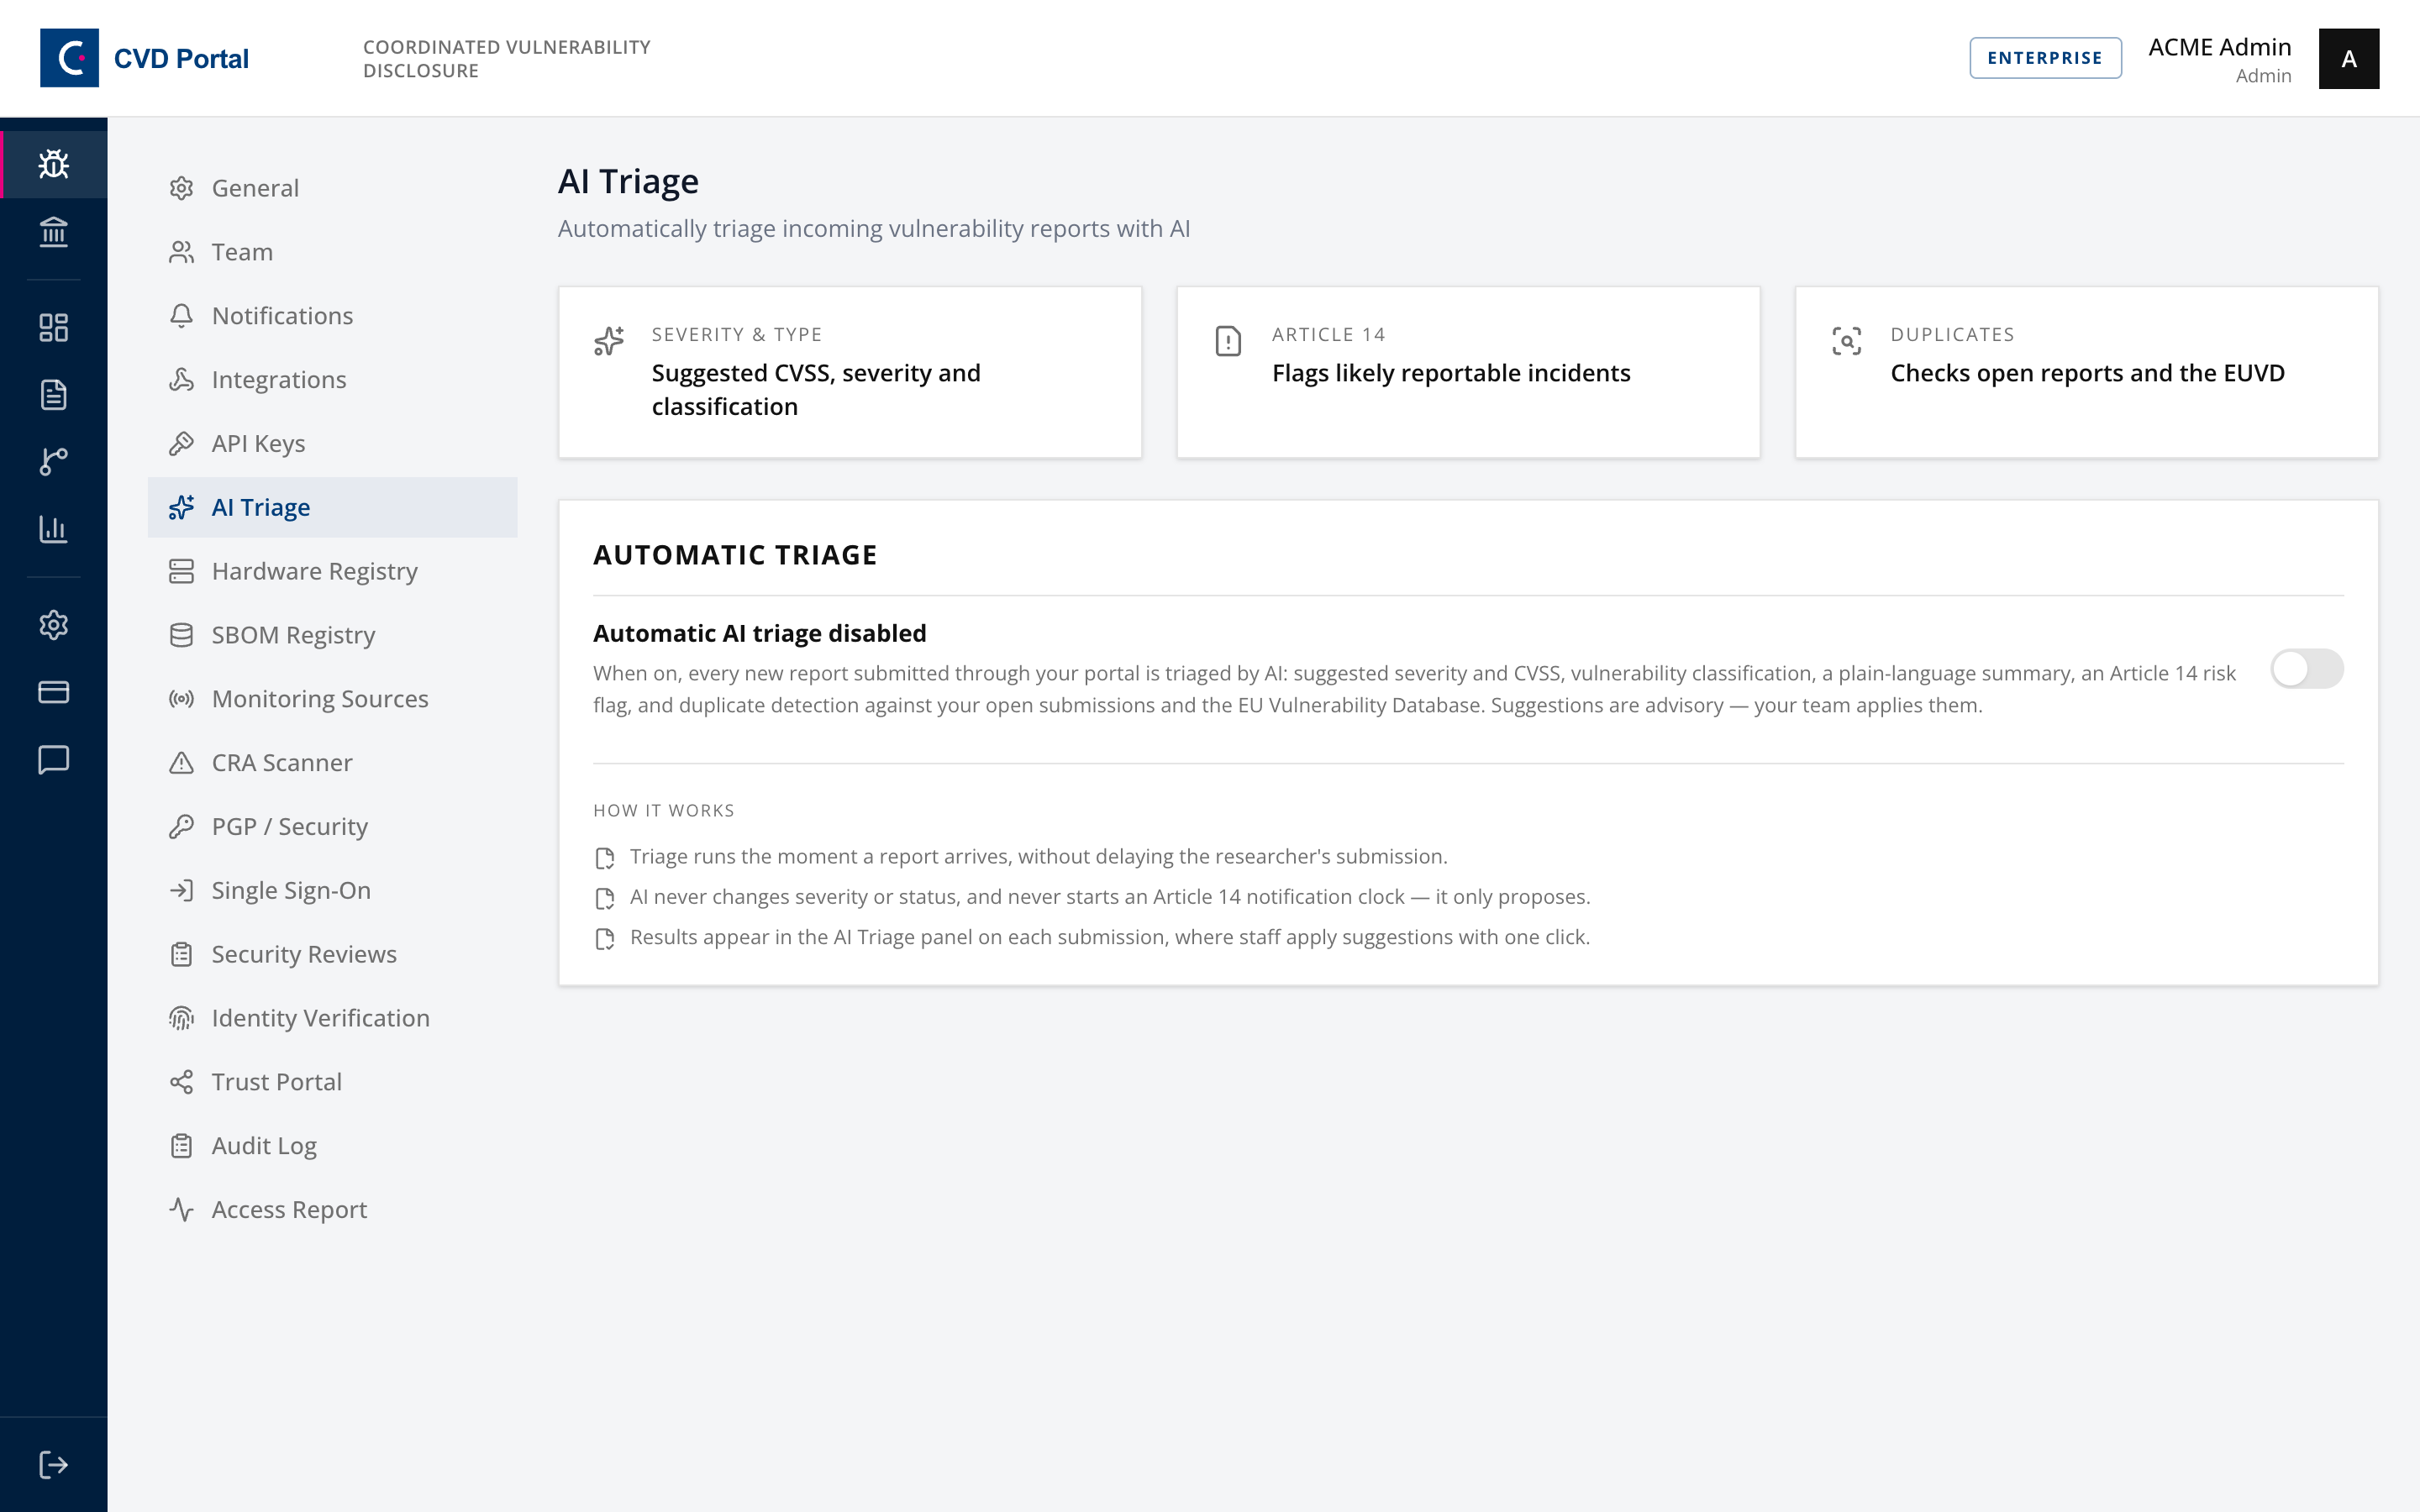
It classifies incoming reports automatically to get them in front of the right person faster. It does not make the remediation decision, and it does not acknowledge on your behalf.
Completion checklist
Per report.
- Acknowledged inside the SLA target
- CVSS scored and applied to the submission
- Coordinator assigned
- Further information requested if the report was incomplete
- Affected components established and marked
- Upstream maintainer notified where the component is third-party, per Article 13(6)
- Communication log reflects every substantive exchange
- Remediation decision recorded with rationale, target date and owner
- Article 14 assessed, and SOP-04 followed if triggered
- Advisory published where the fix is public
Where this connects
- SOP-04 takes over the moment a report is classified as actively exploited or a severe incident.
- SOP-06 covers version-accurate component matching, which is the reliable way to answer "are we affected".
- SOP-01 covers the SLA targets that the first two steps here are measured against.