Taking a Product Through CRA Compliance in the New Dashboard
Audience. The person who owns CRA compliance for a product, in a workspace that uses the new dashboard.
Outcome. One product goes through all seven stages. It is registered, classified, risk-assessed, checked against Annex I, backed by evidence, declared conform and kept under review.
Why it matters. Every product with digital elements needs its own classification, risk assessment and conformity route under the CRA. The full obligations apply from 11 December 2027. The stage bar on each product shows which stage is next and what blocks the later ones.
Time required. Classification takes minutes. The risk assessment, the requirements and the evidence take days to weeks for each product.
Applies to. Workspaces with the new dashboard switched on. For the classic dashboard, use SOP-02.
Step 0. Find the product and read its stage bar
Open Products. The table shows each product with its technical file progress, criteria passed, evidence and next action.
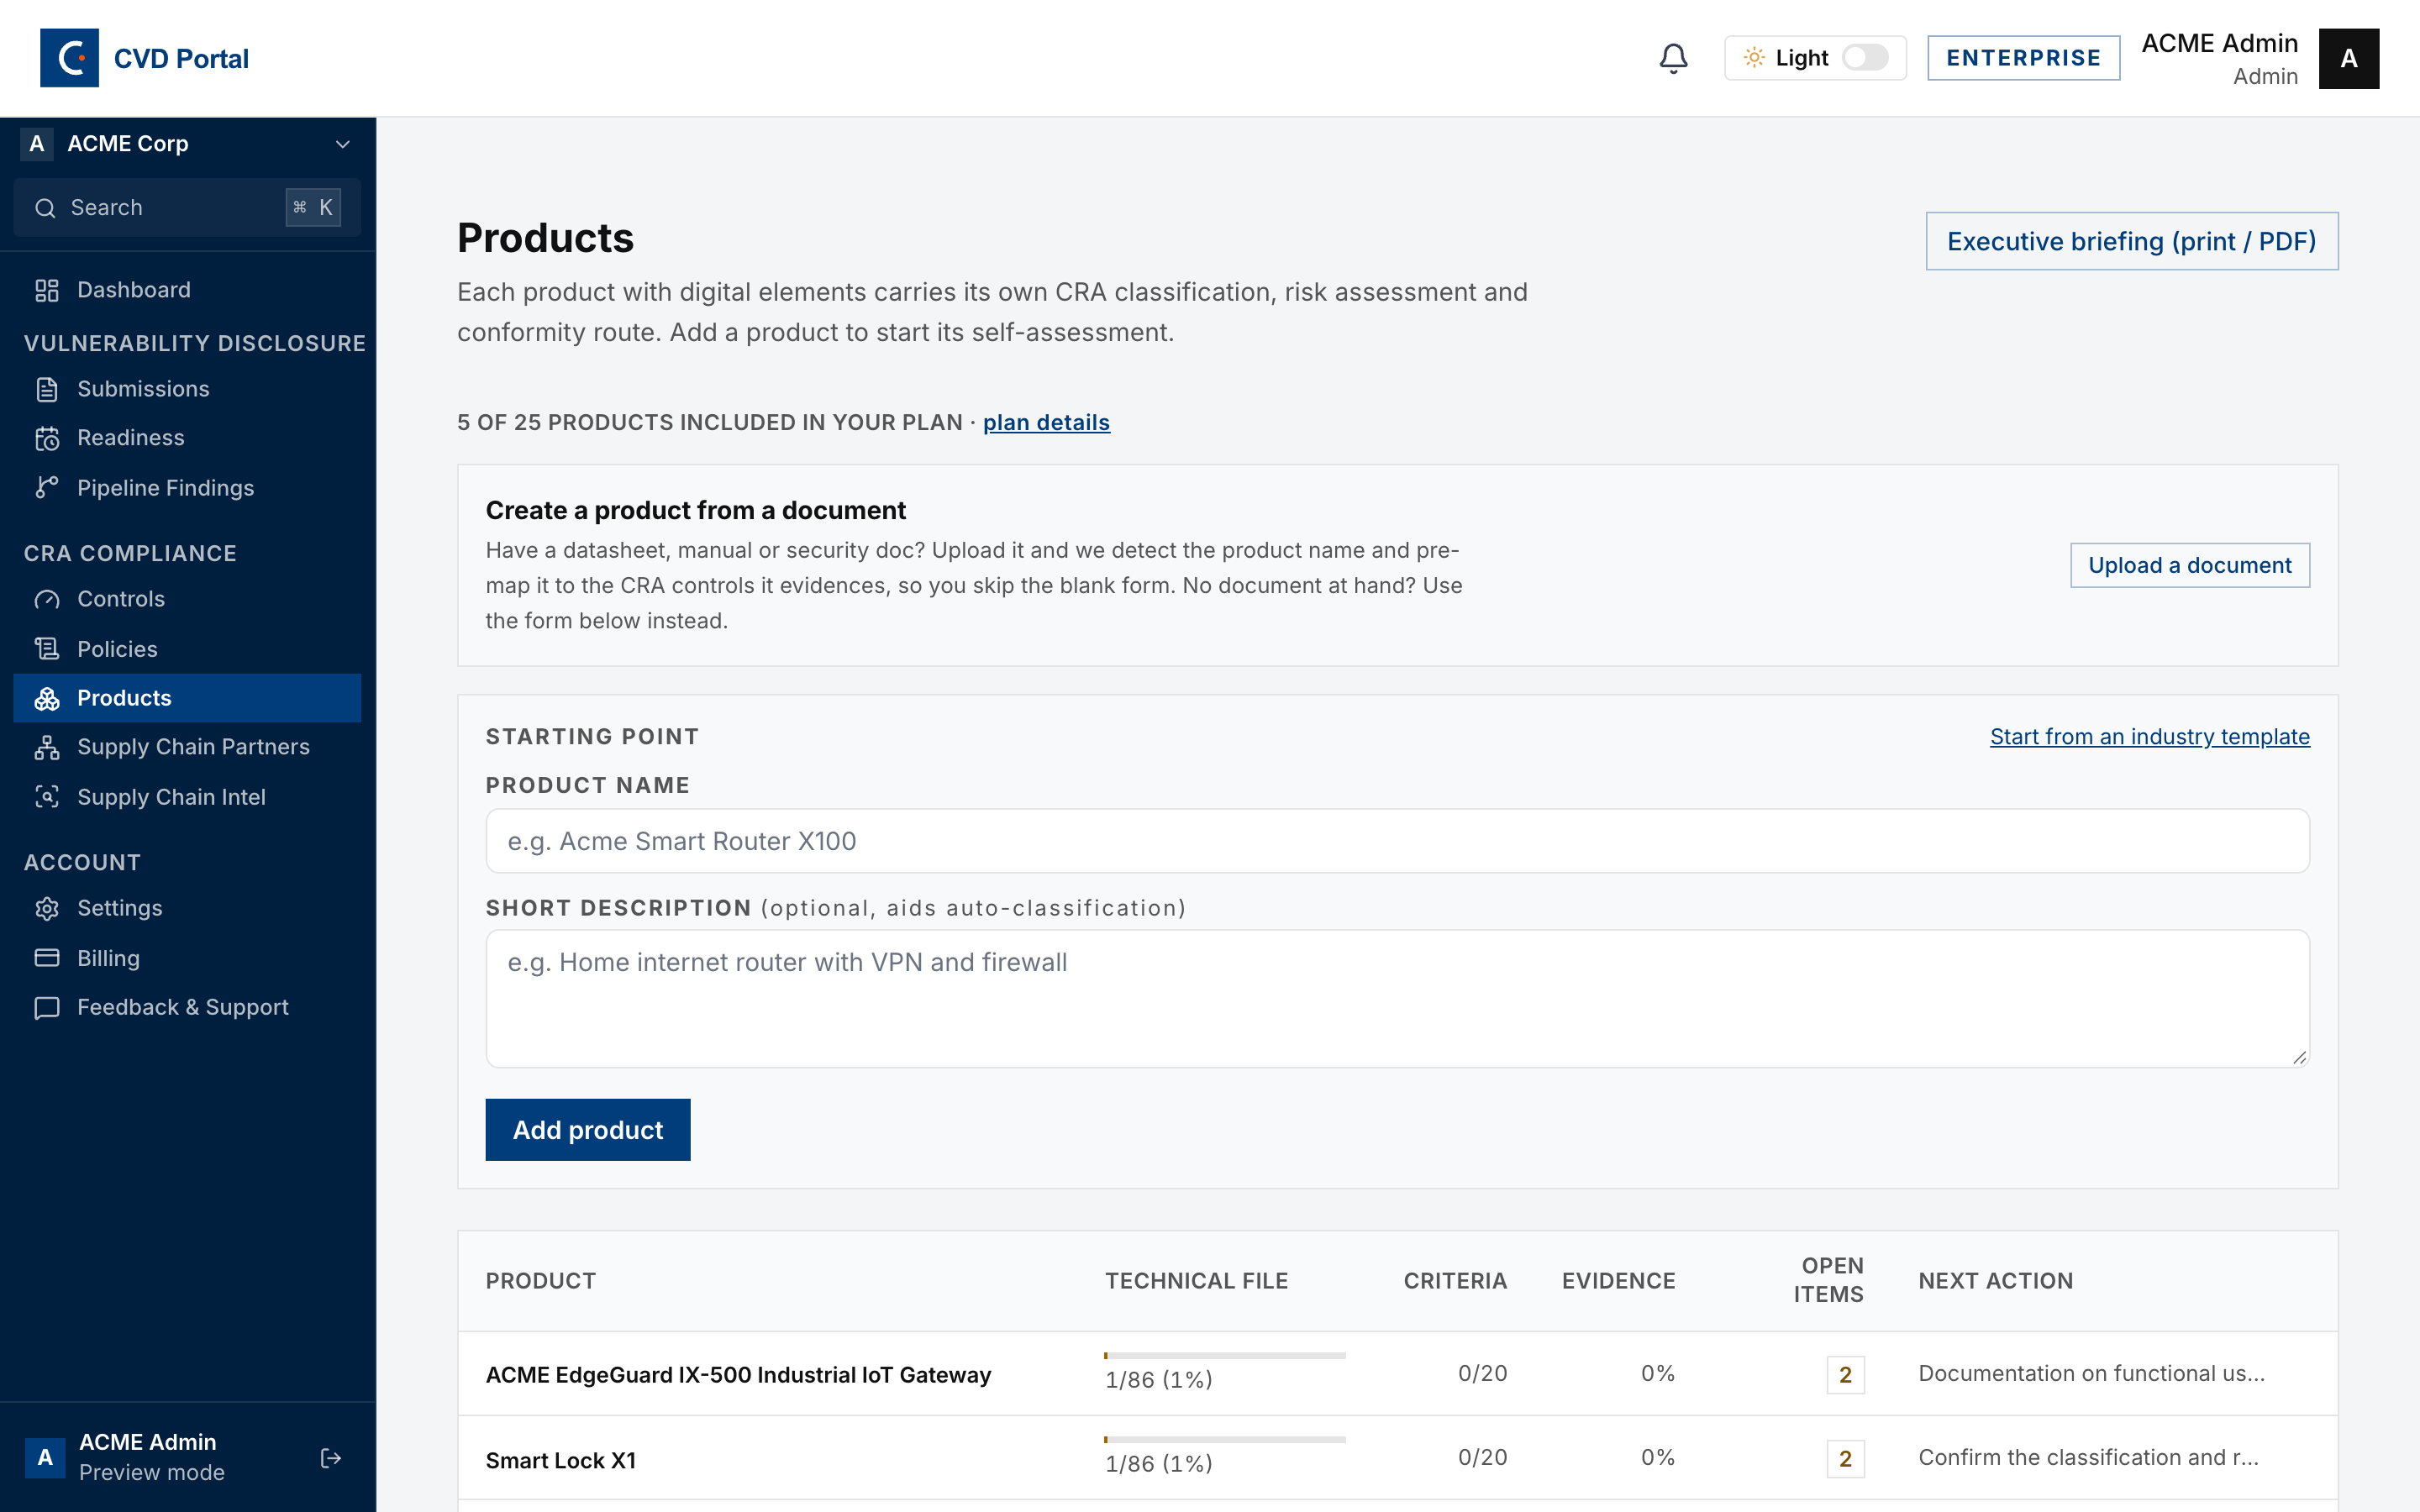
Each product that is not complete also has a row under Needs attention now on the Overview. Next step on the row opens the product at its current stage.
Open the product. The page shows the classification, the technical file readiness checks and the work completed. The stage bar is below them.
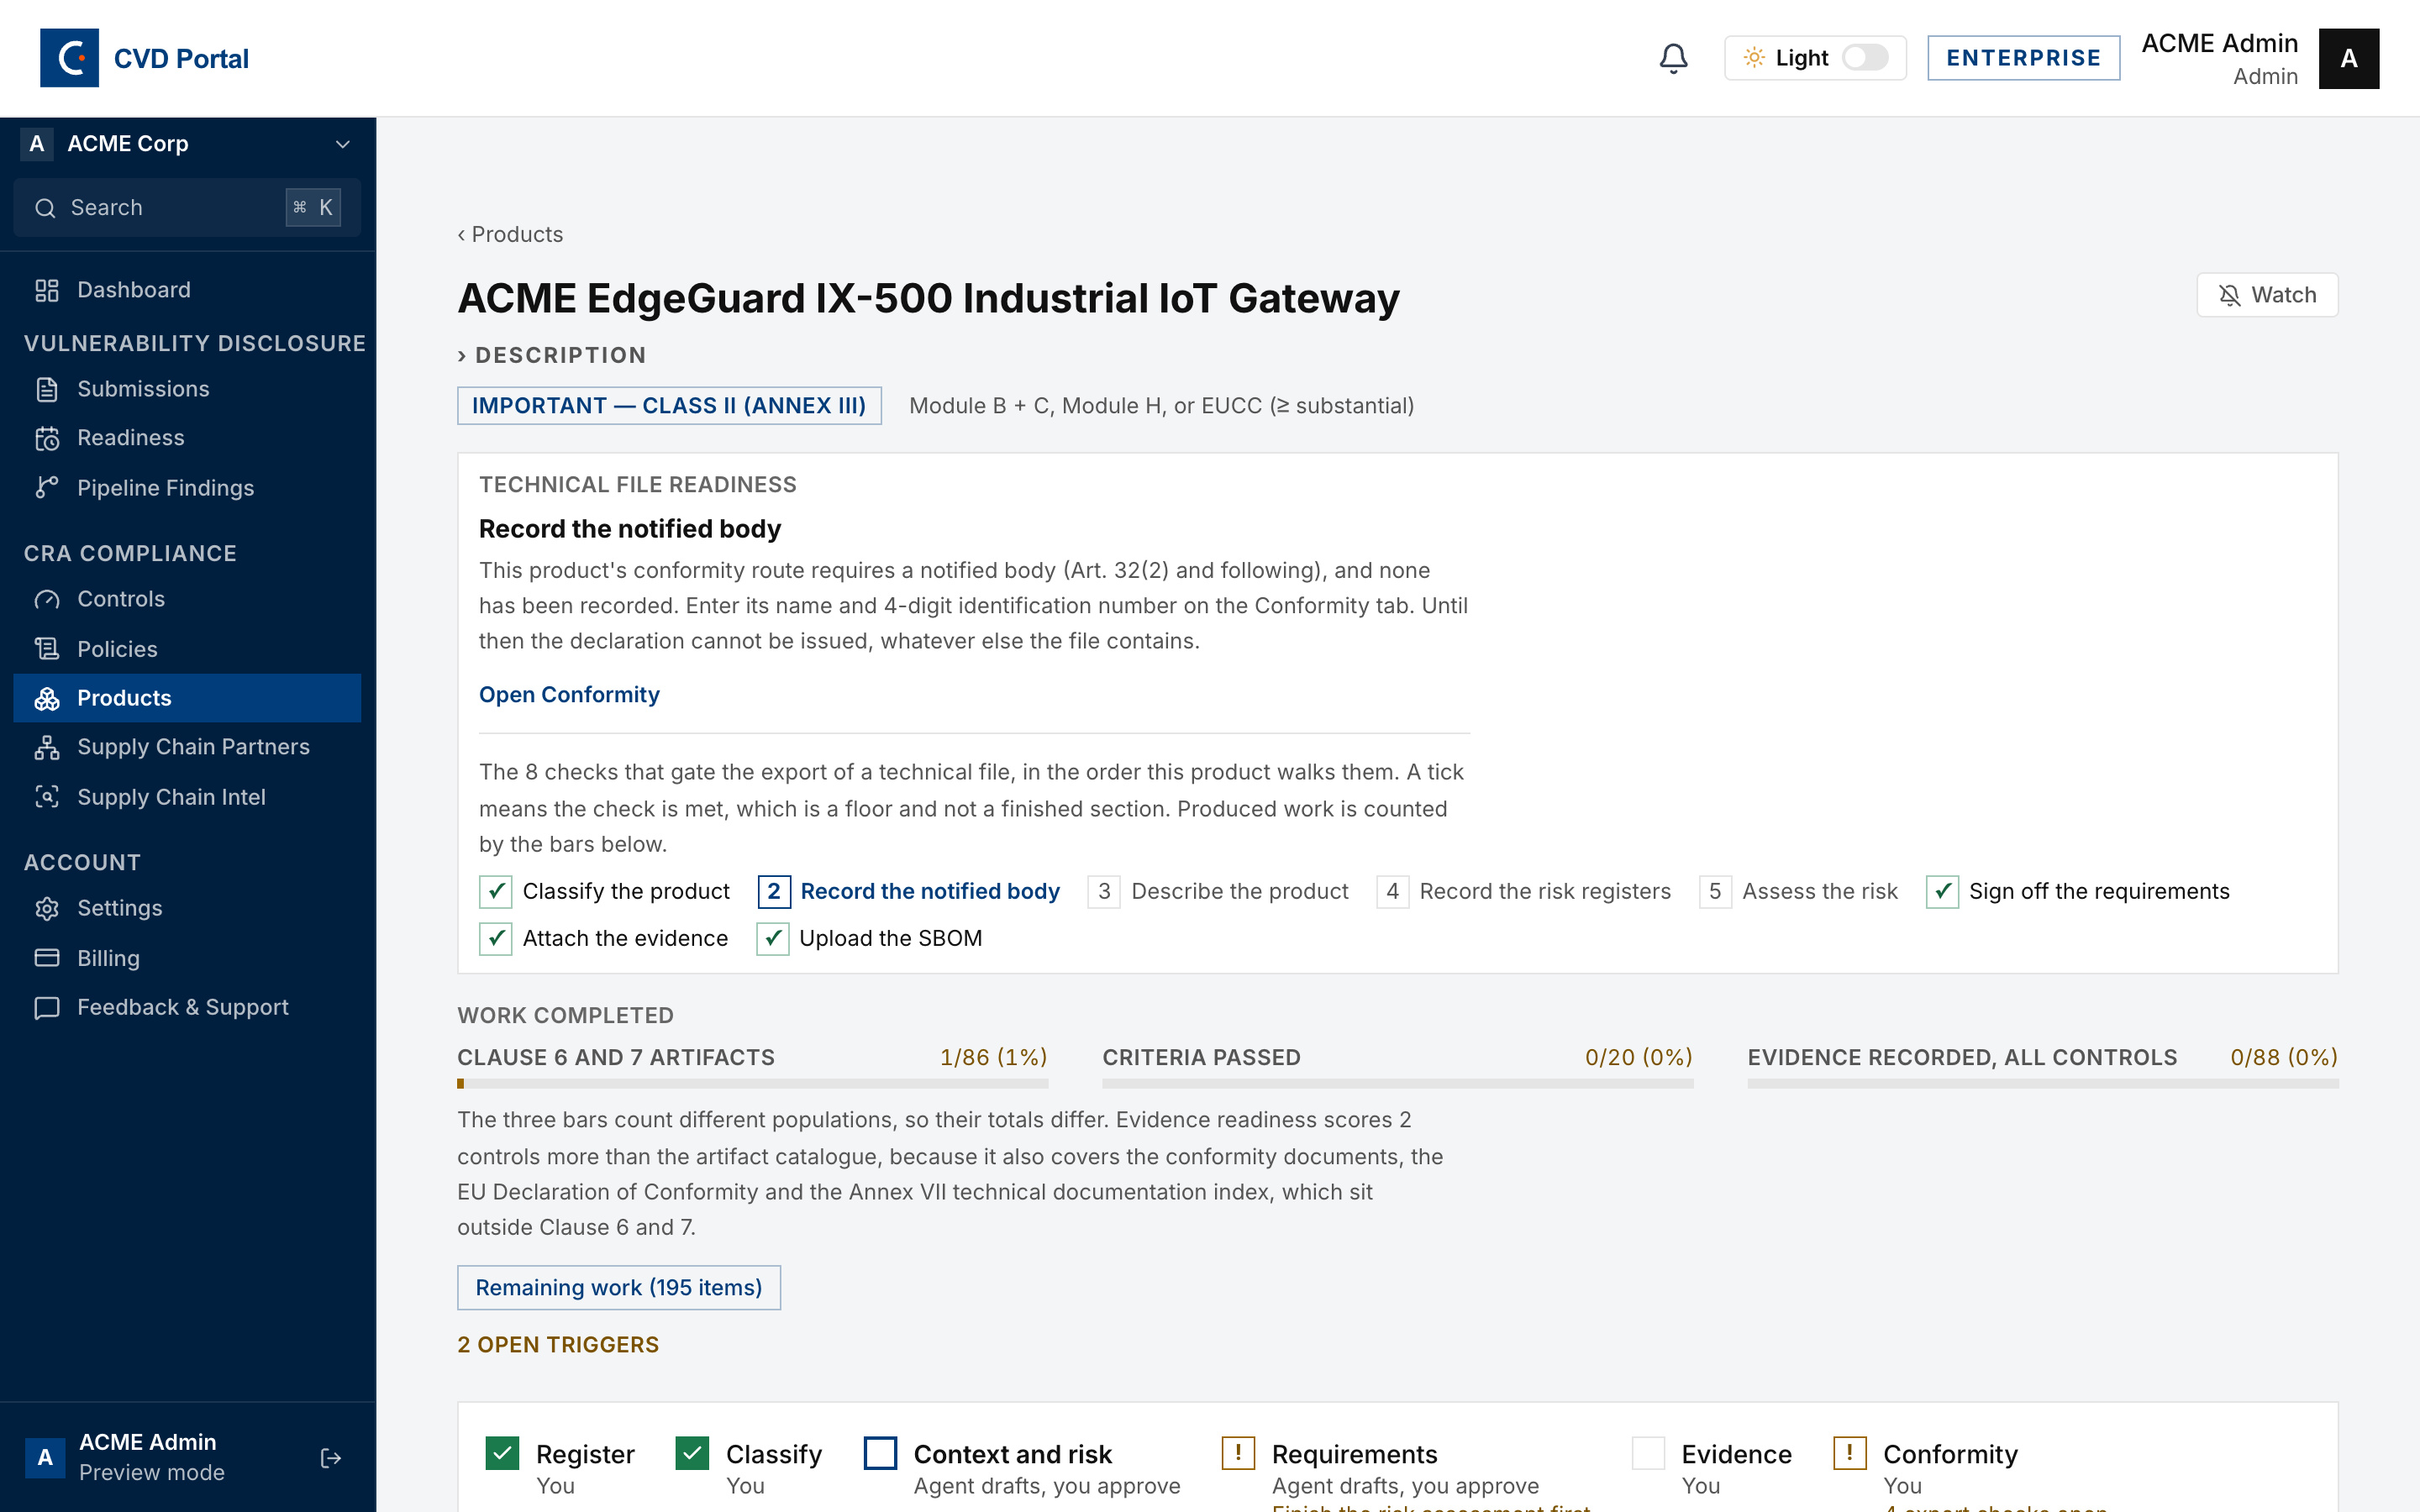

The markers mean the same as on a report. A tick is done. The outlined box is current. A box with "!" is blocked, with the reason below it. An empty box is to do. "Agent drafts, you approve" means the portal drafts the content and you check it.
A Member sees the Requirements and Keep compliant stages without a link, marked "Admin only". An Admin does those two stages.
Step 1. Register
To add a product, go to Products and use one of three ways.
- Enter the Product name and a Short description, then click Add product. The description helps the portal suggest a classification.
- Click Upload a document to create the product from a datasheet, manual or security document. The portal detects the name and pre-maps the document to CRA controls.
- Click Start from an industry template.
Open the Assess tab and complete Product description.
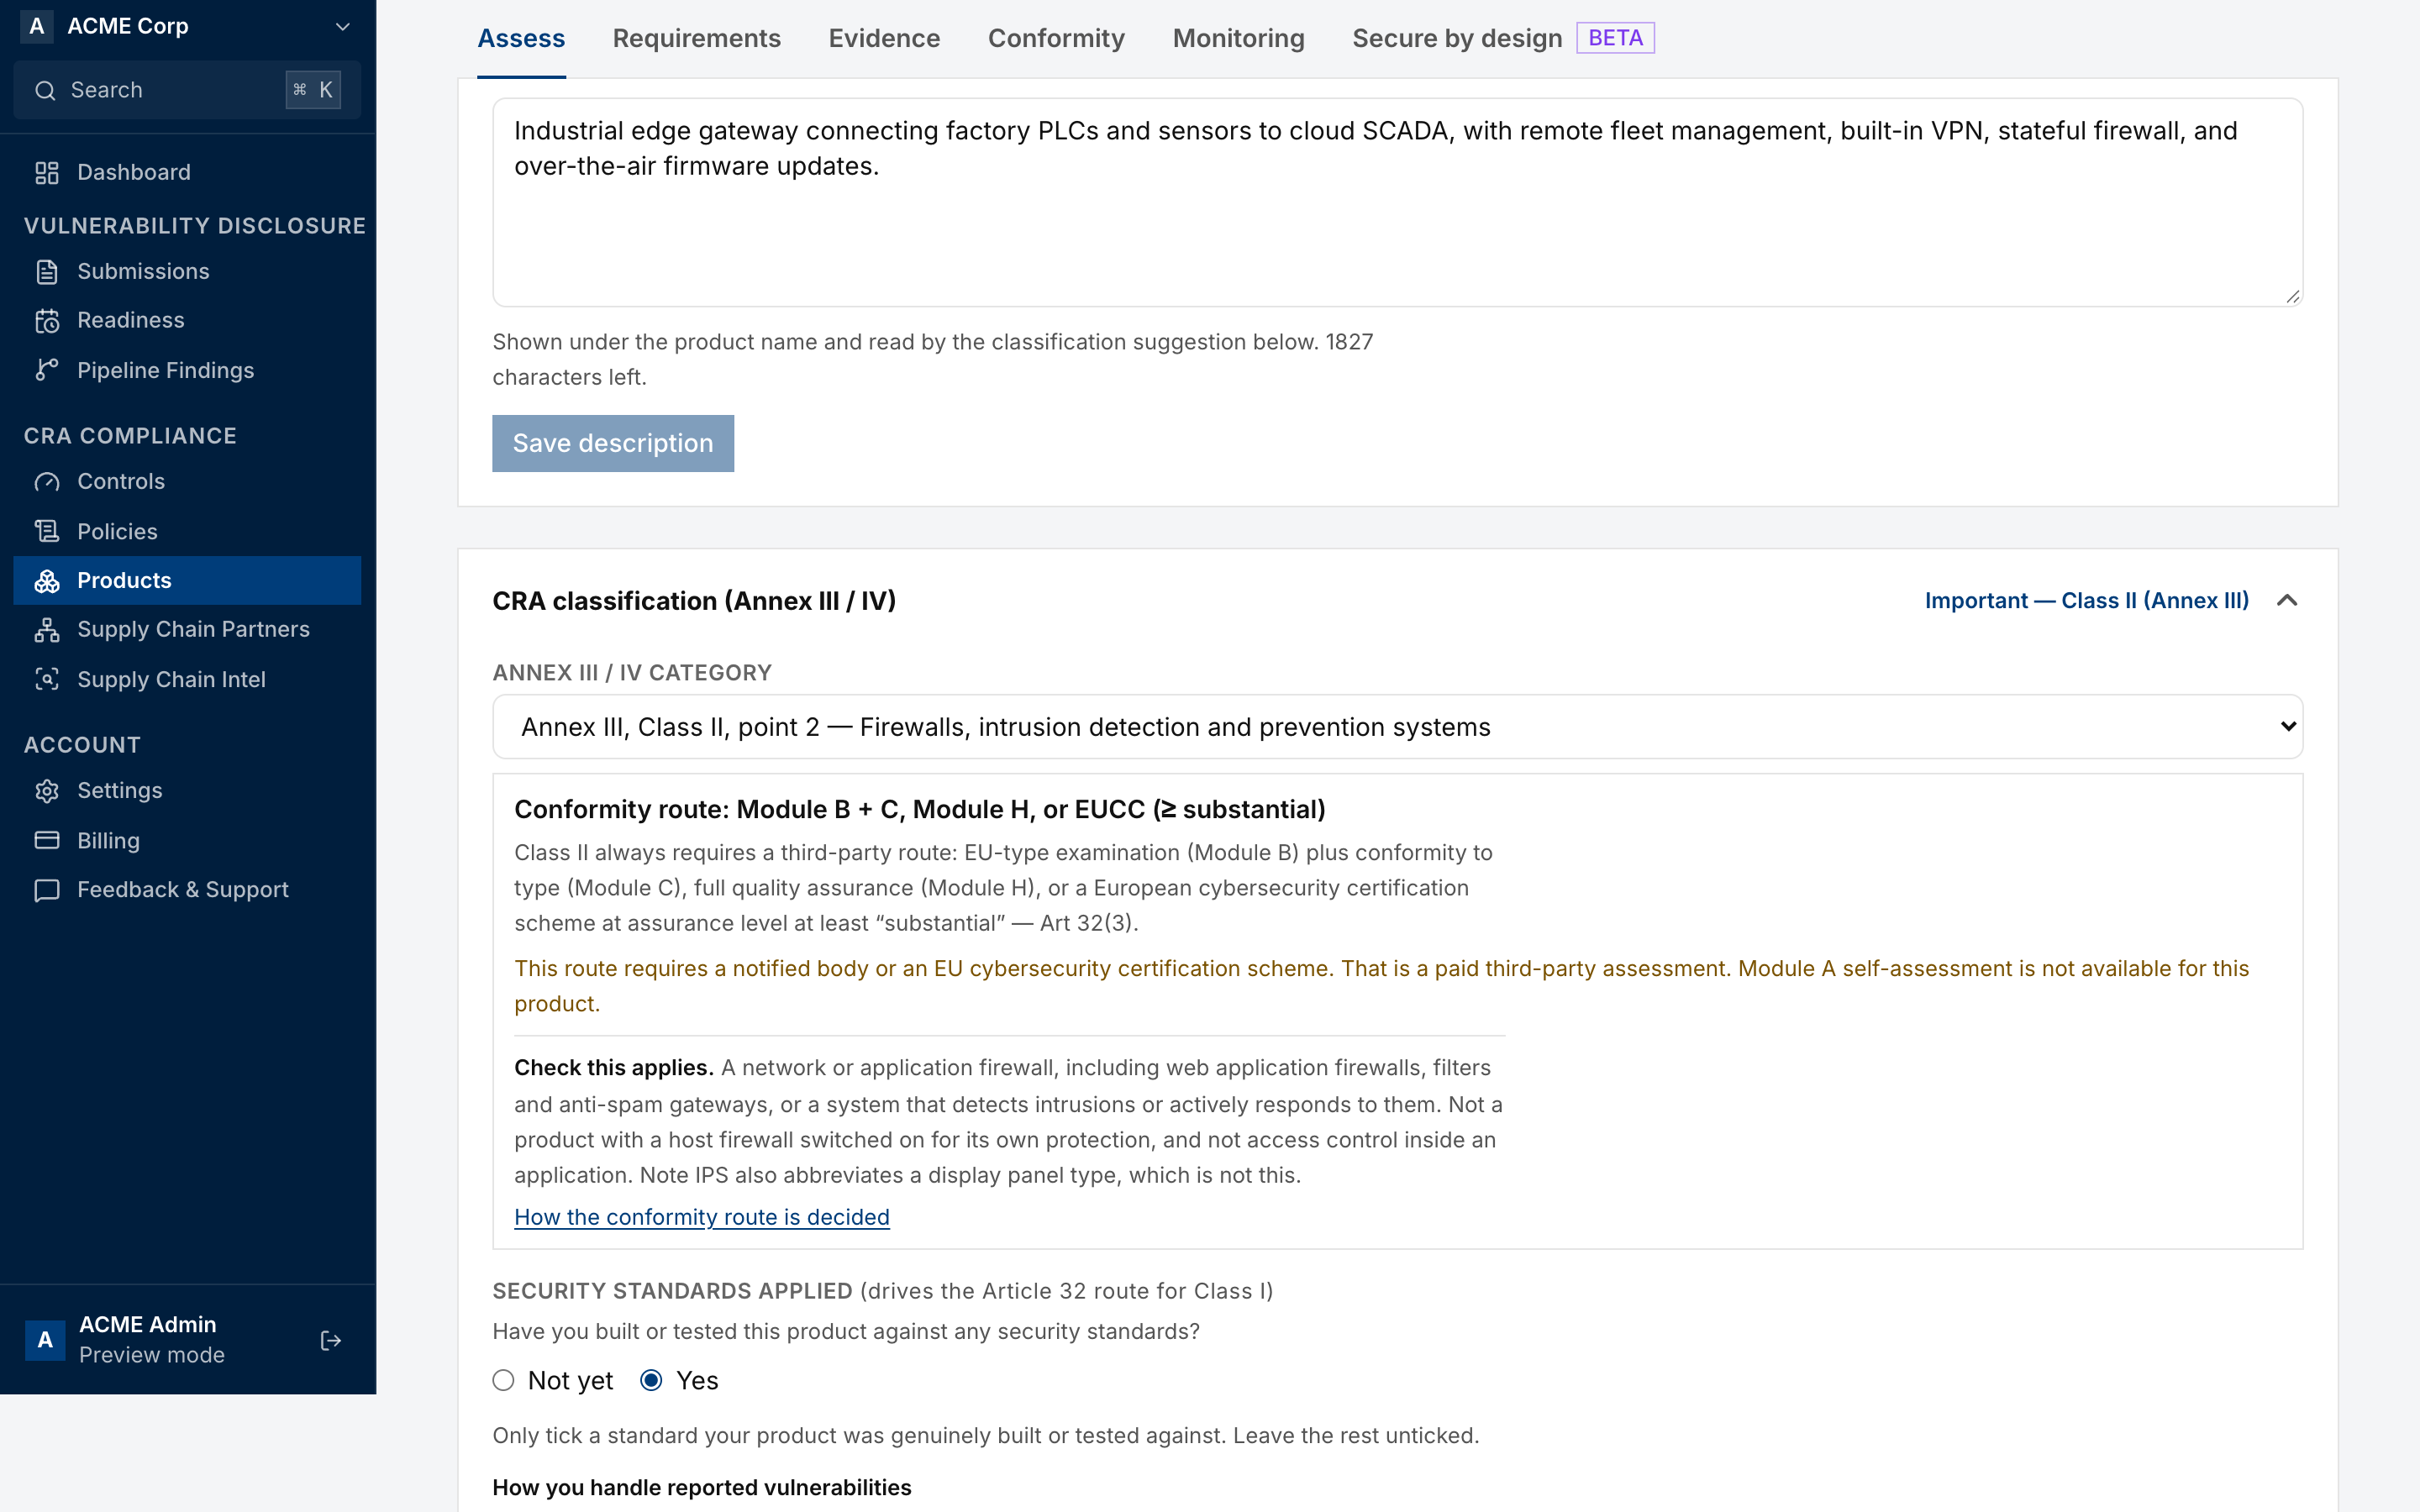
Done when. The product exists. This stage is always done.
Step 2. Classify
On the Assess tab, go to CRA classification (Annex III / IV).
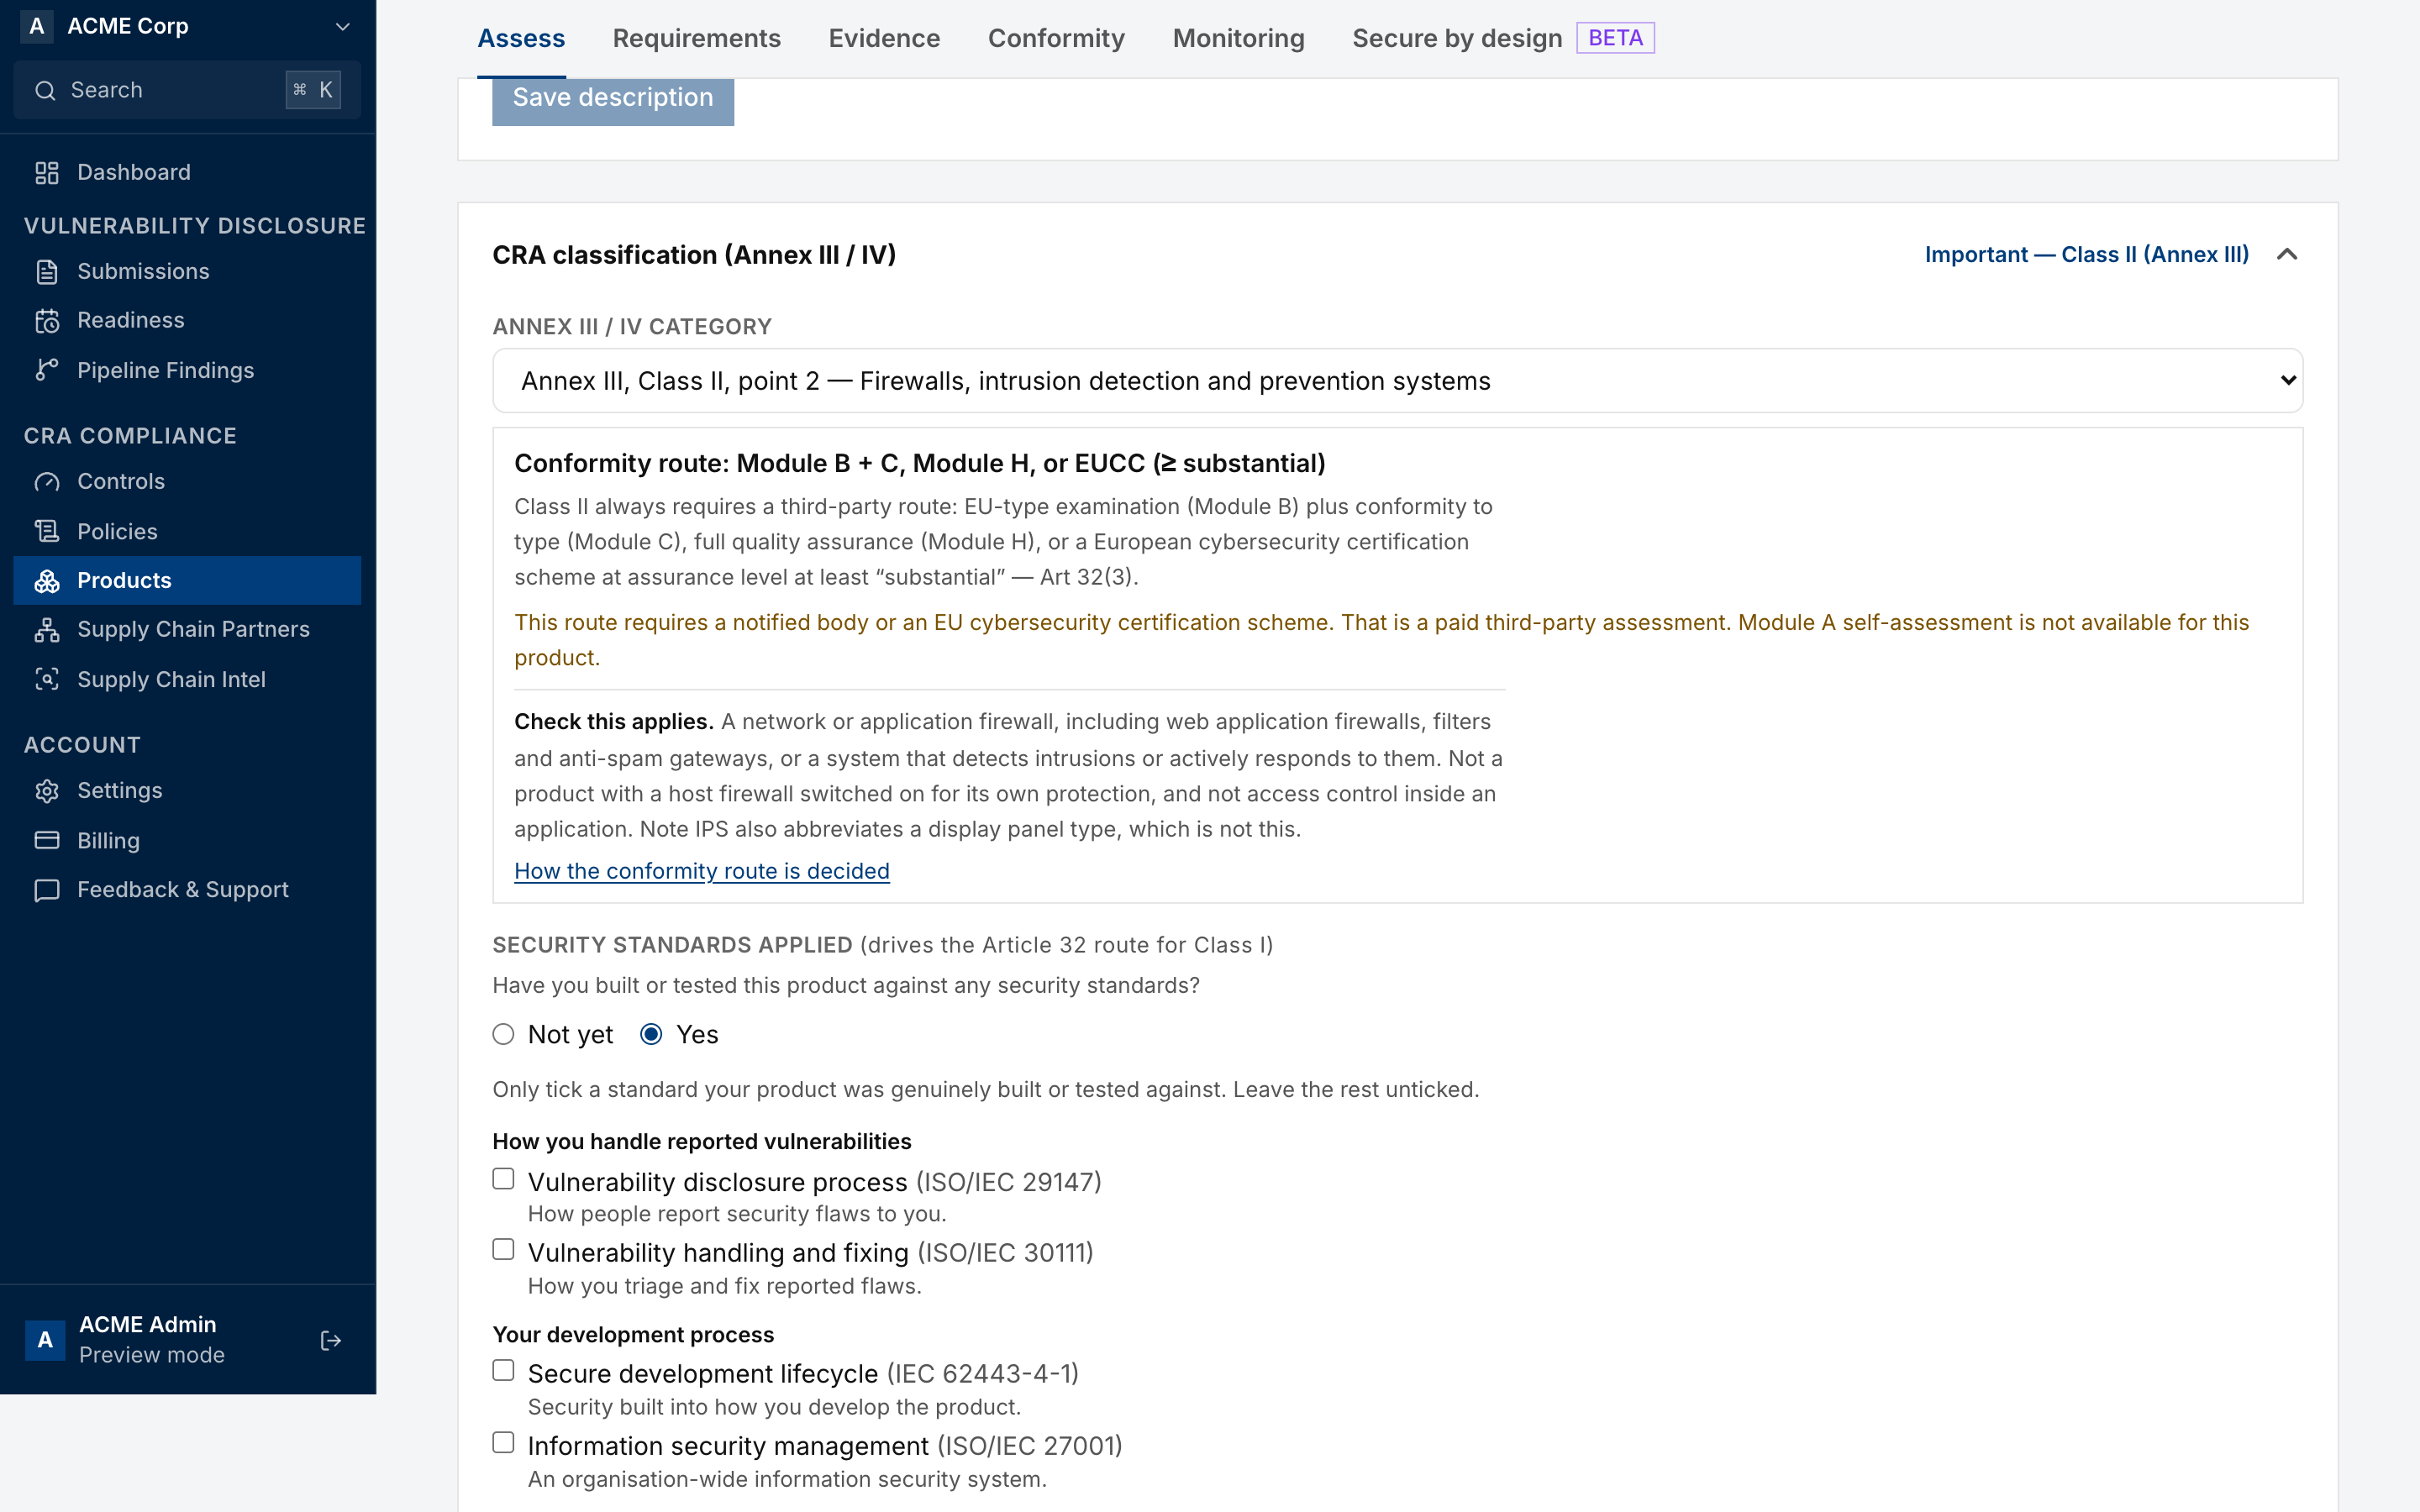
- Select the Annex III or Annex IV category, or the default category. If the portal has a suggestion, check it. The stage then shows "Agent drafts, you approve".
- Read Check this applies under the category. It says what the category covers and what it does not cover.
- Read the conformity route. Important Class II and Critical products need a notified body or a European cybersecurity certification scheme. Module A self-assessment is not open to them.
- Under Security standards applied, tick only the standards the product was built or tested against.
- Click Save classification. Saving confirms the classification and records who decided it.
Done when. The classification is saved.
Step 3. Context and risk
On the Assess tab, work through the Clause 6 sections. The stage links to the first missing artifact.
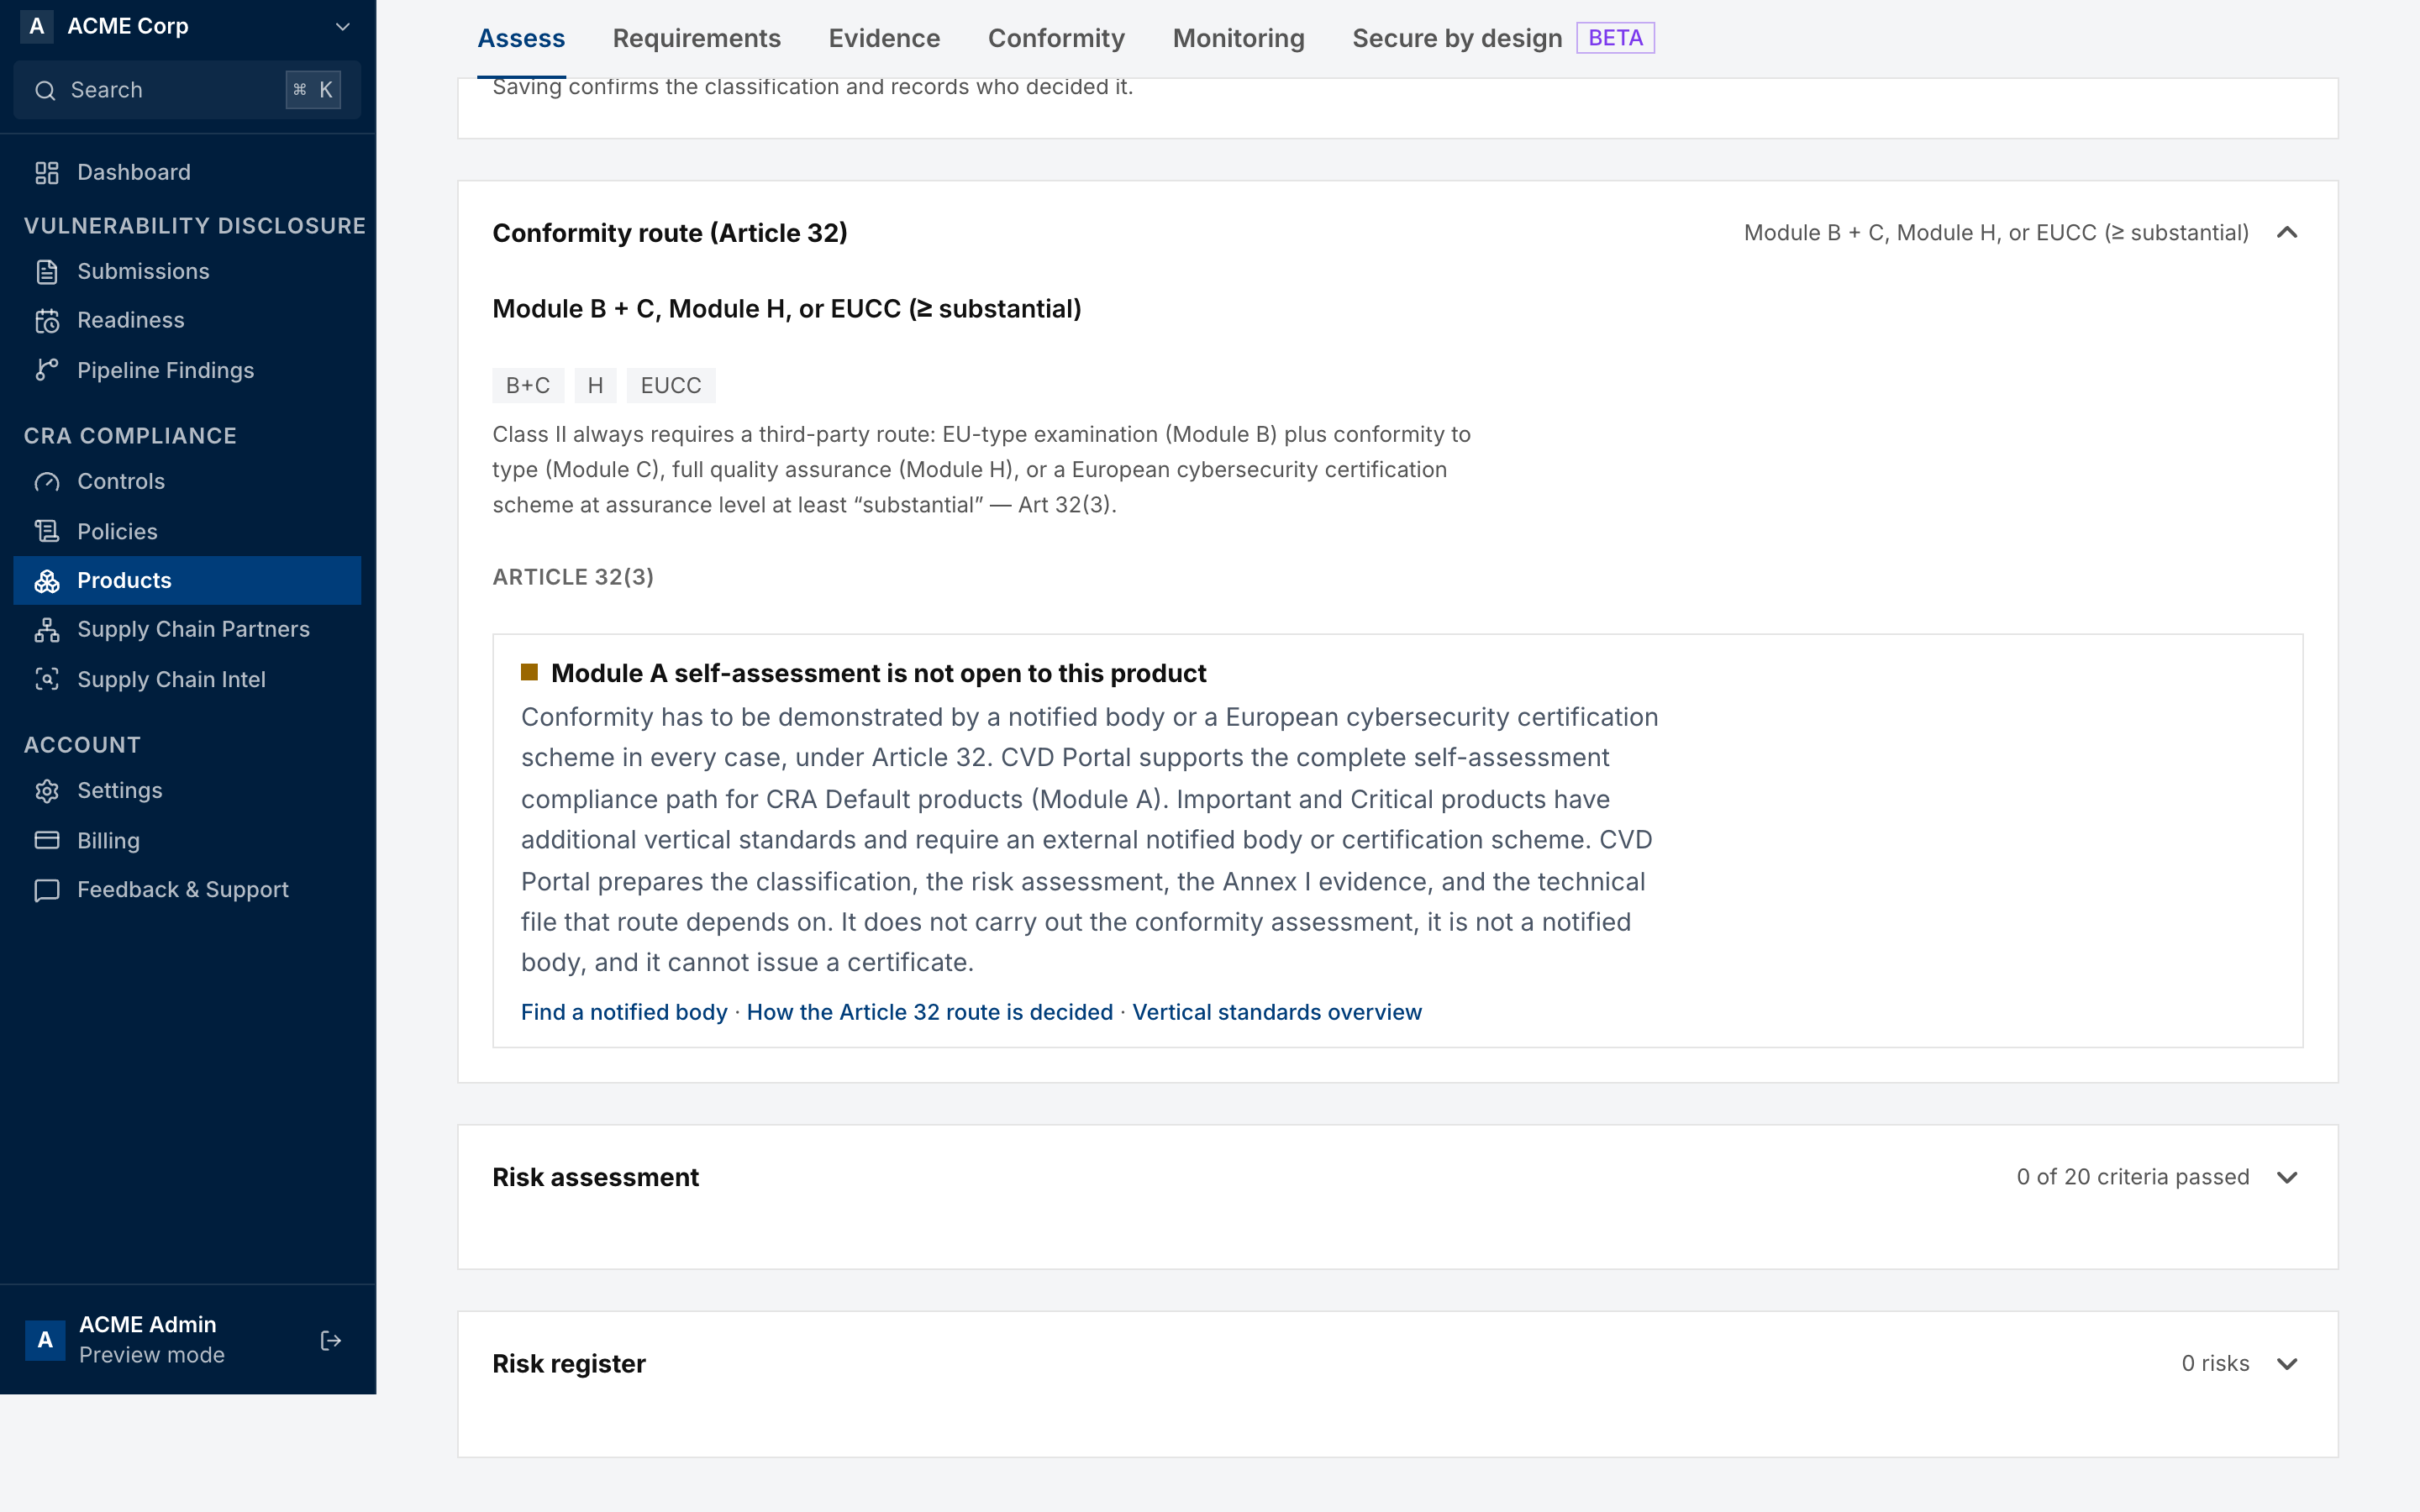
- Product context (Clause 6.2). Describe the interfaces, users and functions. Use Import and analyze a document to draft from existing documents.
- Risk assessment. Record assets, data-flow diagrams and the threat model. The portal drafts the STRIDE threat model for you to check.
- Risk register. Record each risk and its treatment.
- Clause artifacts (6 and 7). Review each drafted artifact and complete it.
Done when. Every Clause 6 artifact is complete.
Blocked when. The product is not classified.
Step 4. Requirements
Open the Requirements tab. This stage is for Admins only.
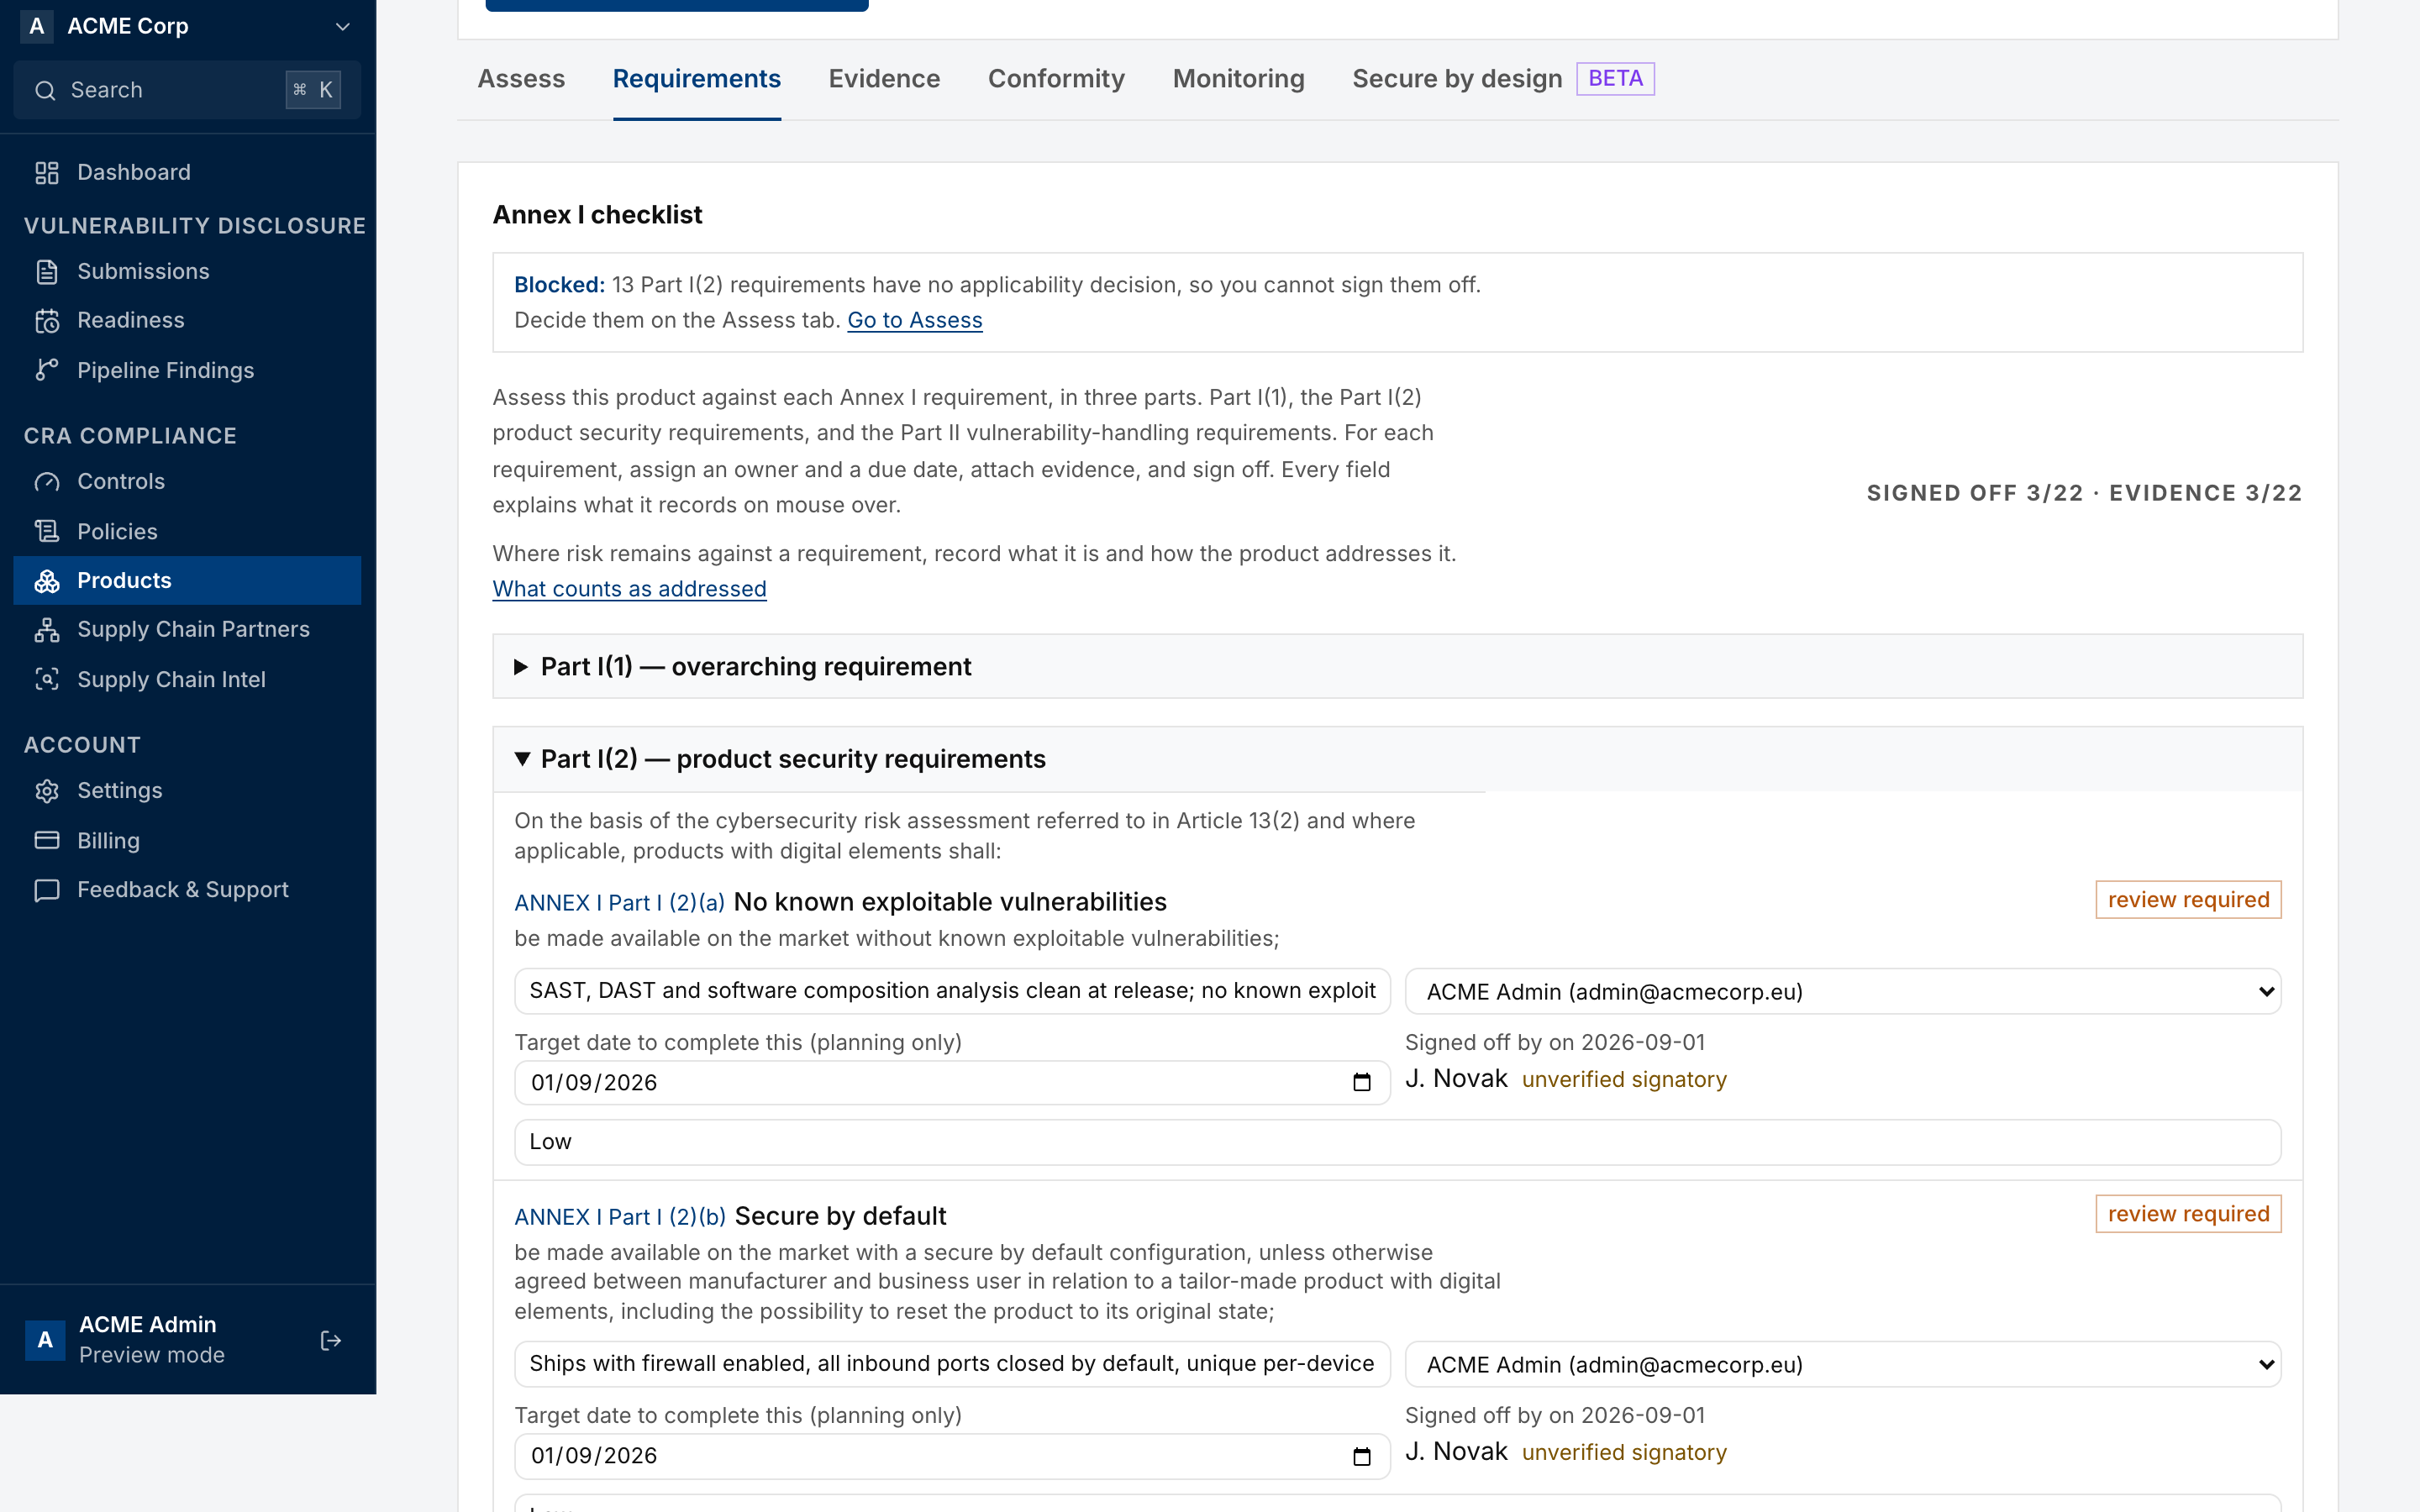
- If the checklist shows Blocked, open the Assess tab and record the applicability decision for each Part I(2) requirement first.
- For each Annex I requirement, record how the product meets it. Assign an owner and a target date.
- Attach evidence and sign off each requirement. The counter shows how many are signed off and how many have evidence.
Done when. Every Clause 7 artifact is complete and every risk assessment criterion has passed.
Blocked when. Context and risk is not done.
Step 5. Evidence
Open the Evidence tab.
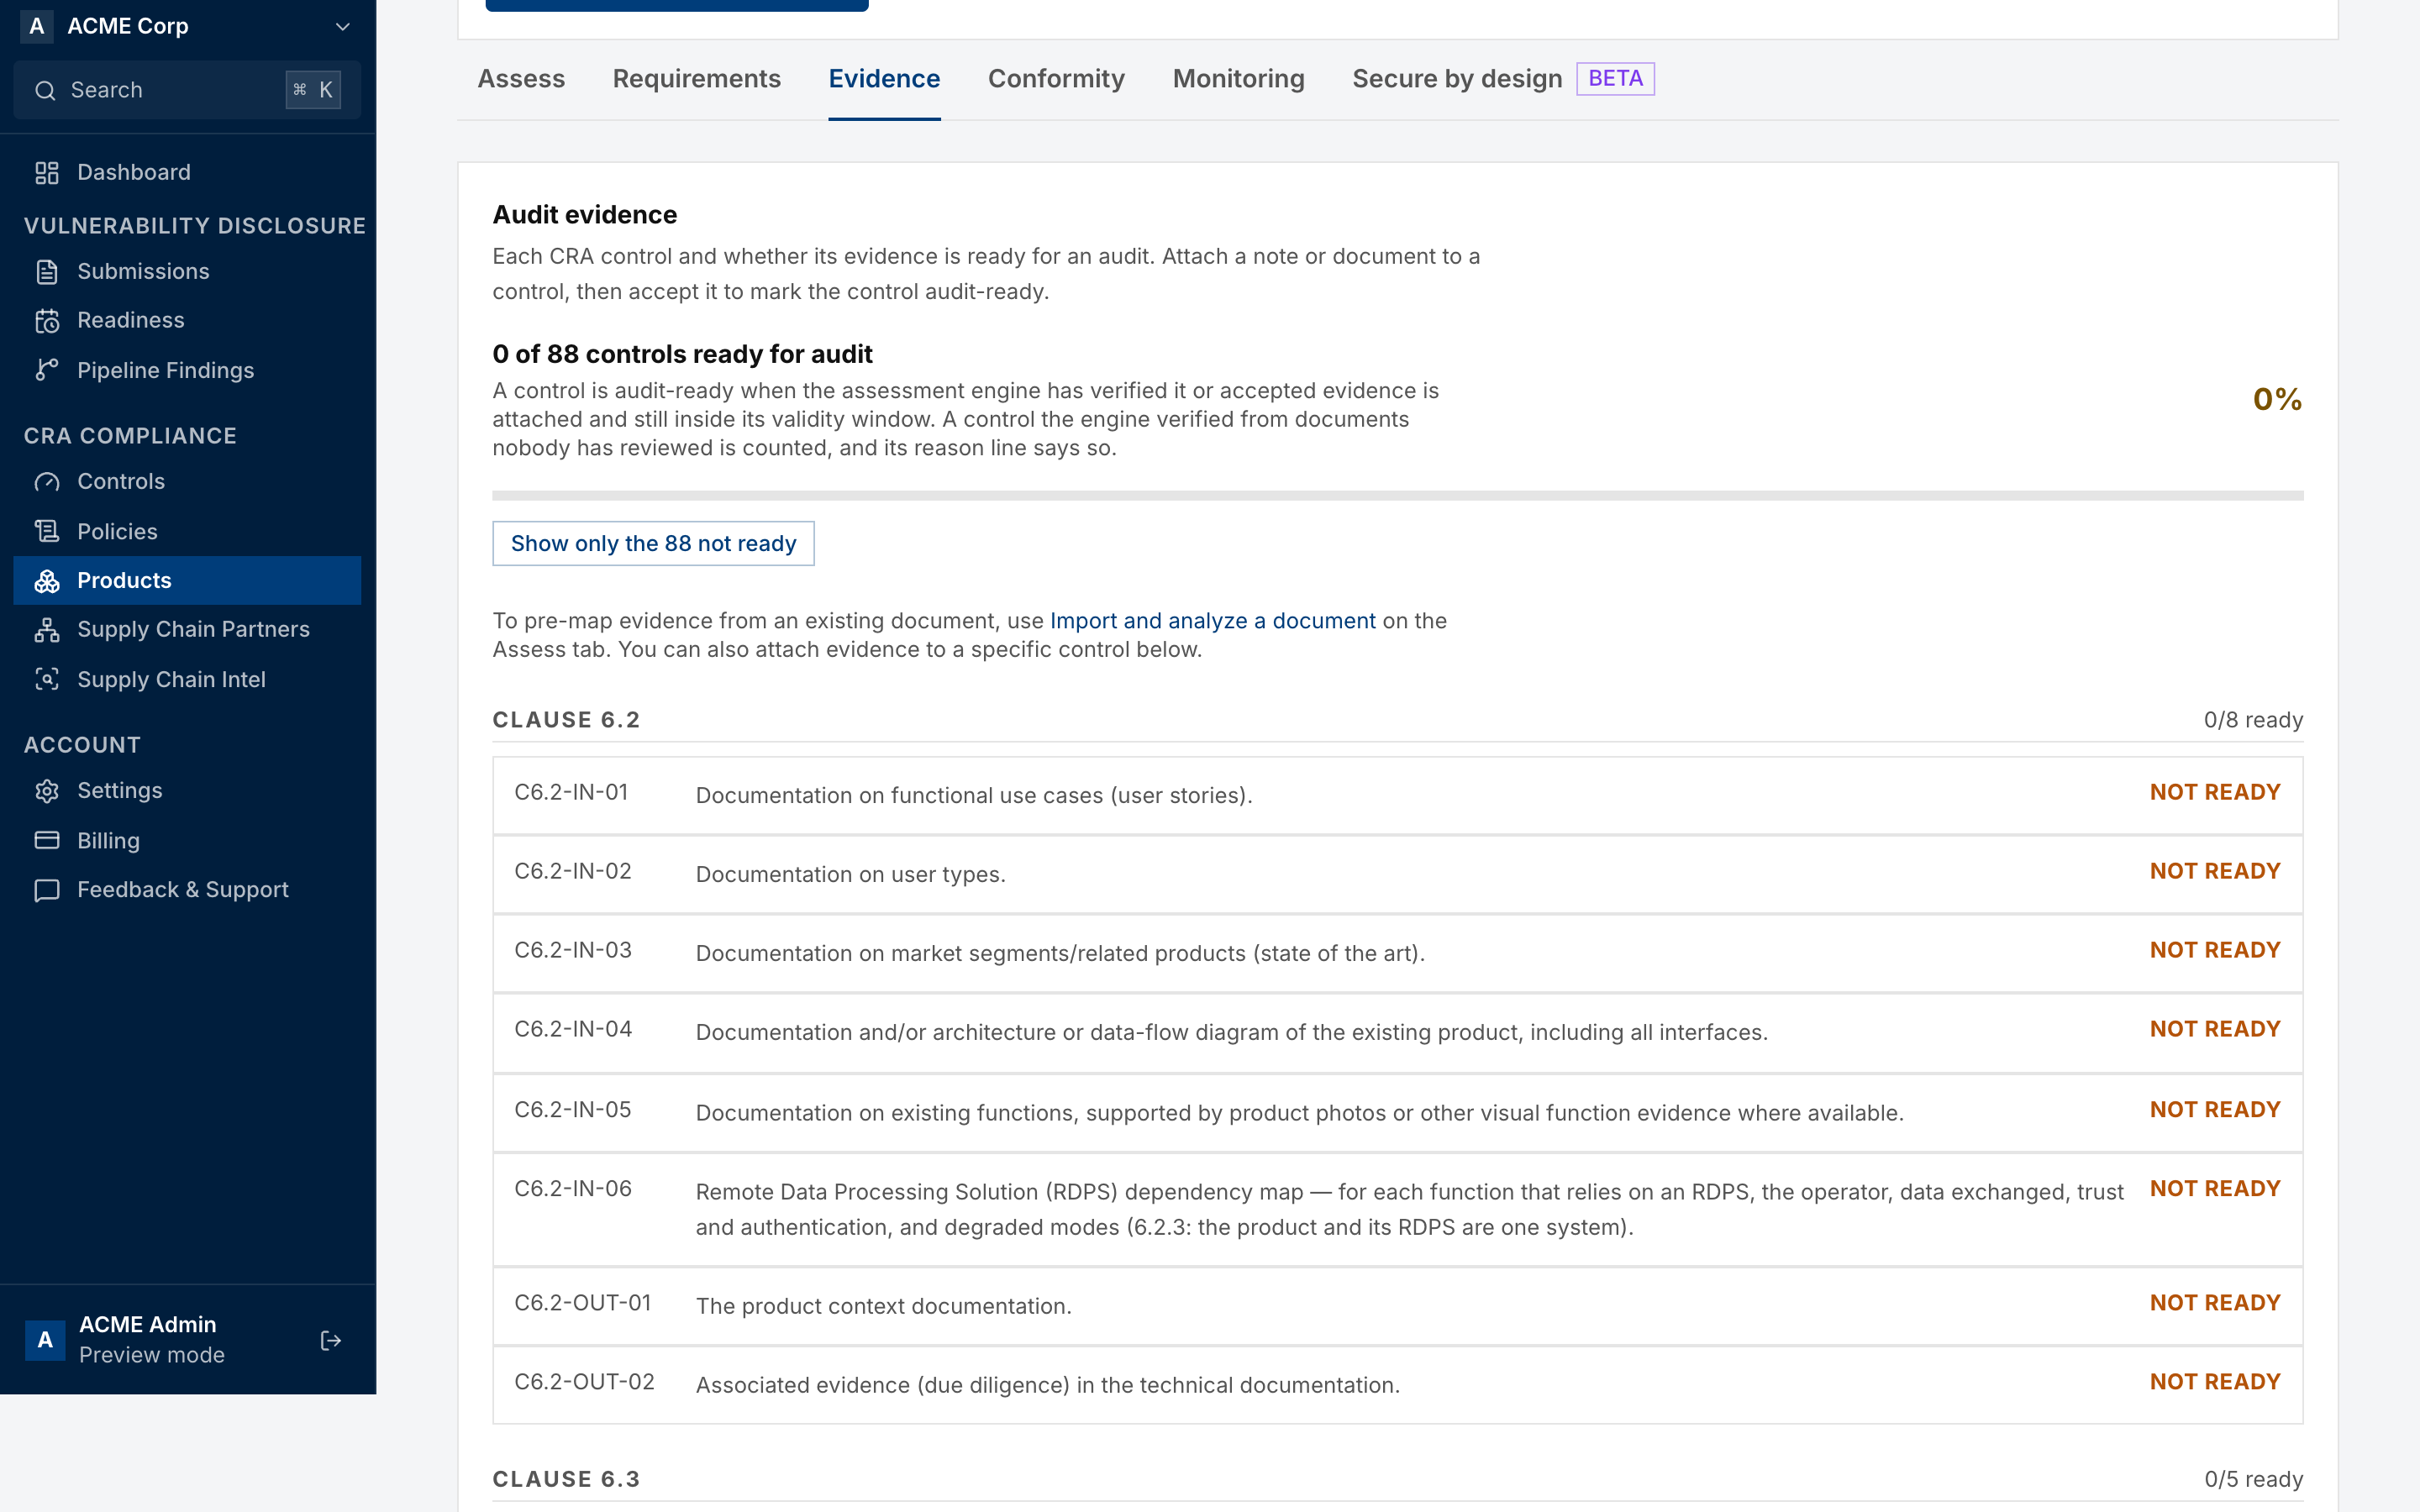
Each CRA control shows Ready or Not ready. To make a control ready, attach a note or a document to it with Add evidence, then accept it. Set how long the evidence stays valid if it expires. Click Show only the N not ready to list only the gaps. N is the number of controls not ready.
Done when. Every control is ready.
Step 6. Conformity
Open the Conformity tab.
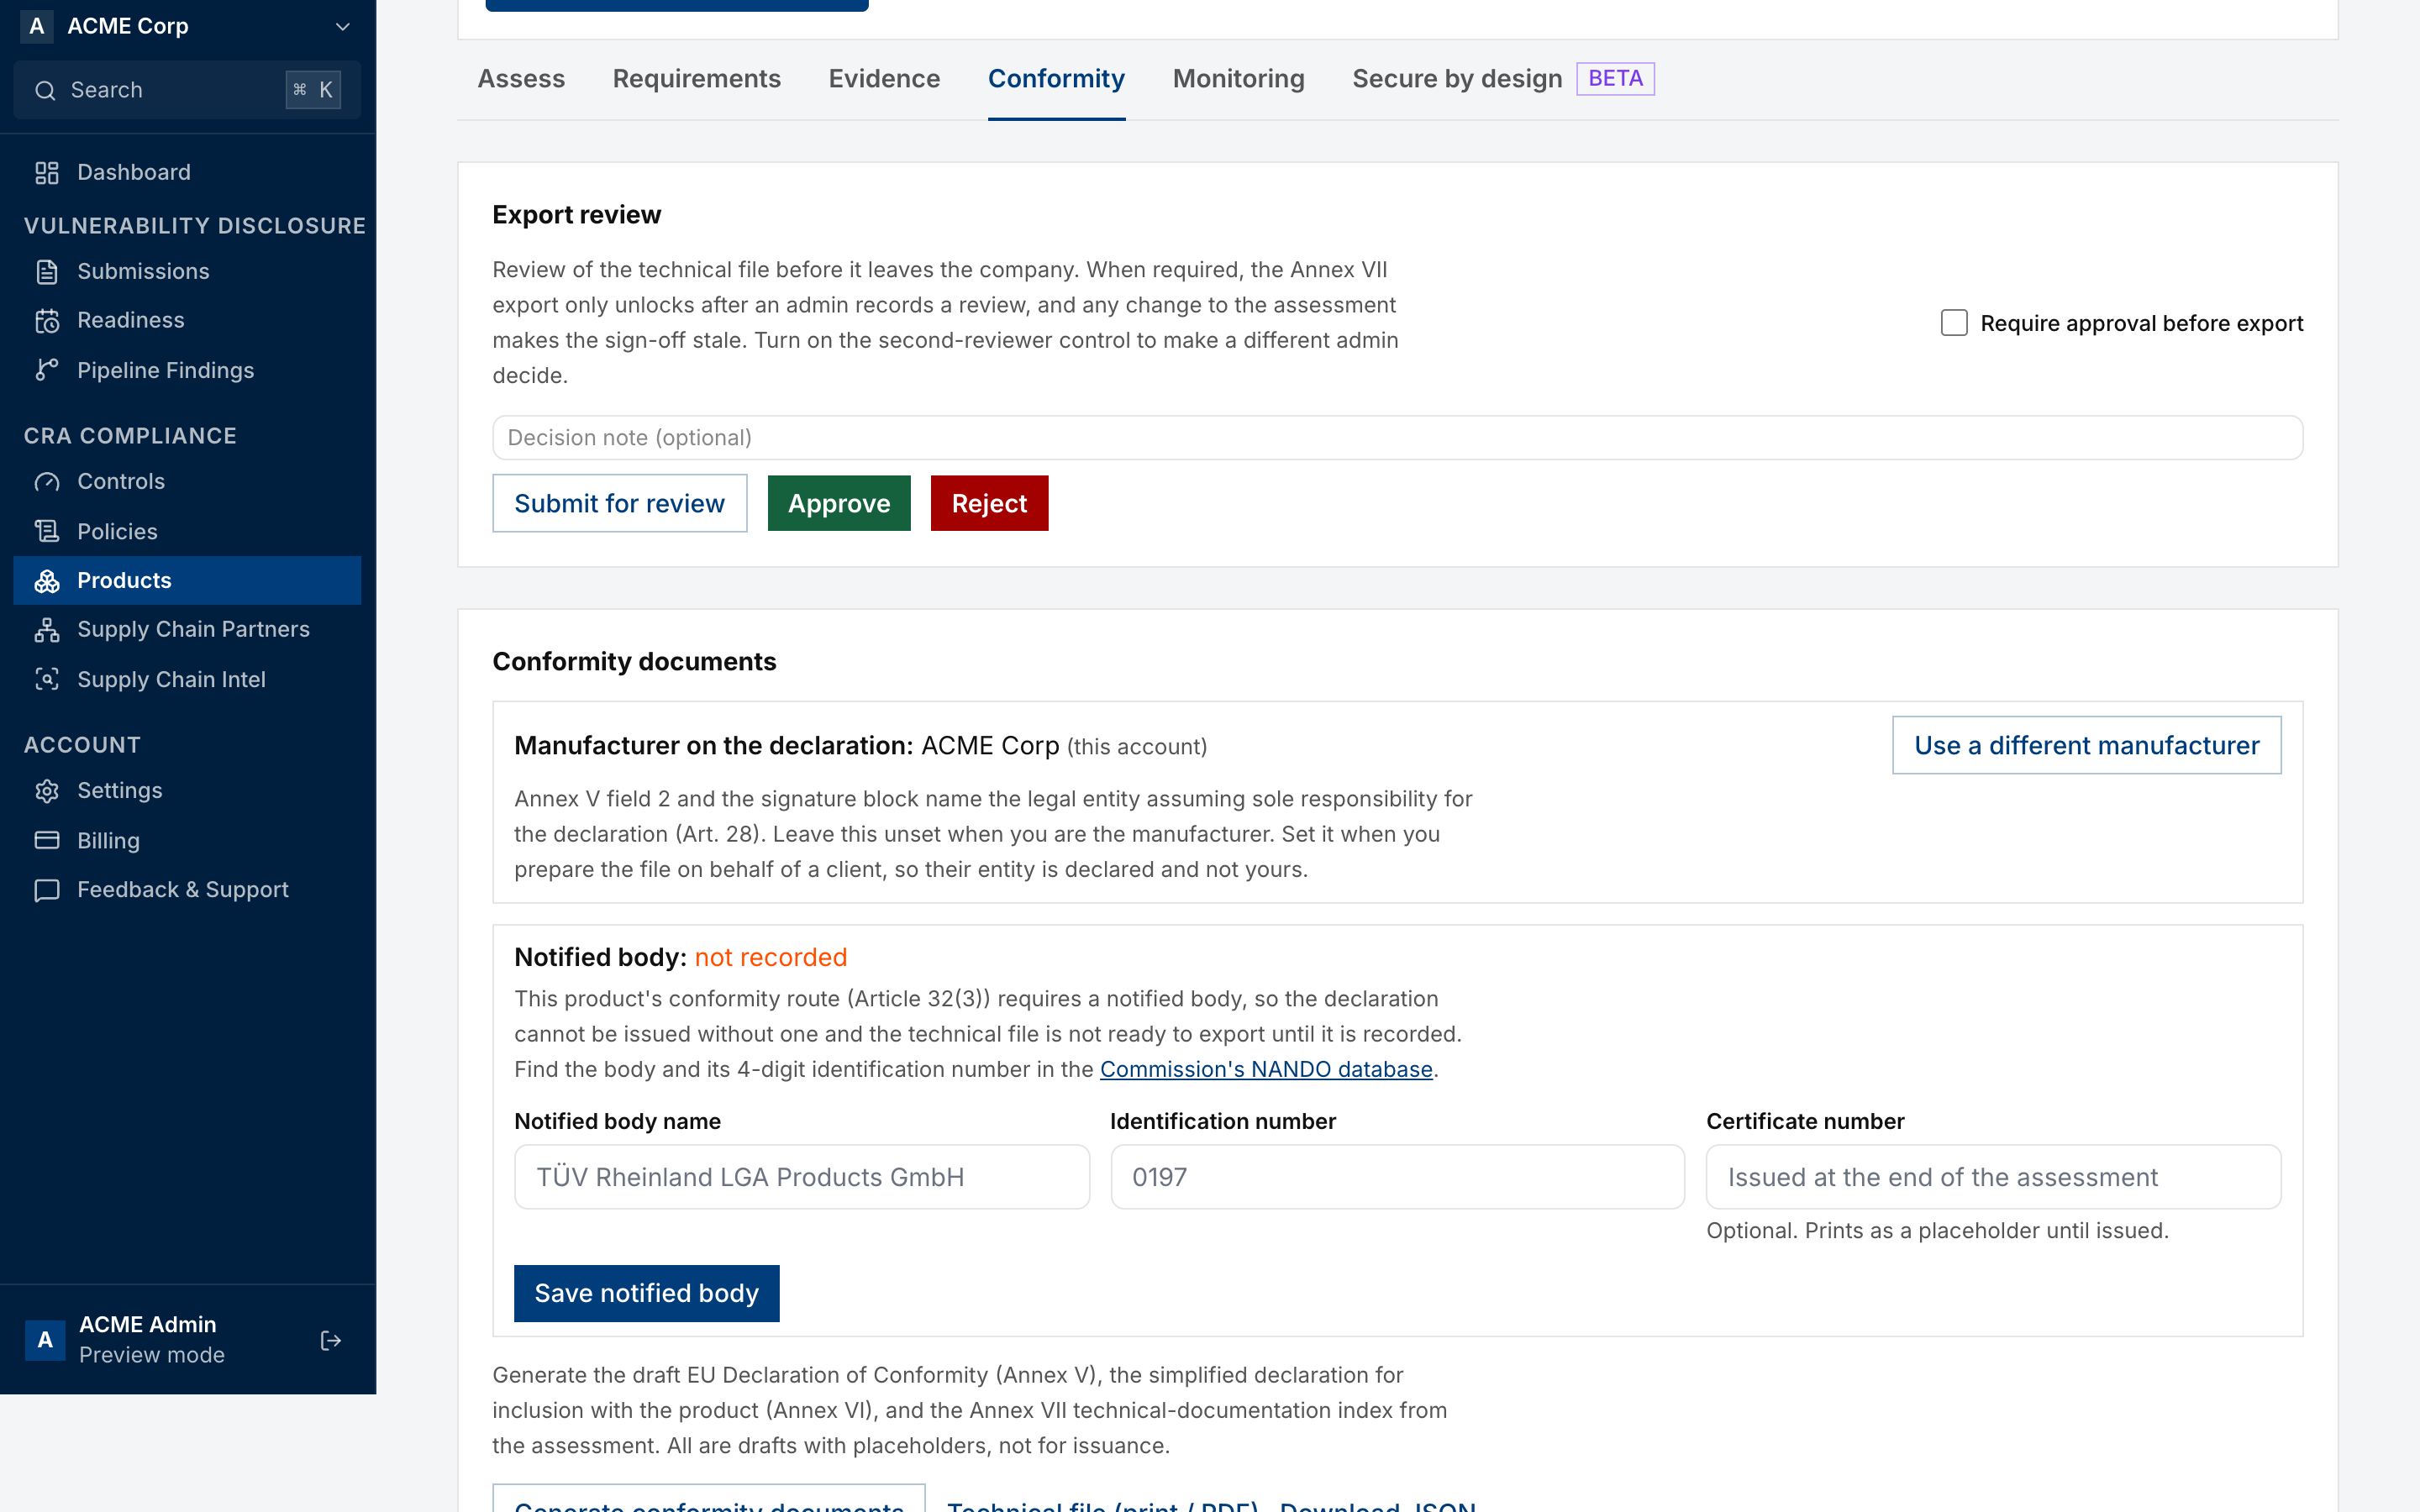
- Under Export review, submit the technical file for review. An Admin approves or rejects it. Tick Require approval before export to make this review mandatory.
- Under Conformity documents, check the manufacturer on the declaration. Click Use a different manufacturer only when you prepare the file for a client.
- If the conformity route needs a notified body, enter its name, its 4-digit identification number and the certificate number. Click Save notified body.
- Click Generate conformity documents. The portal drafts the EU Declaration of Conformity (Annex V), the simplified declaration (Annex VI) and the technical documentation index (Annex VII).
- Under Actions, click Capture snapshot. The snapshot records the state of the assessment when the product is placed on the market.
The generated documents are drafts with placeholders. Do not issue them without review.
Done when. A snapshot exists and no export check is open.
Blocked when. Requirements or Evidence is not done. The note shows how many export checks are open.
Step 7. Keep compliant
Open the Monitoring tab. This stage is for Admins only.
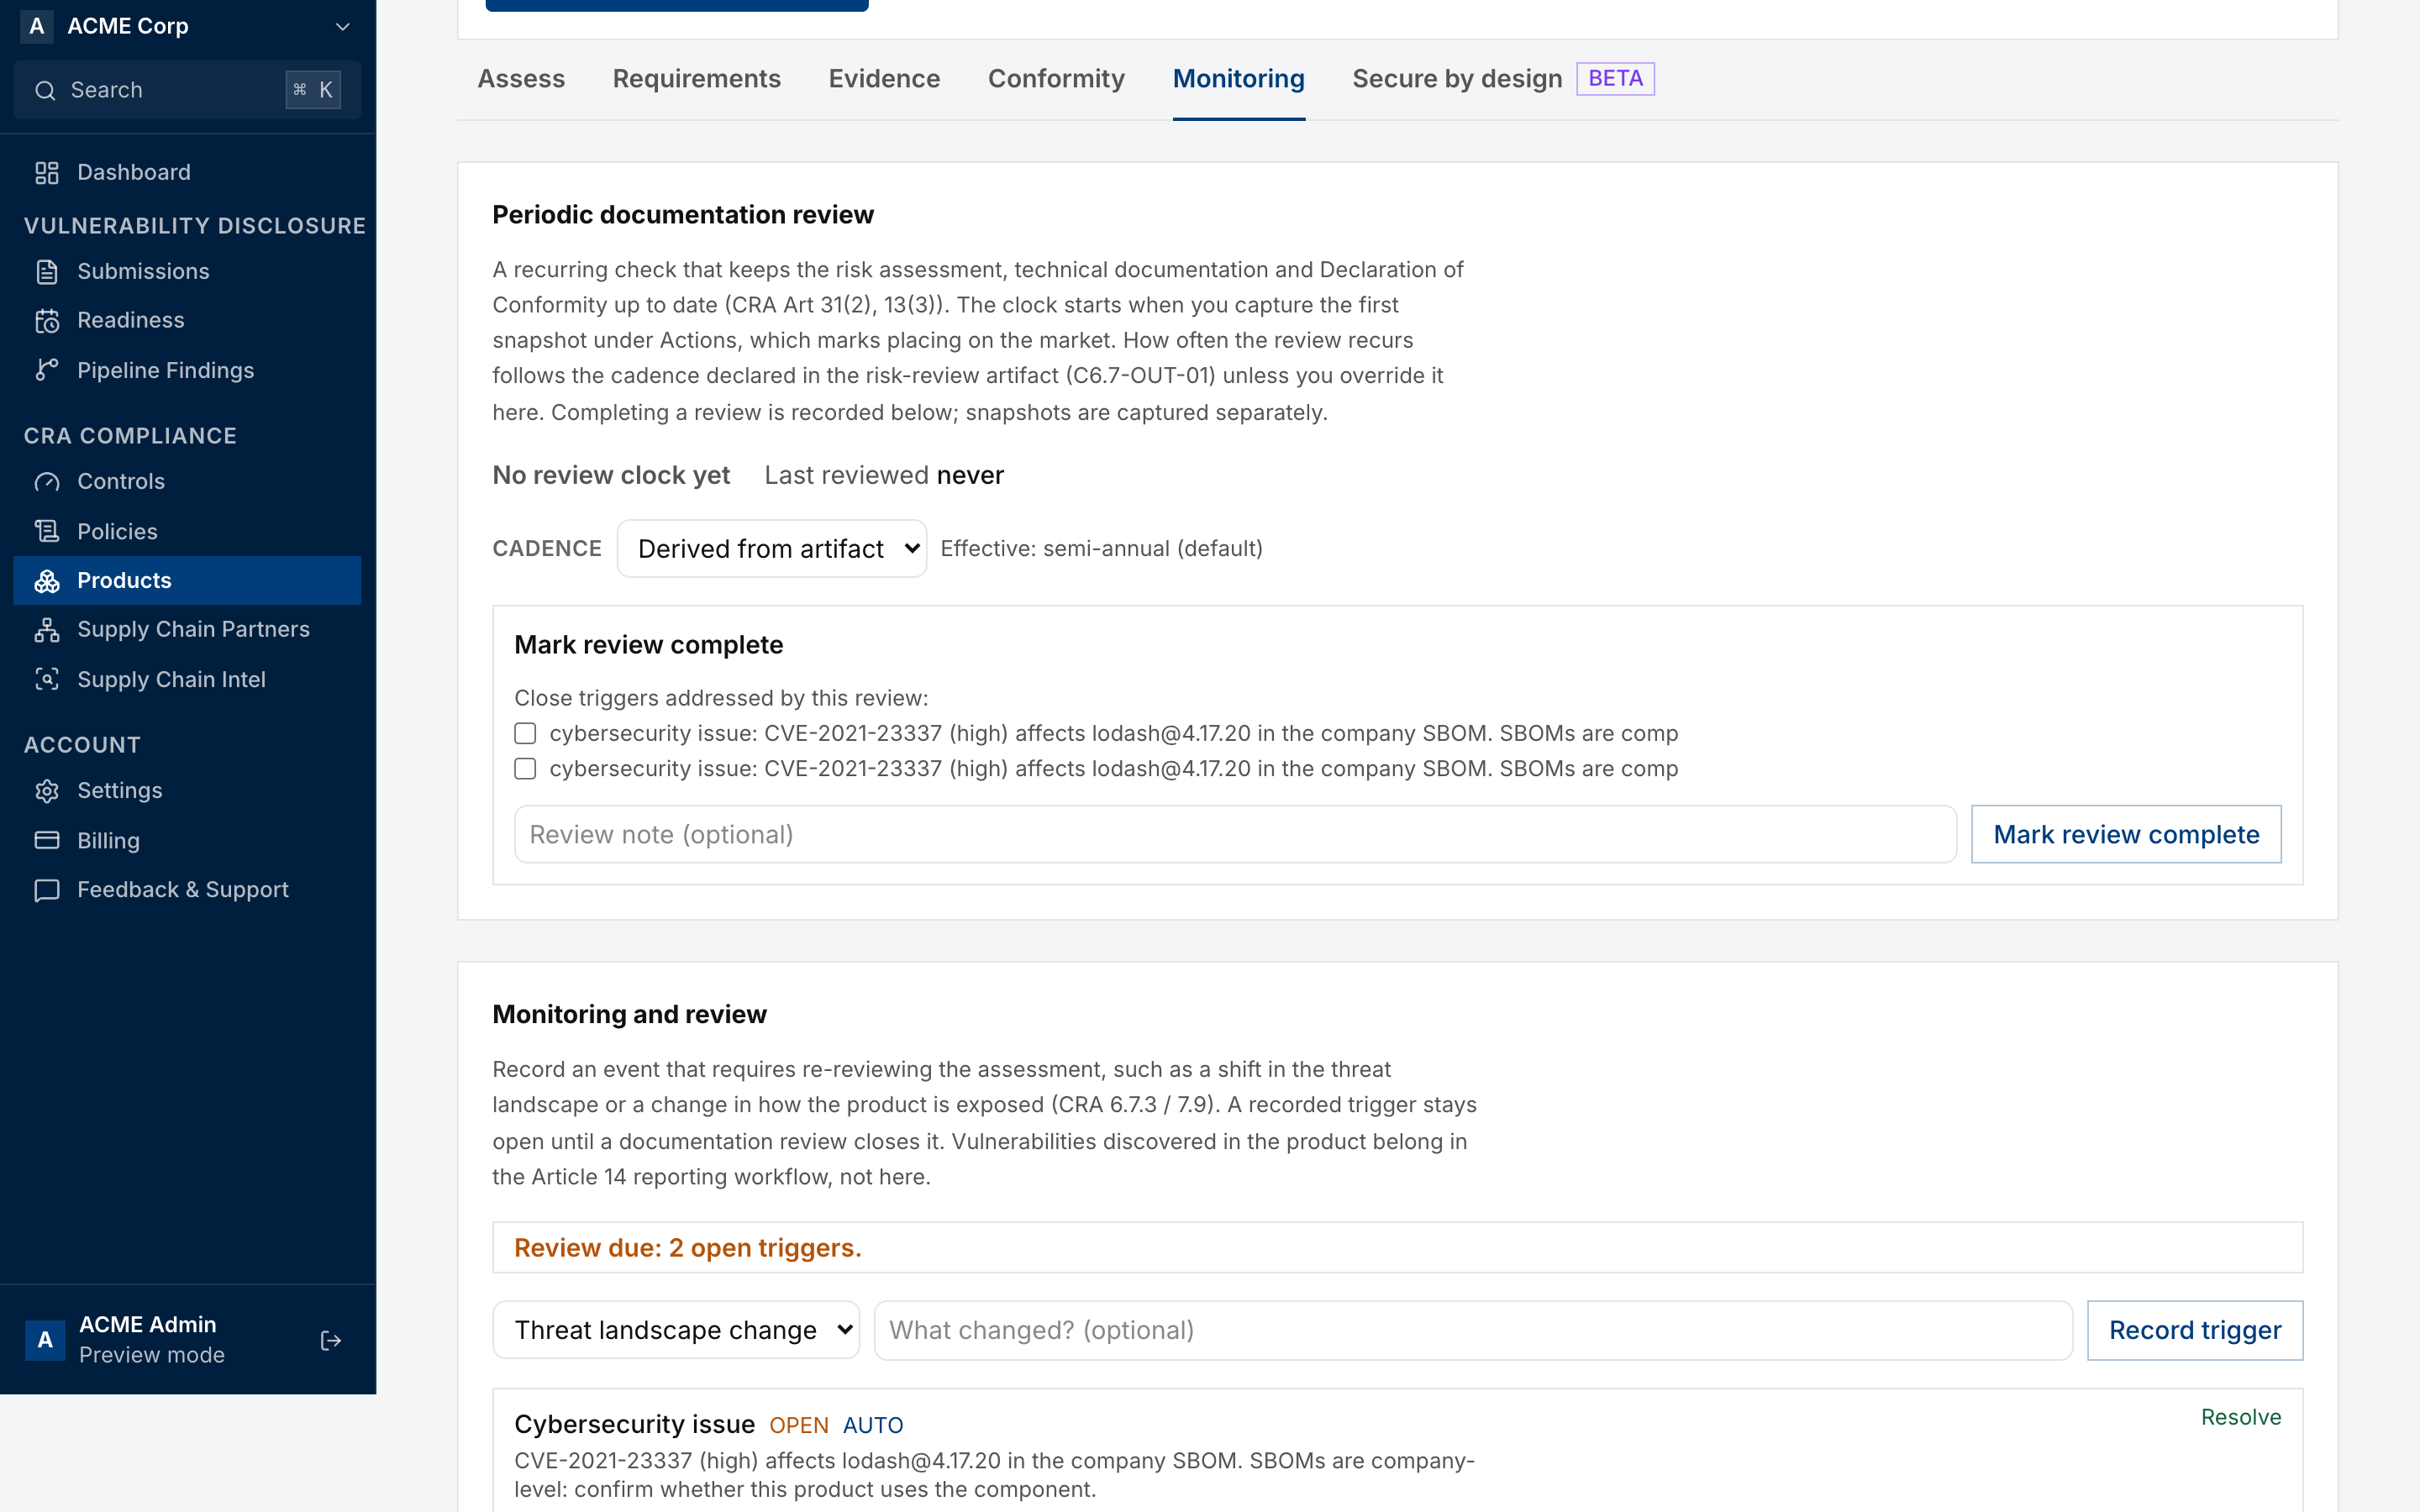
- Under Periodic documentation review, check the review cadence. The review clock starts at the first snapshot.
- When something changes, record it under Monitoring and review. Select the trigger type and click Record trigger. The portal also records some triggers itself, for example a new CVE in a component of your SBOM.
- When you review the documentation, tick the triggers the review addresses and click Mark review complete.
Vulnerabilities found in the product go through the report workflow. Use SOP-10 for them.
Done when. Conformity is done, no trigger is open and the next review is not overdue. This stage can return to current at any time, when a new trigger opens or a review falls due.
Blocked when. Conformity is not done.
Completion checklist
Per product.
- Product registered with a description
- Classification saved, with the conformity route read and understood
- All Clause 6 artifacts complete, including the risk assessment and risk register
- Annex I checklist signed off, with all criteria passed
- All controls ready on the Evidence tab
- Notified body recorded, where the route needs one
- Conformity documents generated, reviewed and completed
- Snapshot captured
- Review cadence set and open triggers closed