Setting Up Your Workspace in the New Dashboard
Audience. The account administrator of a workspace that uses the new dashboard.
Outcome. All six Company setup stages are done. Your Article 14 contacts are recorded, your reporting channel is published and verified, alerts go to the right people, your team has access, and your portal has received a report.
Why it matters. Article 14 of the CRA applies from 11 September 2026. The setup stages are the minimum a manufacturer needs before a report arrives. The new dashboard tracks each stage and shows the next one on the home page.
Time required. About 45 minutes. Stage 3 can take longer if someone else controls your company website.
Applies to. Workspaces with the new dashboard switched on. The sidebar shows "Preview mode" under your name. For the classic dashboard, use SOP-01.
Step 0. Find the setup row on the Overview
Open Dashboard. The Overview page shows your deadlines first, then Needs attention now.
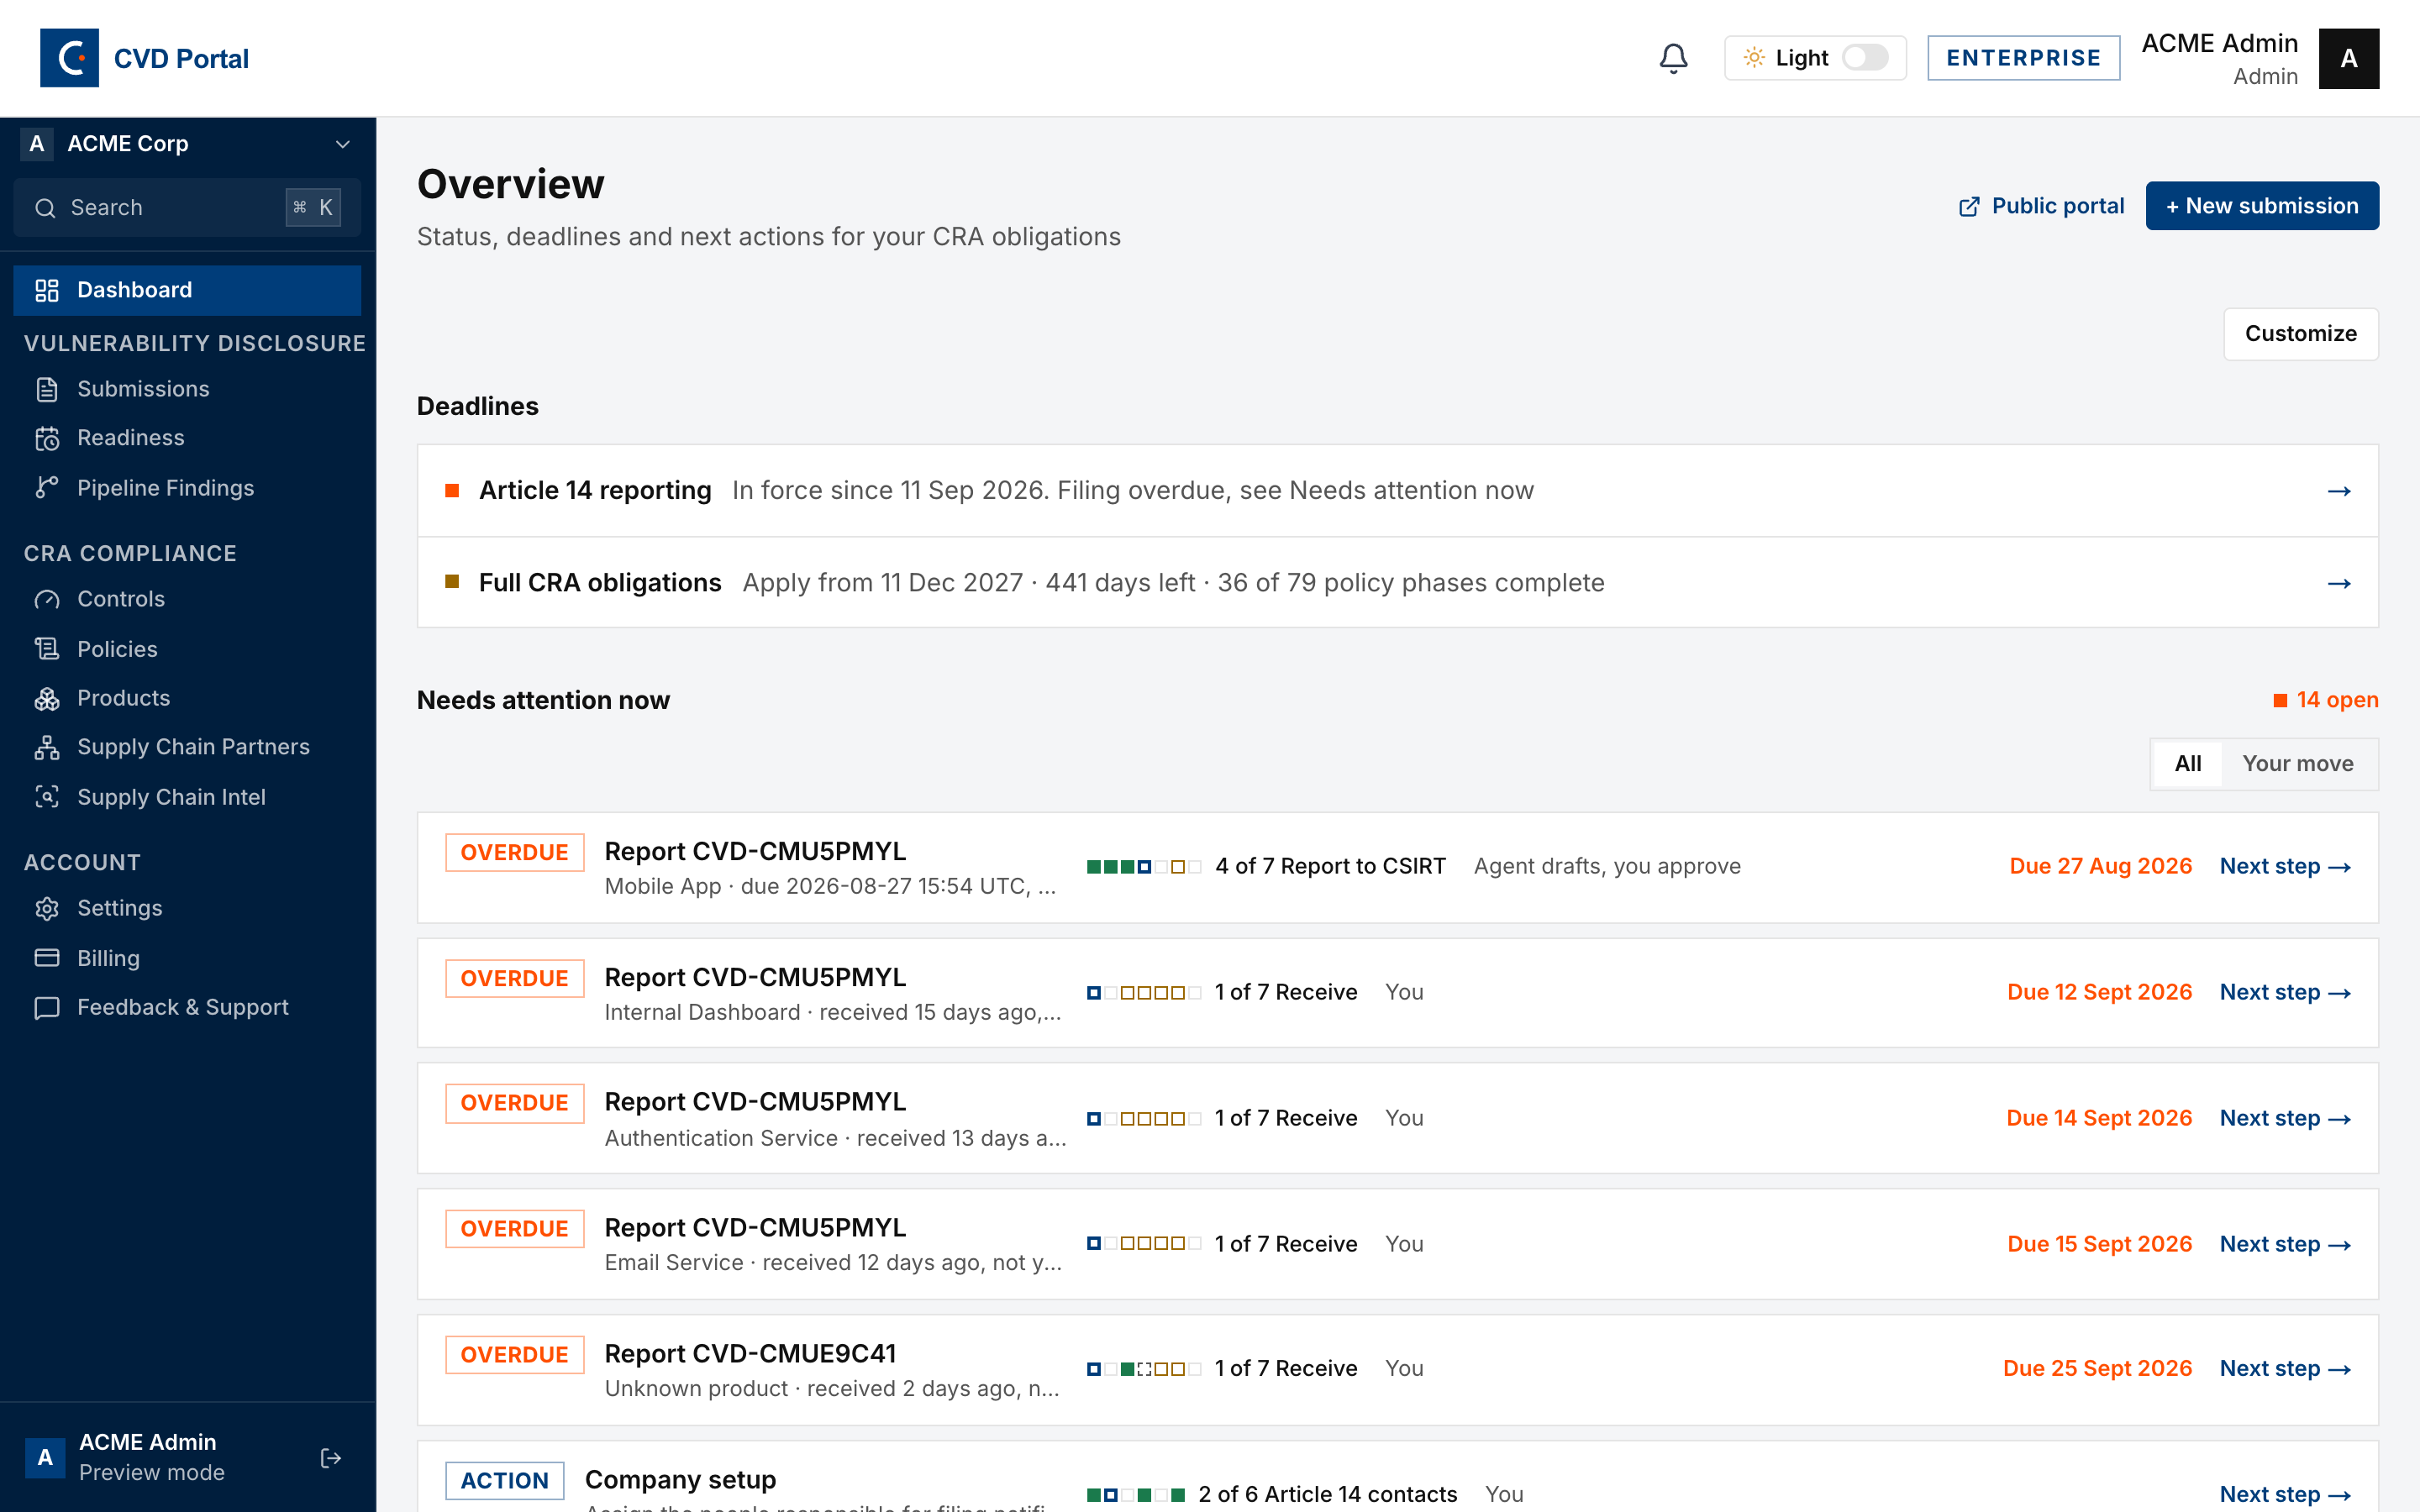
The row Company setup shows your progress, for example "2 of 6 Article 14 contacts". The small bar shows one square per stage. A filled square is a done stage. The outlined square is the current stage.
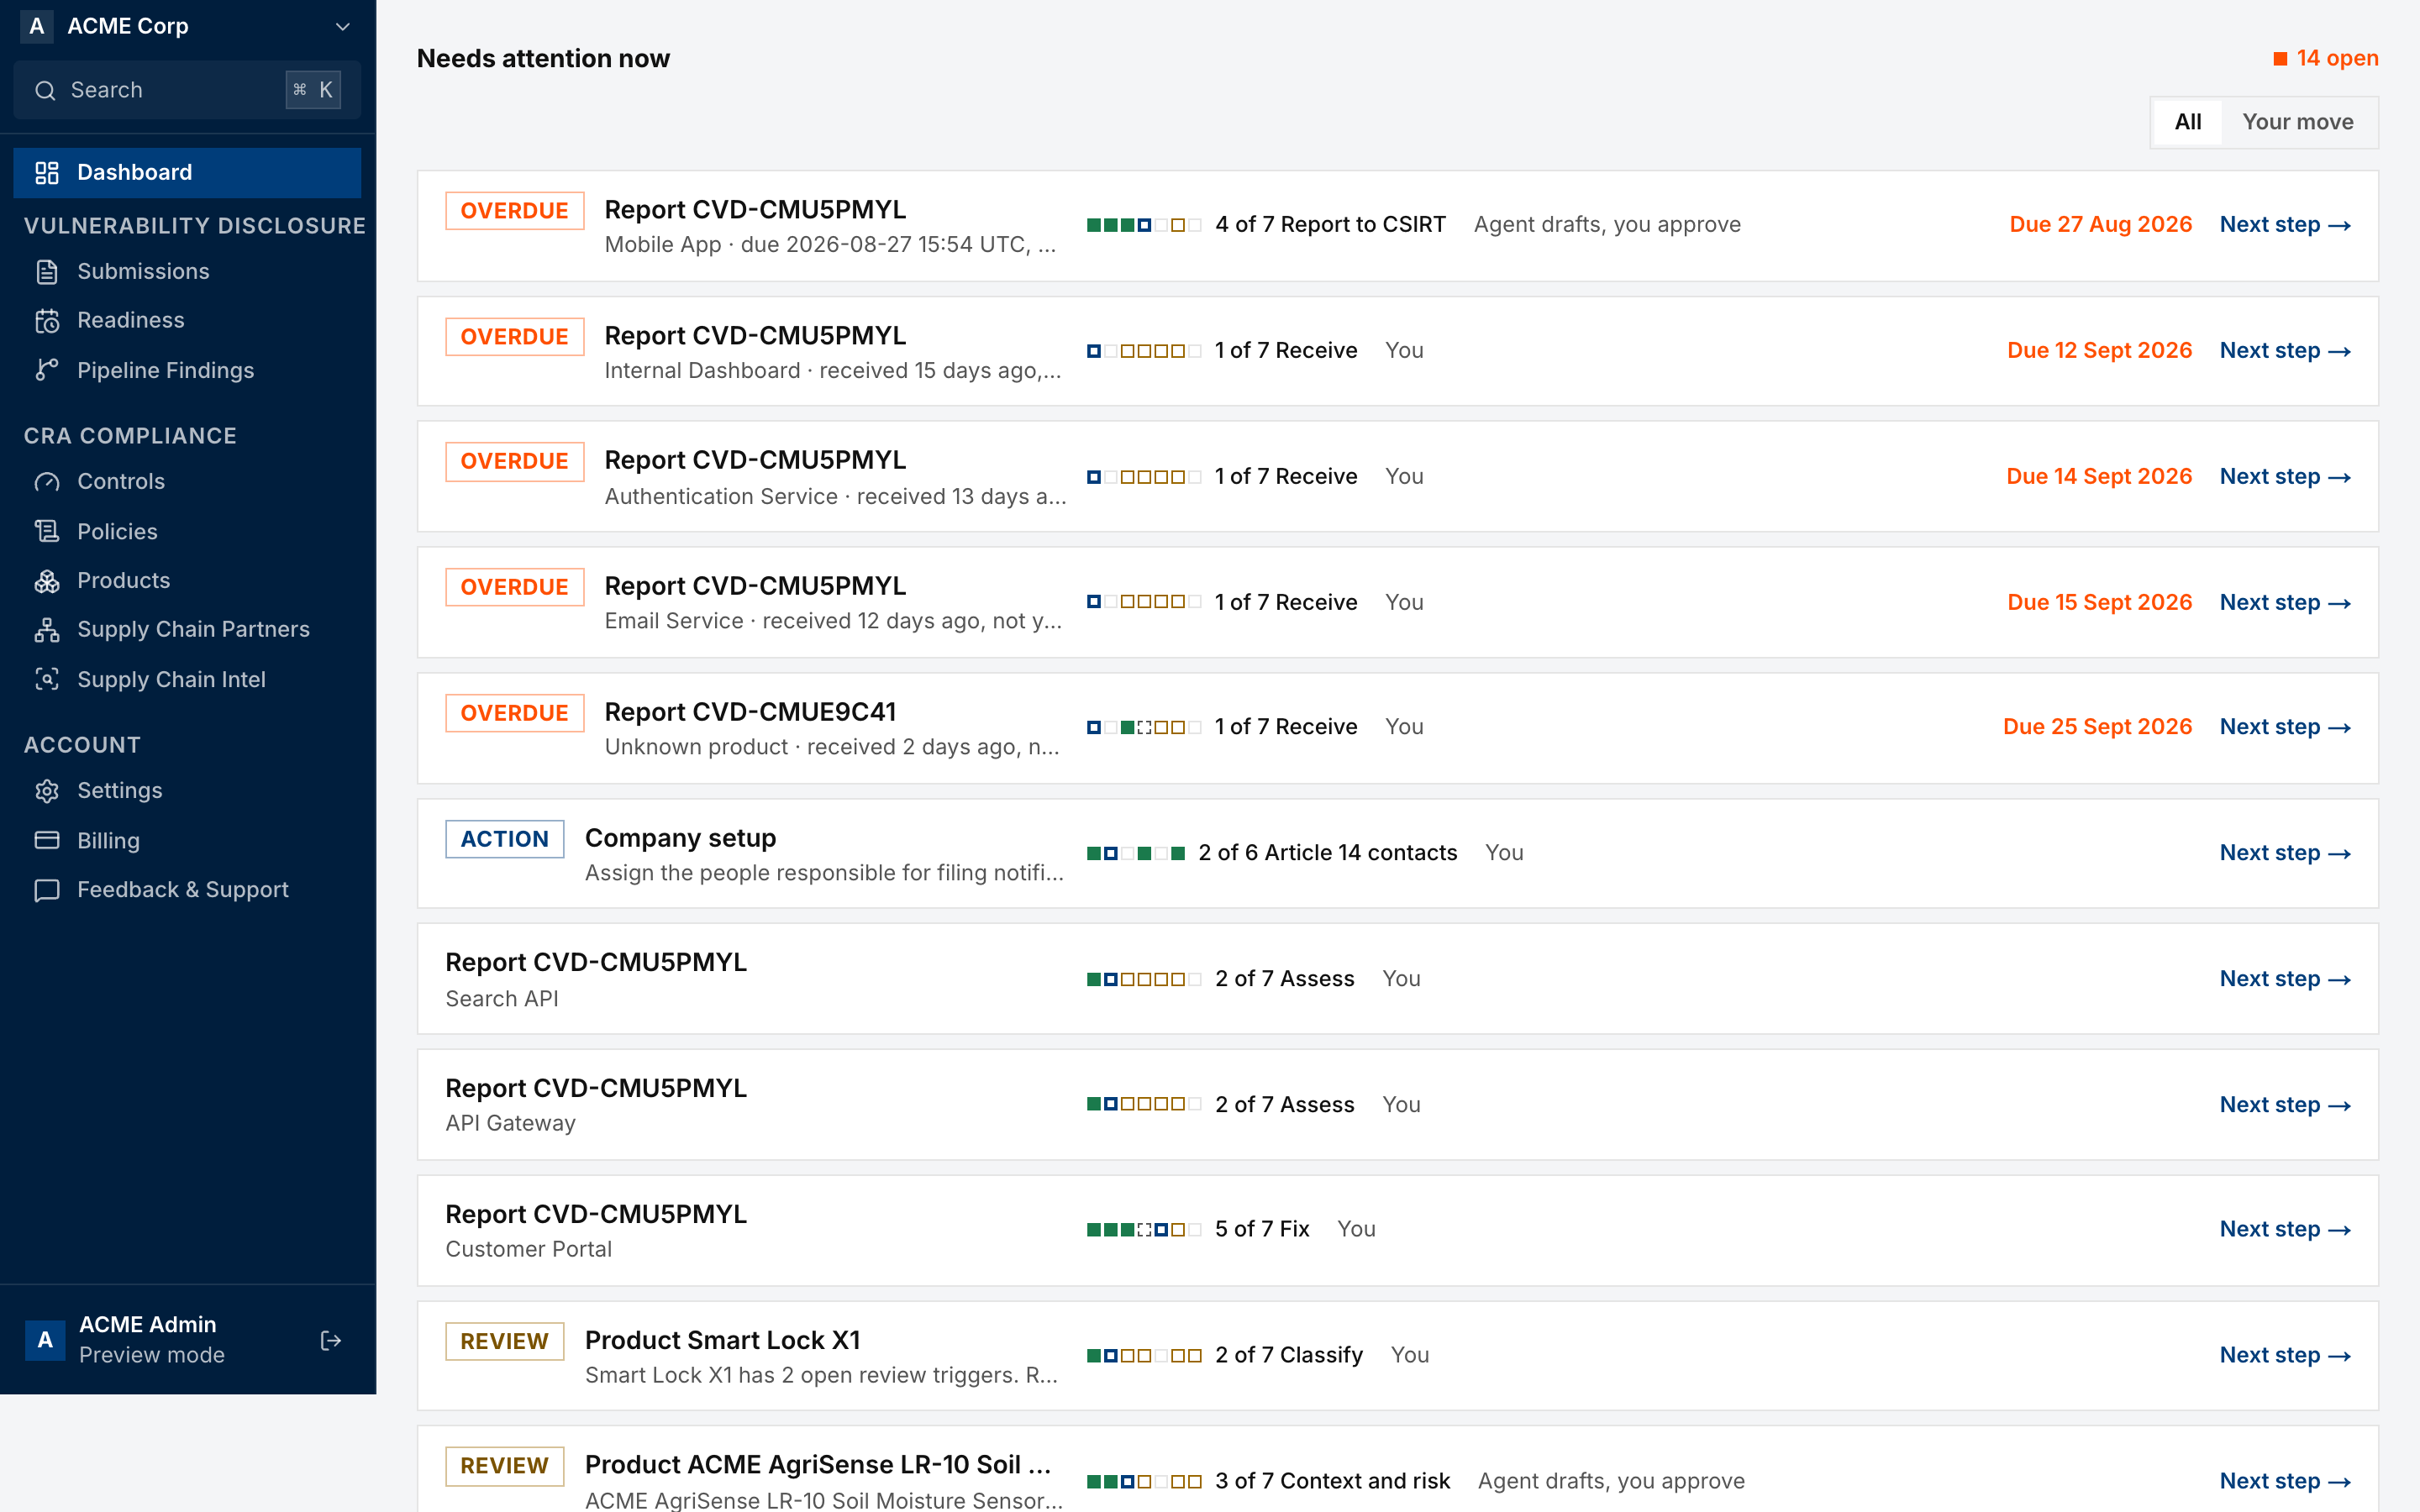
Click Next step on the row. The portal opens the page for the current stage. When all six stages are done, the row goes away.
Select Your move to show only the rows where you must act.
Step 1. Company profile
Open Settings, then General. Go to Establishment & Article 14 reporting.
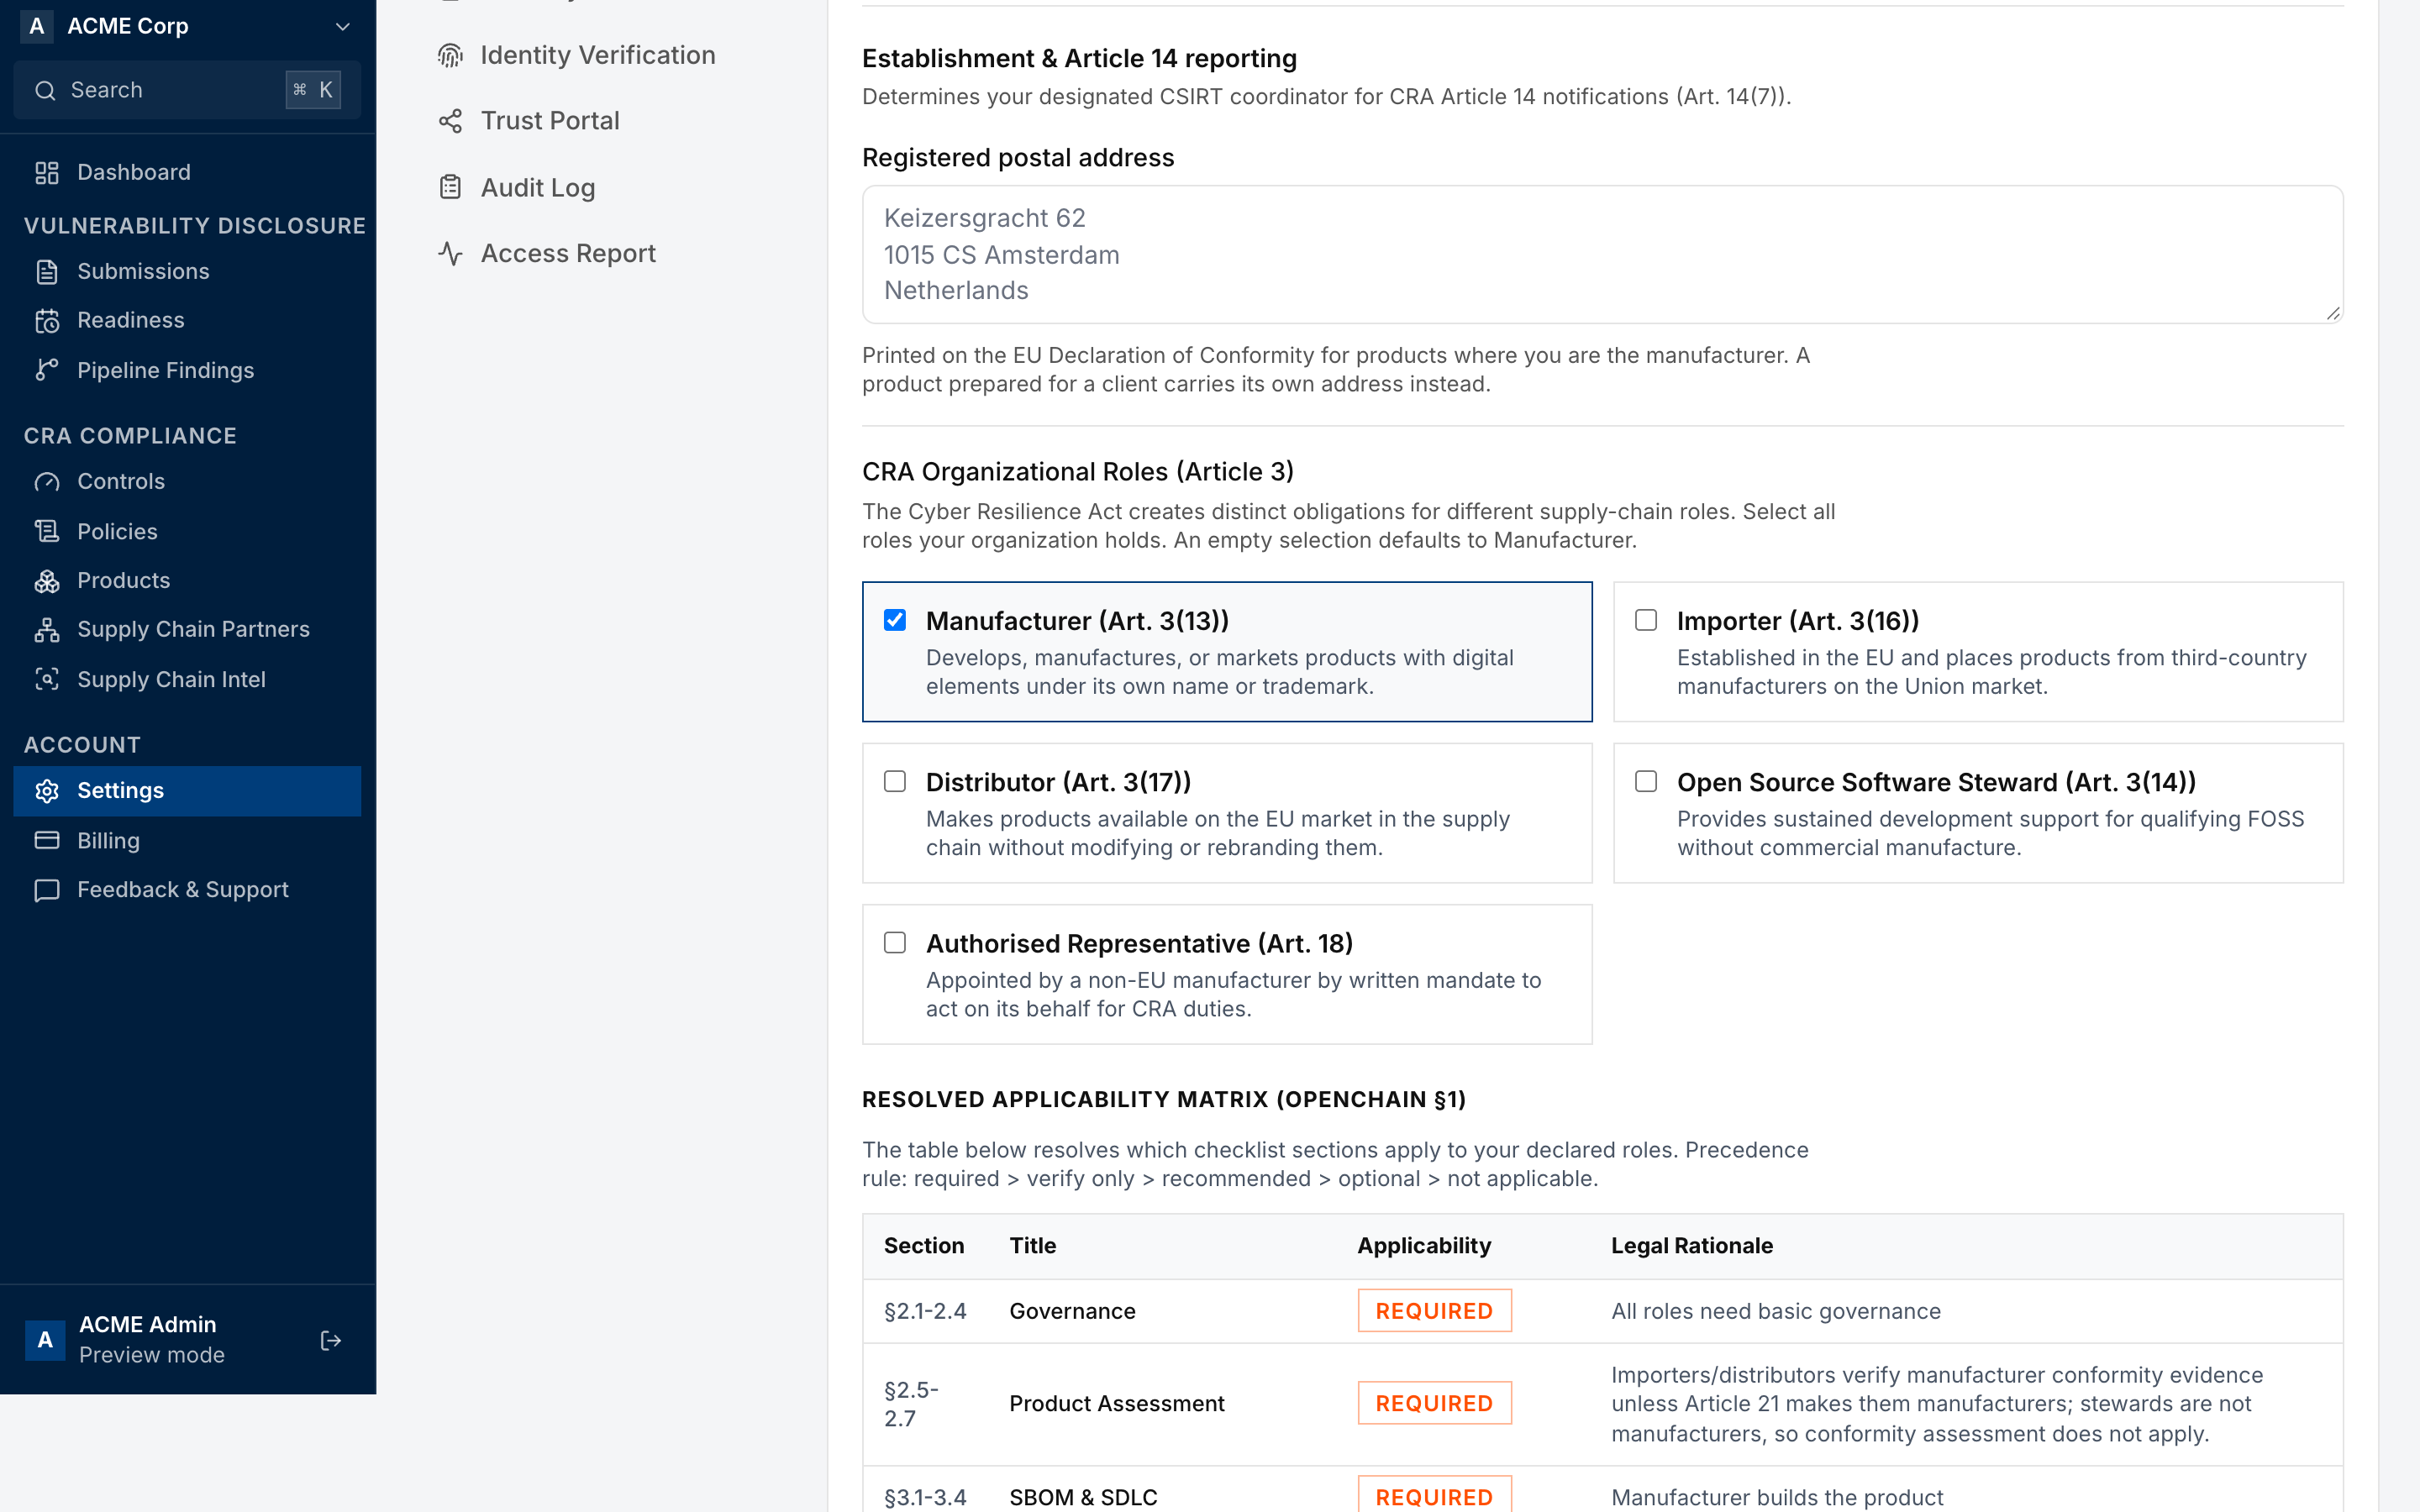
- Enter your registered postal address.
- Select every CRA role your company has. If you select none, the portal uses Manufacturer.
- In Place of establishment, select where your company is established.
- If it is in the EU, select the Member State of main establishment.
- If it is not in the EU, enter the name, email and Member State of your authorised representative.
- Click Save Changes.
Done when. The country of establishment is set, or the authorised representative email is set. The country decides which national CSIRT receives your Article 14 notifications (Article 14(7)).
Step 2. Article 14 contacts
Open Readiness. The portal opens the September 2026 section at Vulnerability Handling Procedure.
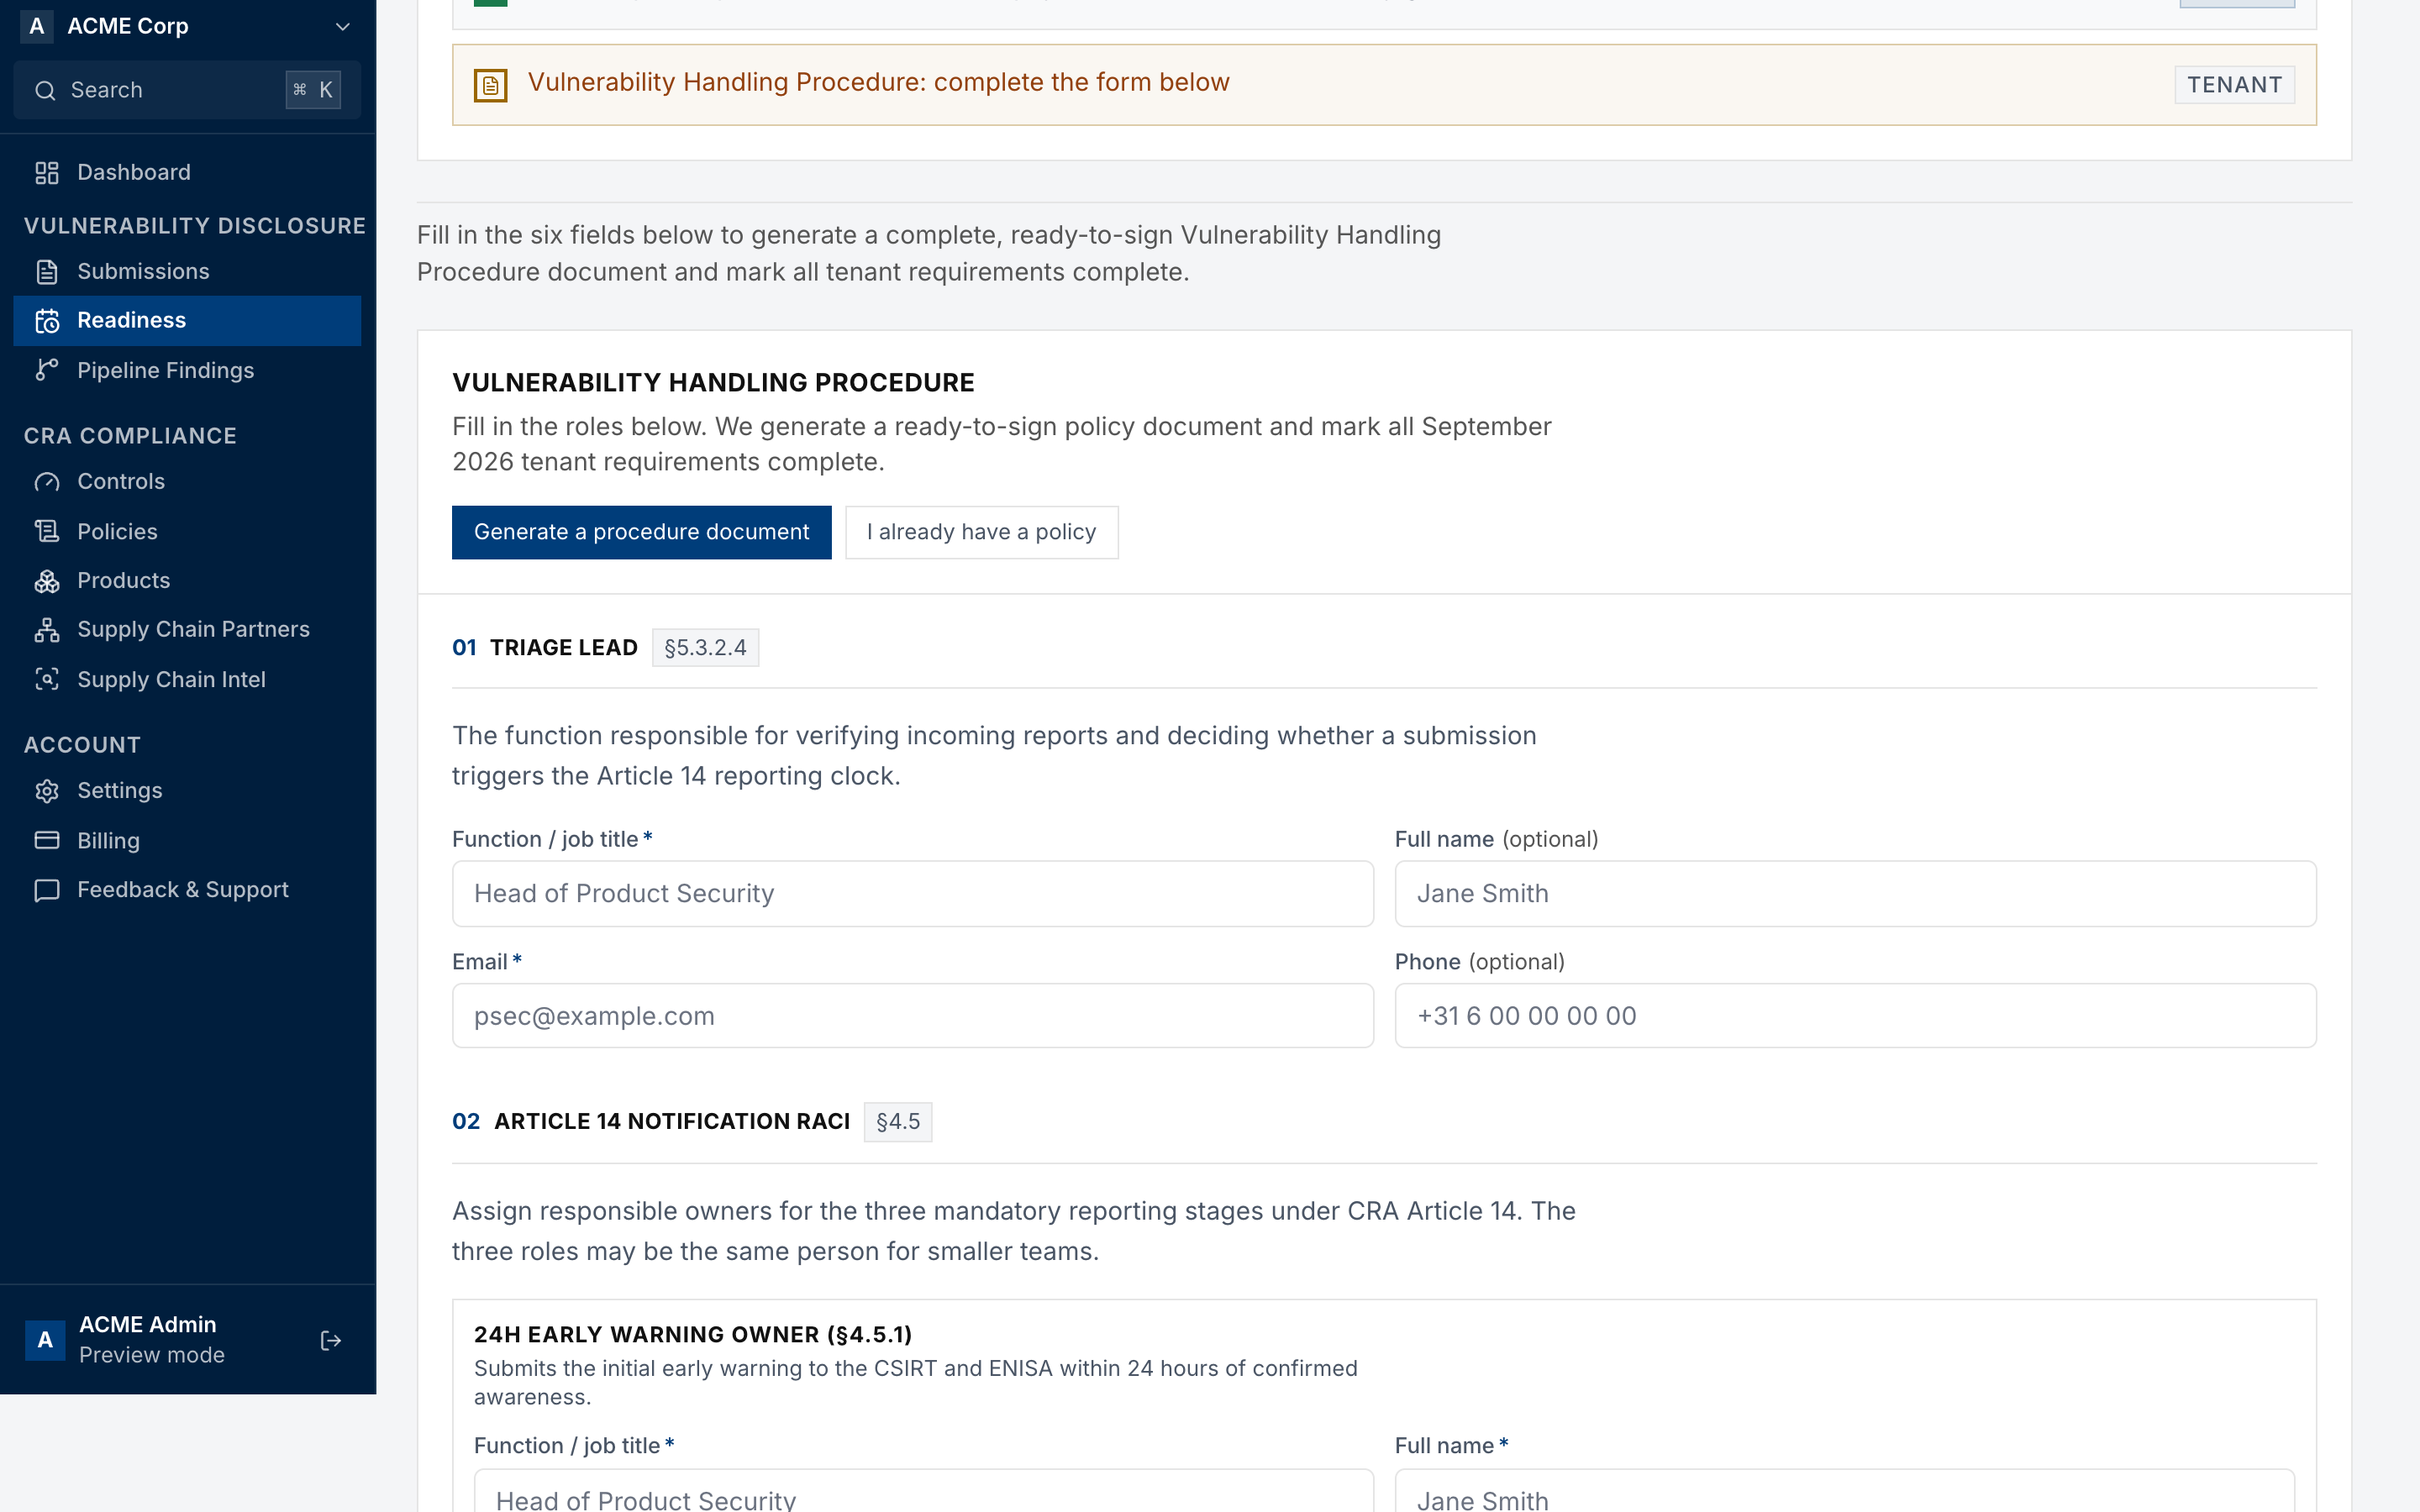
- Select Generate a procedure document. If you already have a signed policy, select I already have a policy.
- Under 01 Triage lead, enter the function and email of the person who verifies reports.
- Under 02 Article 14 notification RACI, assign an owner for the 24-hour early warning, the 72-hour notification and the final report. One person can hold all three roles in a small team.
- Complete the other fields.
- Click Save & Generate Document. With an existing policy, the button is Mark complete.
Done when. The procedure is saved. The generated document must be signed by an authorised officer. Keep it with your technical documentation (Article 23).
Step 3. Publish reporting channel
On the same page, go to Publish your reporting channel.
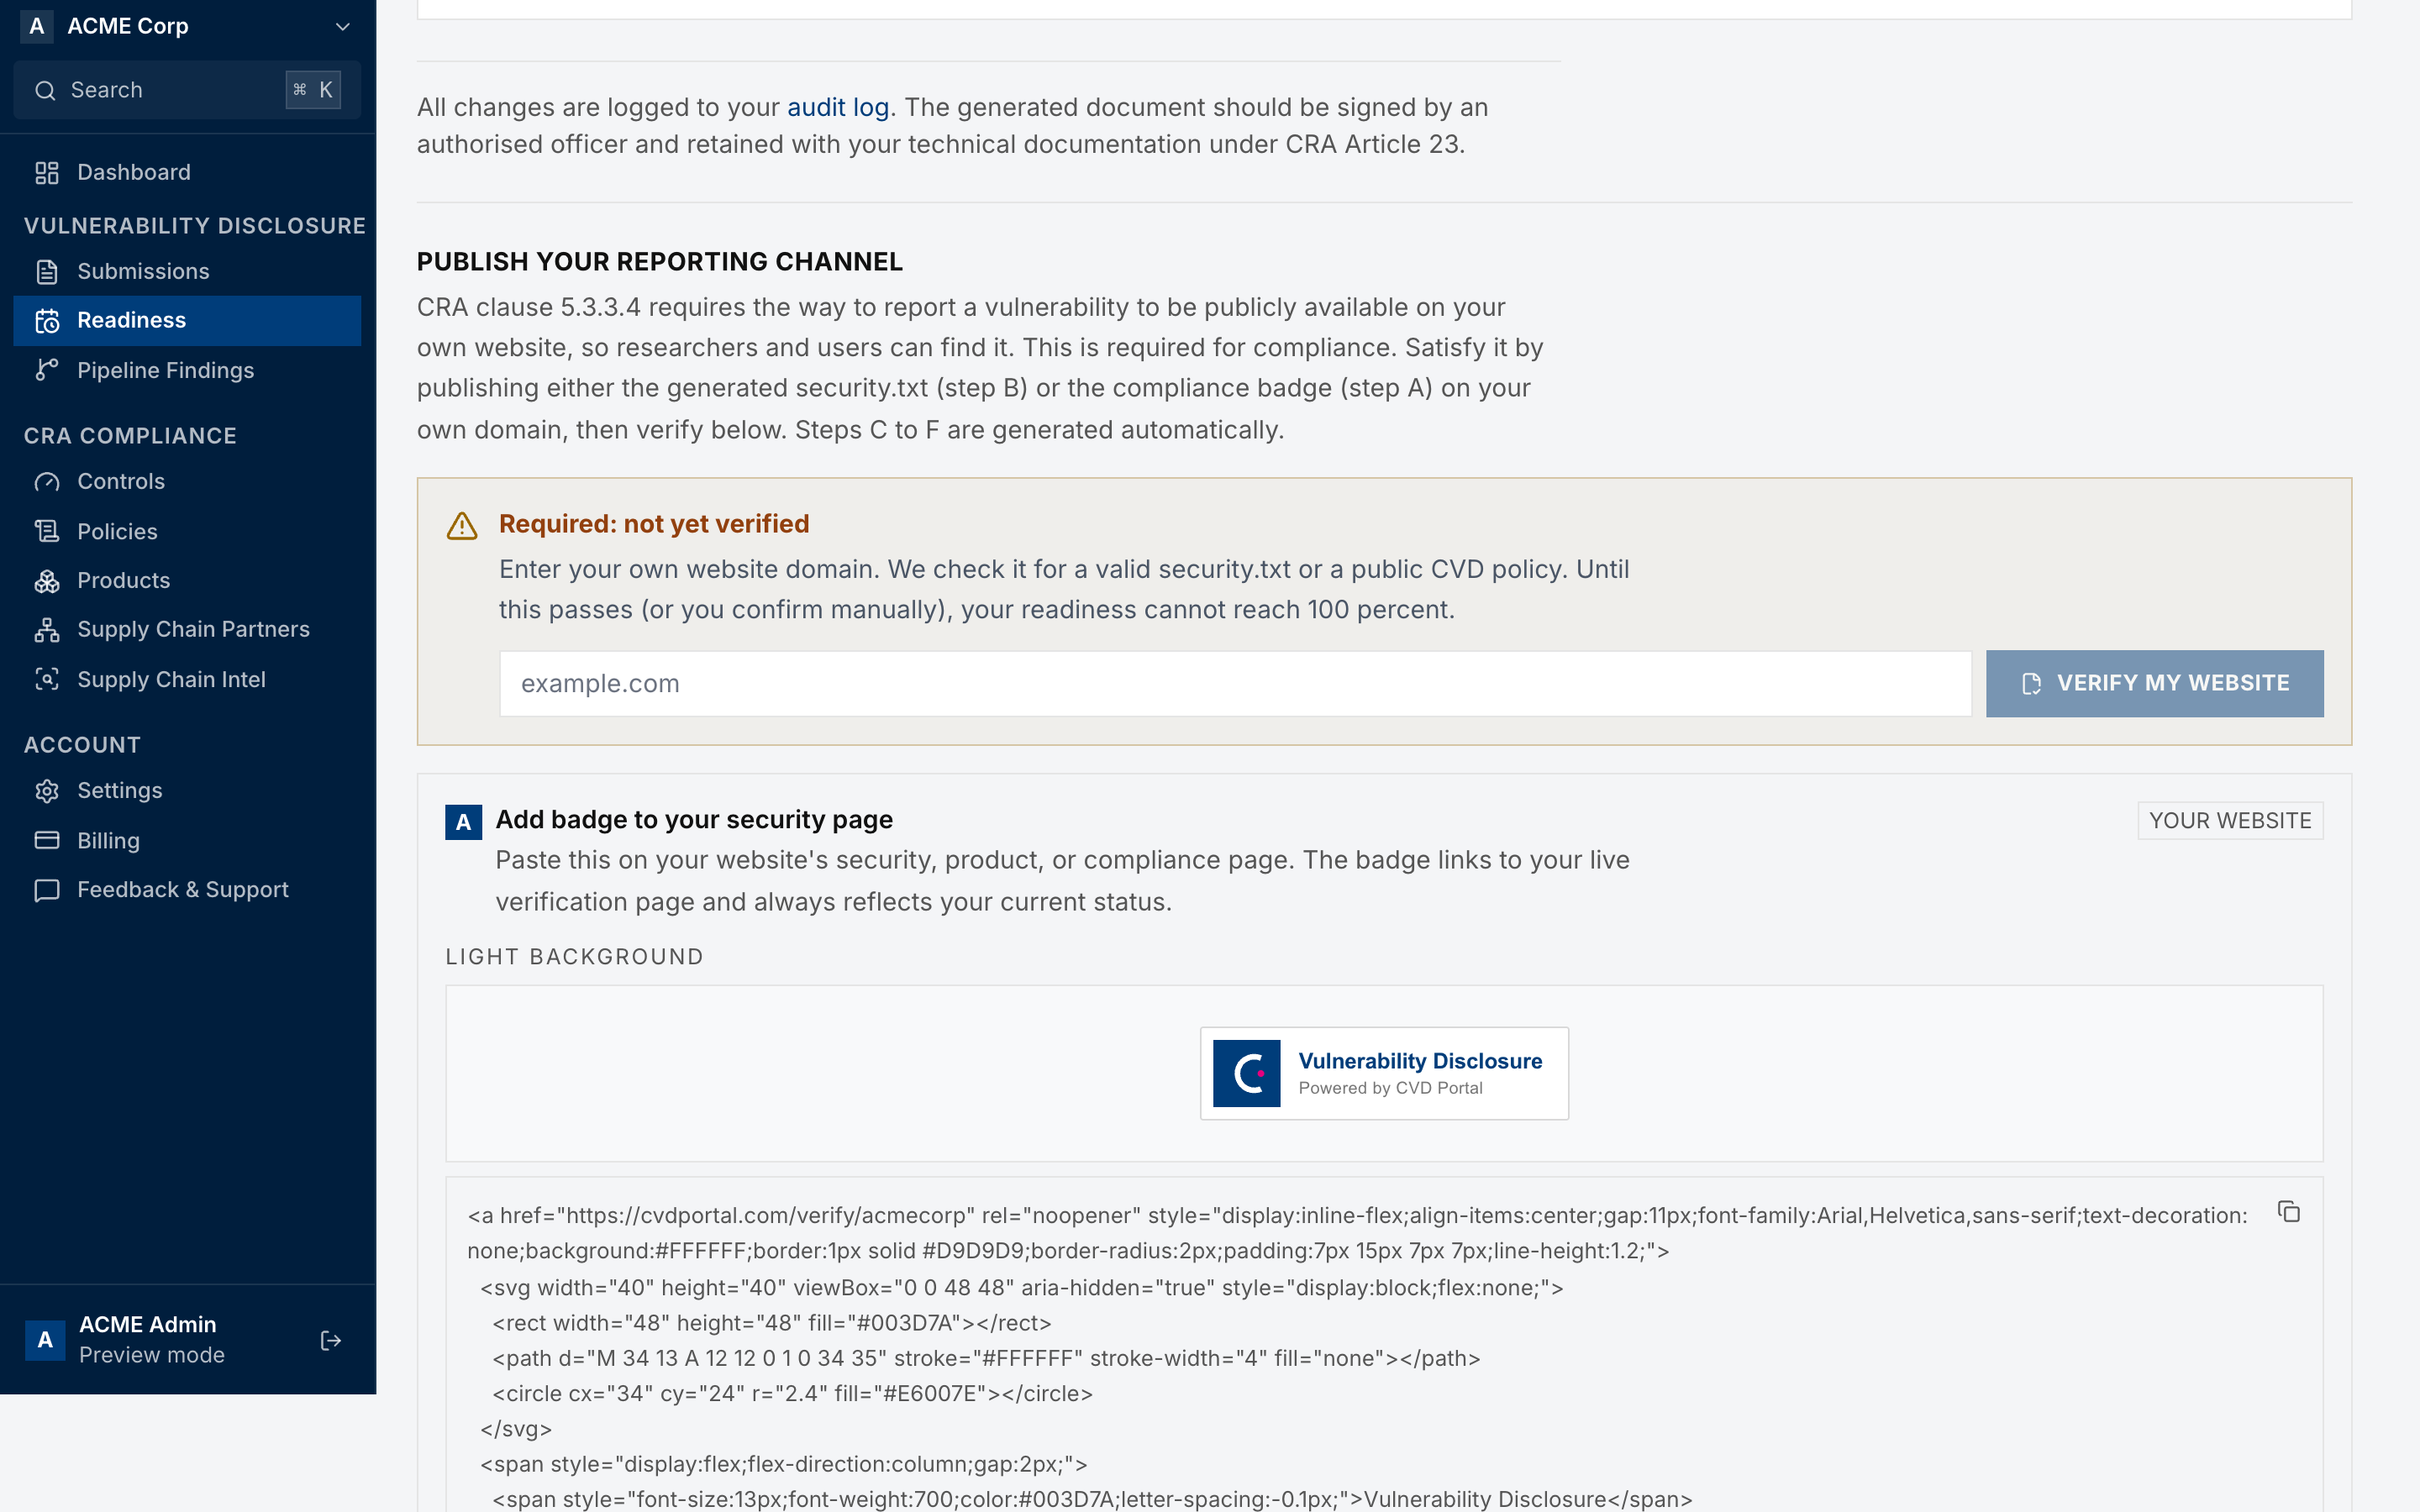
- Publish the generated security.txt, or the compliance badge, on your own website.
- Enter your website domain.
- Click Verify my website. The portal checks the domain for a valid security.txt or a public CVD policy.
- If the scanner cannot reach your site, confirm manually with I confirm I have published it.
Done when. The channel is verified or confirmed. CRA clause 5.3.3.4 requires a public way to report a vulnerability on your own website.
Step 4. Submission alerts
Open Settings, then Notifications.
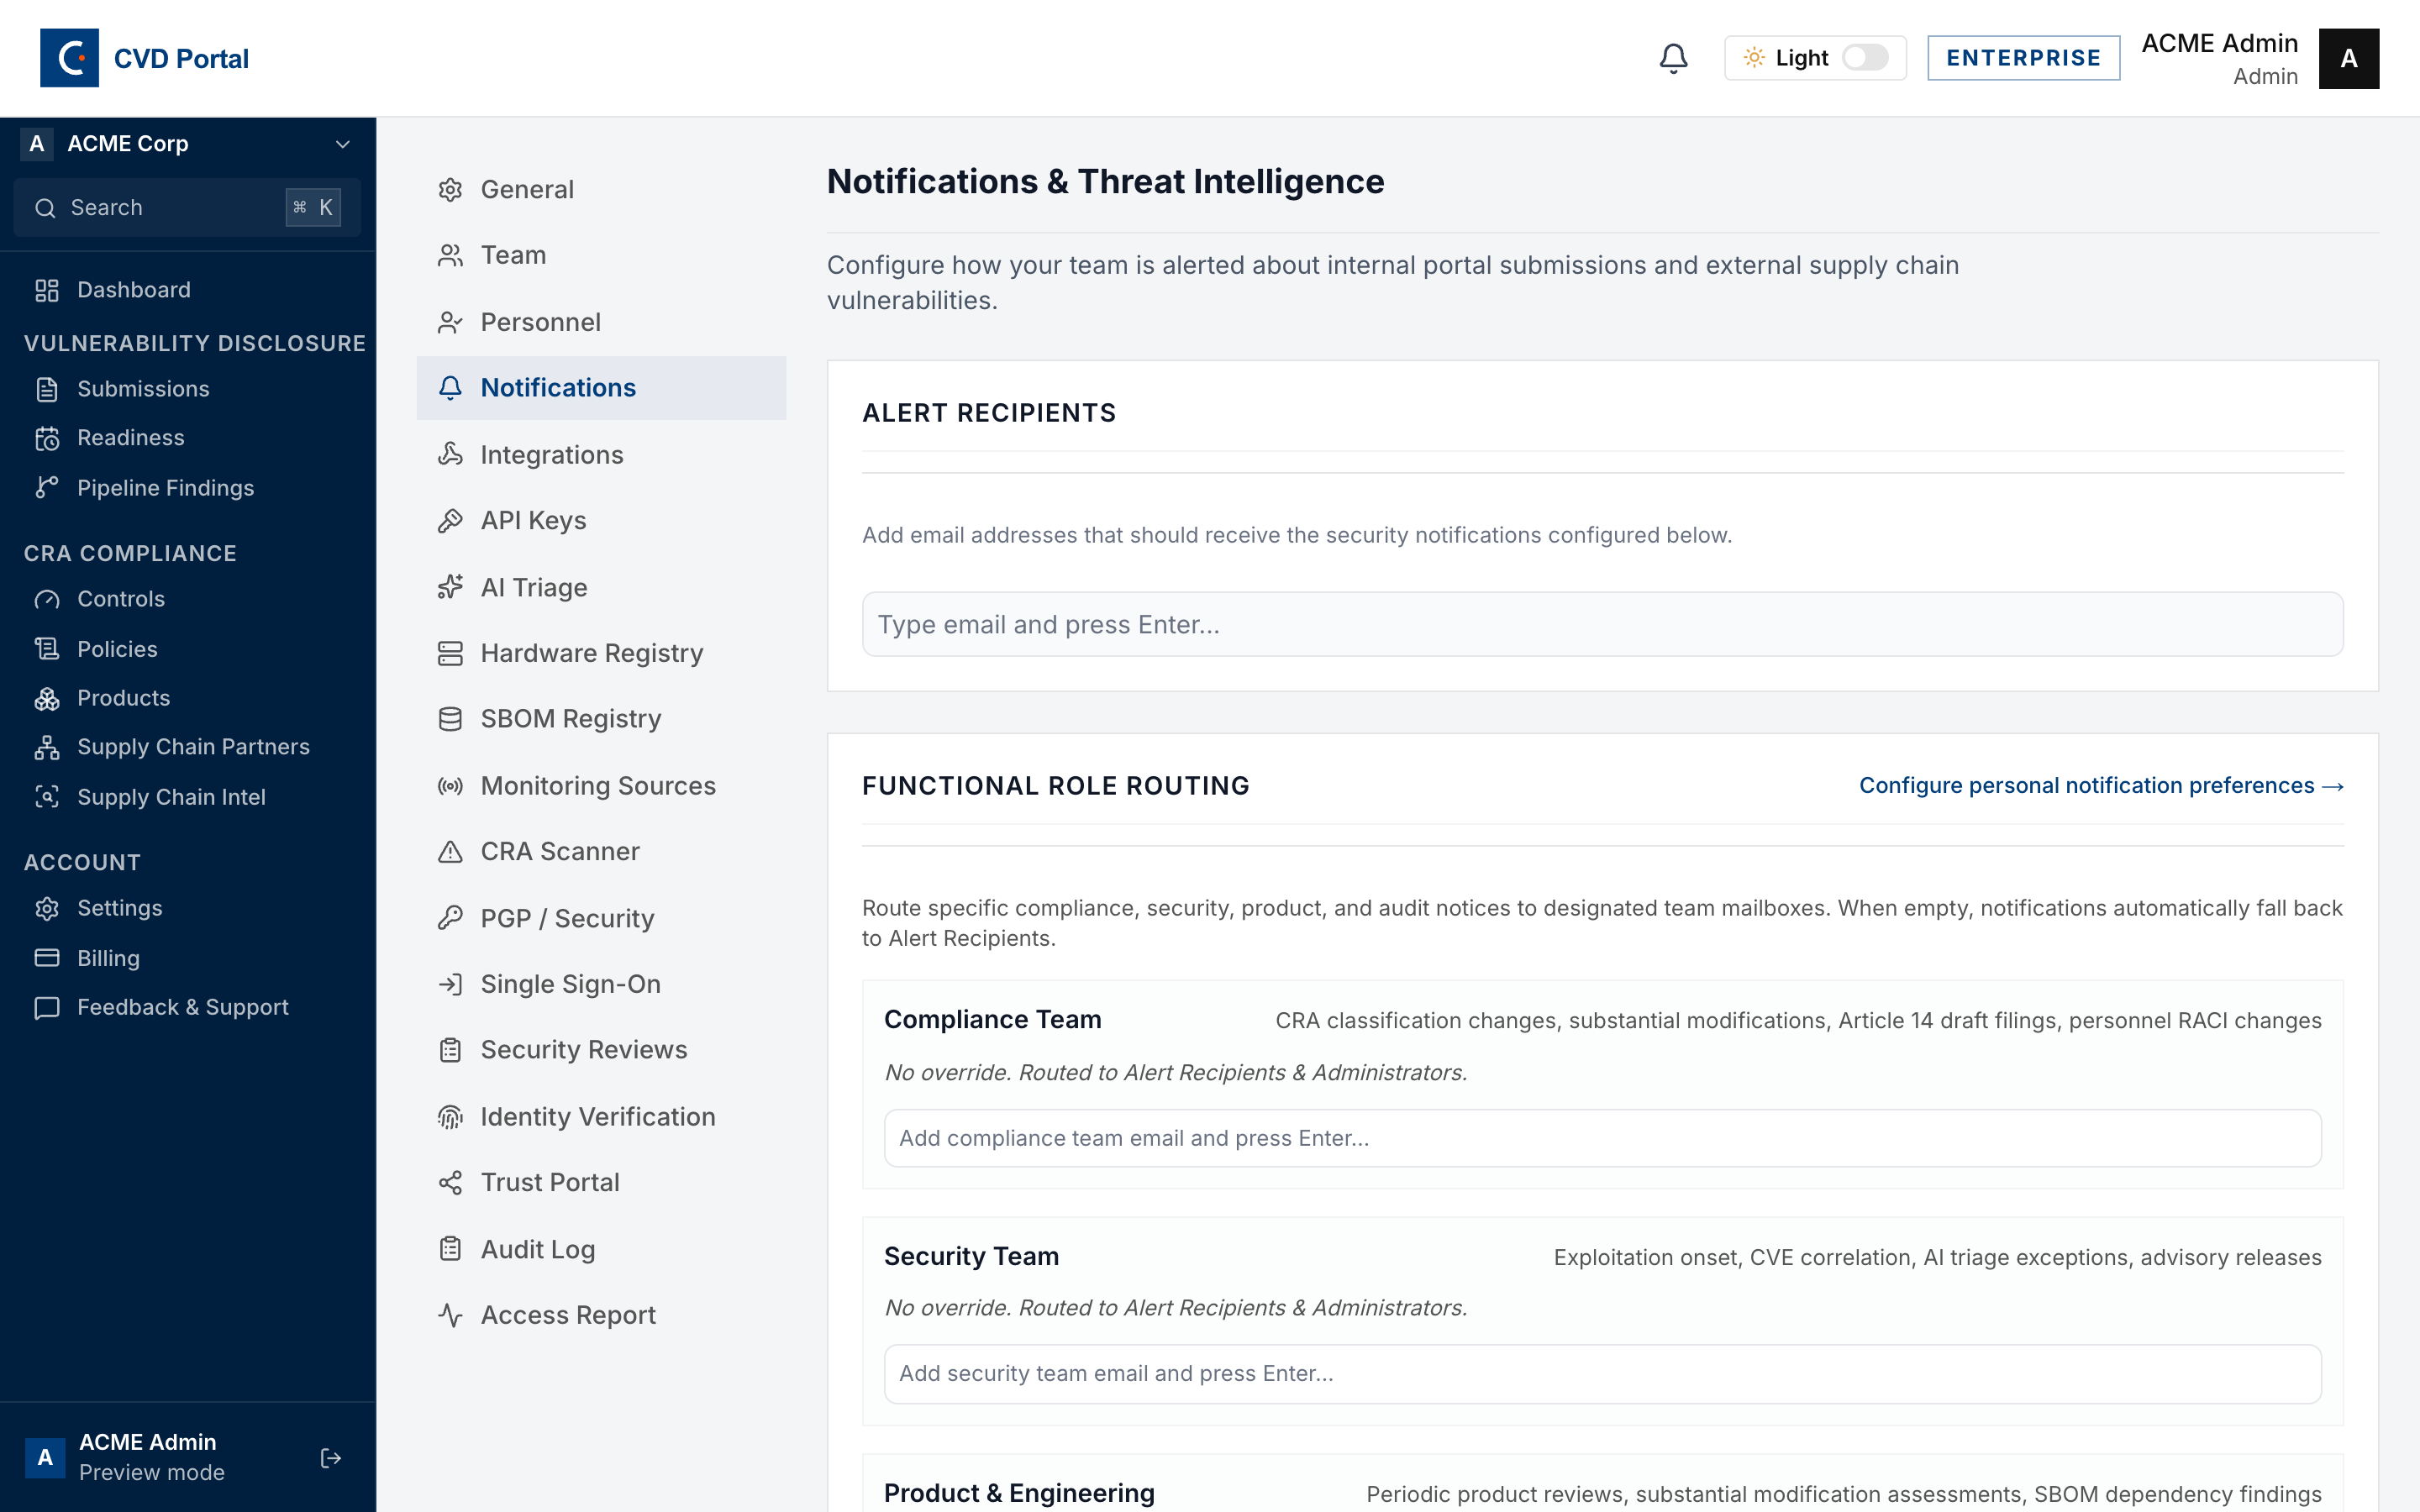
- Under Alert recipients, type each email address and press Enter. Use a shared inbox that someone reads every day.
- Under Functional role routing, add a mailbox for each team if you want to route notices by topic. If you leave a team empty, its notices go to the alert recipients.
- Click Save Preferences.
Done when. Your preferences are saved. A report that nobody sees cannot meet the 24-hour Article 14 clock.
Step 5. Invite your team
Open Settings, then Team.
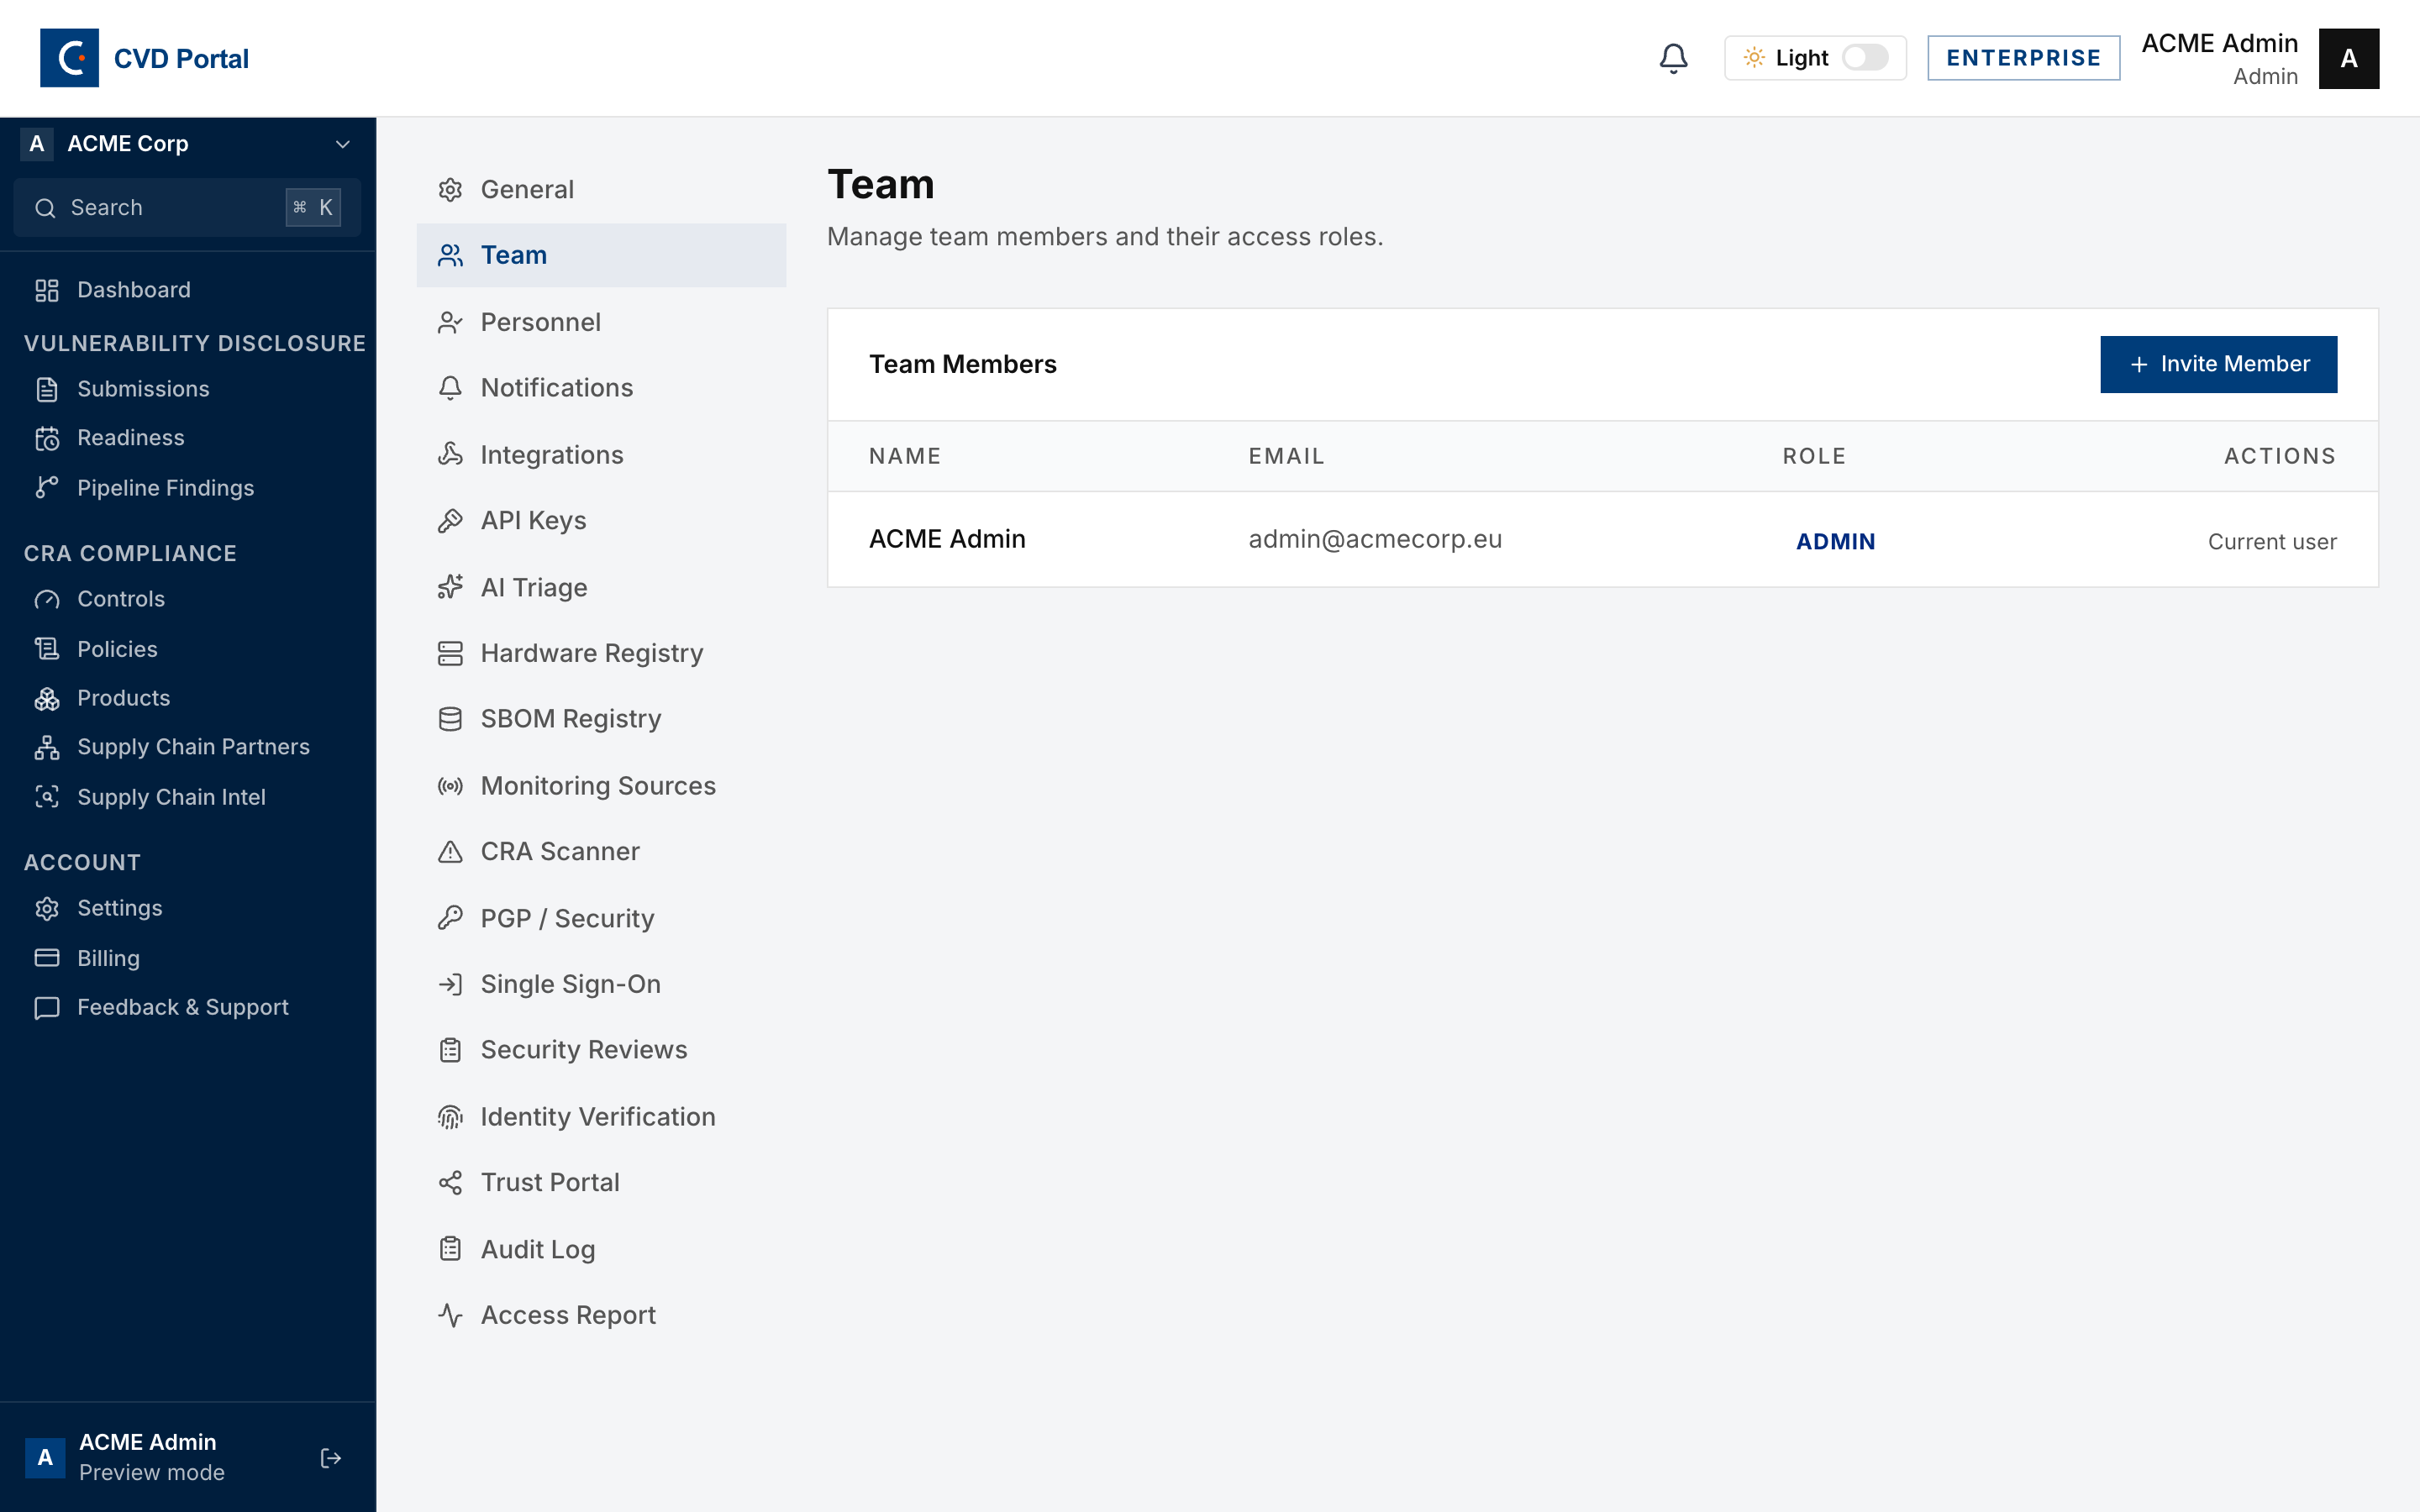
- Click Invite Member.
- Enter the email address.
- Select a role. Member can read and triage. Admin has full control. Auditor is read-only for a limited time.
- Click Send Invitation.
Done when. The workspace has more than one member. Invite at least one other person, so that a report does not wait while one person is away.
Step 6. First report received
Your public portal is live at https://<your-slug>.cvdportal.com/submit. The Public portal link on the Overview opens it.
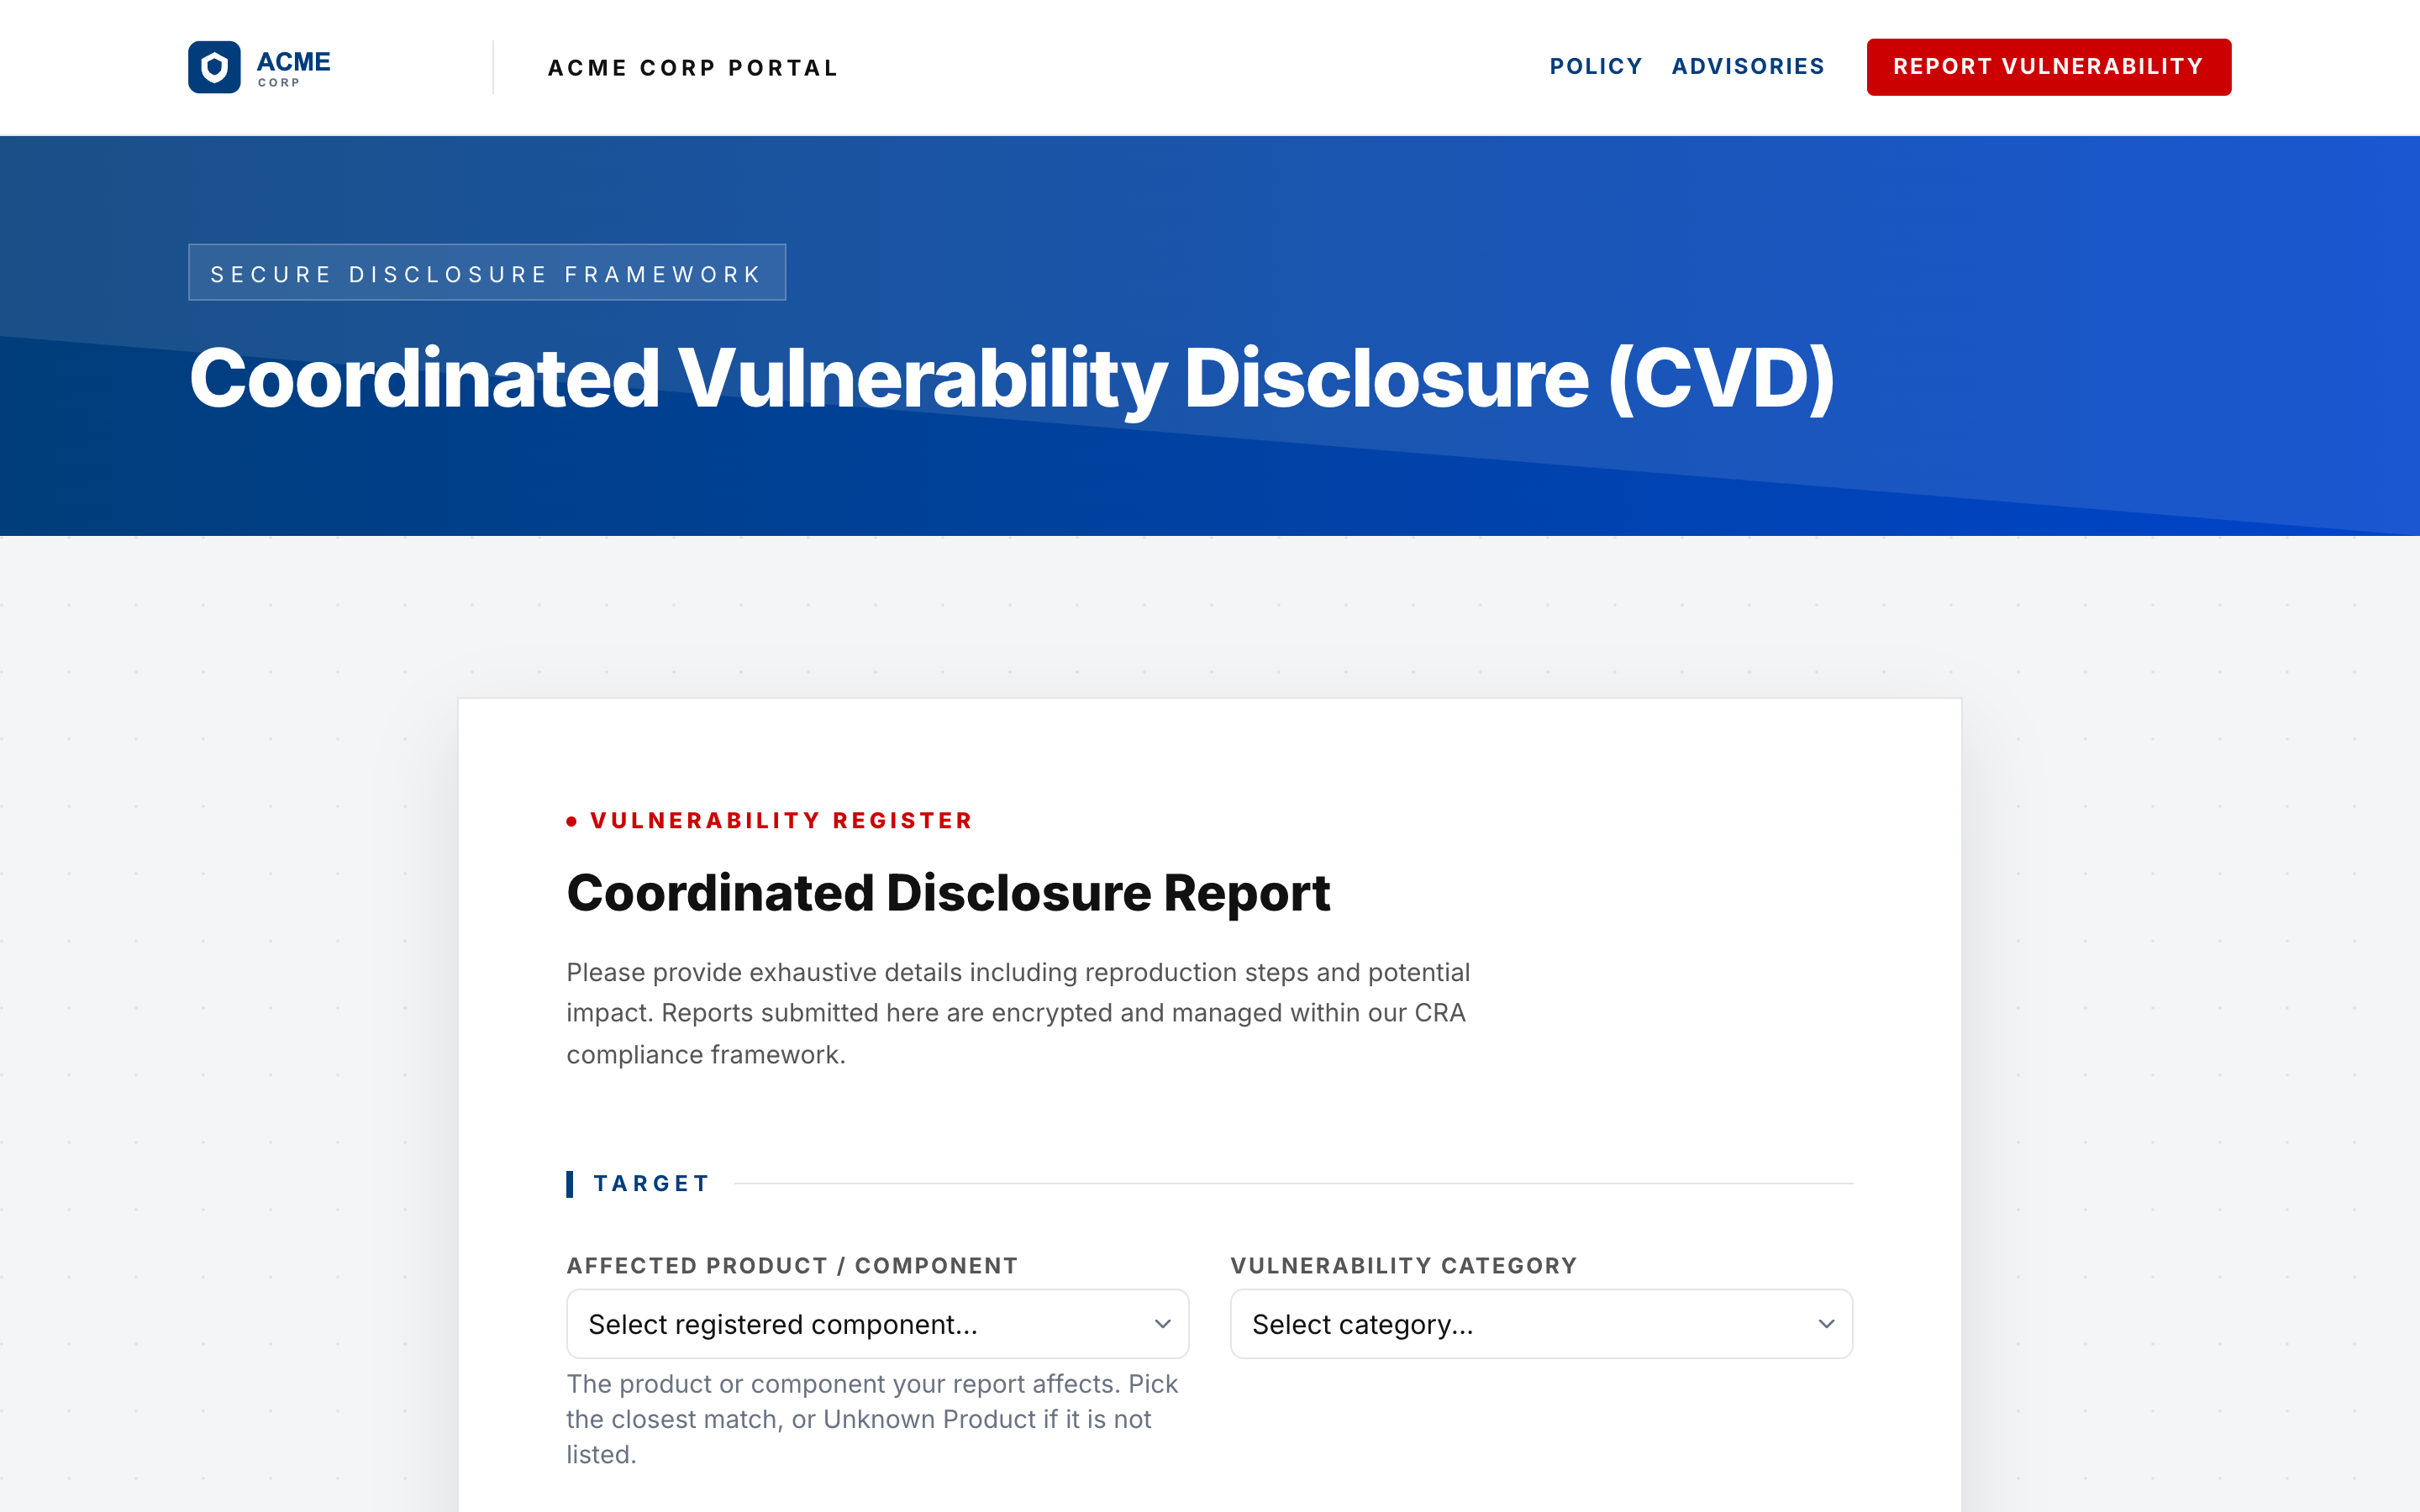
- Link to the portal from your security.txt, your website and your product documentation.
- To test it, submit one report yourself. Mark it as a test in the description.
Done when. The workspace has received at least one report. To work that report, use SOP-10.
Completion checklist
- Company profile has the country of establishment, or the authorised representative
- Vulnerability Handling Procedure saved, signed and filed
- Reporting channel published on your website and verified
- Alert recipients saved
- At least one other team member invited
- At least one report received
- The Company setup row no longer shows on the Overview