Handling a Vulnerability Report in the New Dashboard
Audience. Whoever works the submissions inbox in a workspace that uses the new dashboard.
Outcome. One report goes through all seven stages. It is acknowledged, assessed, decided on for Article 14, reported if needed, fixed, disclosed and closed. Each stage leaves a record in the audit trail.
Why it matters. CRA Annex I Part II requires a working vulnerability handling process. Article 14 adds a 24-hour clock for actively exploited vulnerabilities. The stage bar on each report shows what is done, what is next and what is blocked, so no step waits unseen.
Time required. Acknowledgement takes one minute. The other stages follow the vulnerability.
Applies to. Workspaces with the new dashboard switched on. For the classic dashboard, use SOP-05.
Step 0. Find the report and read its stage bar
Open Submissions. A warning at the top counts the reports past the acknowledgement target. The SLA column marks each one.
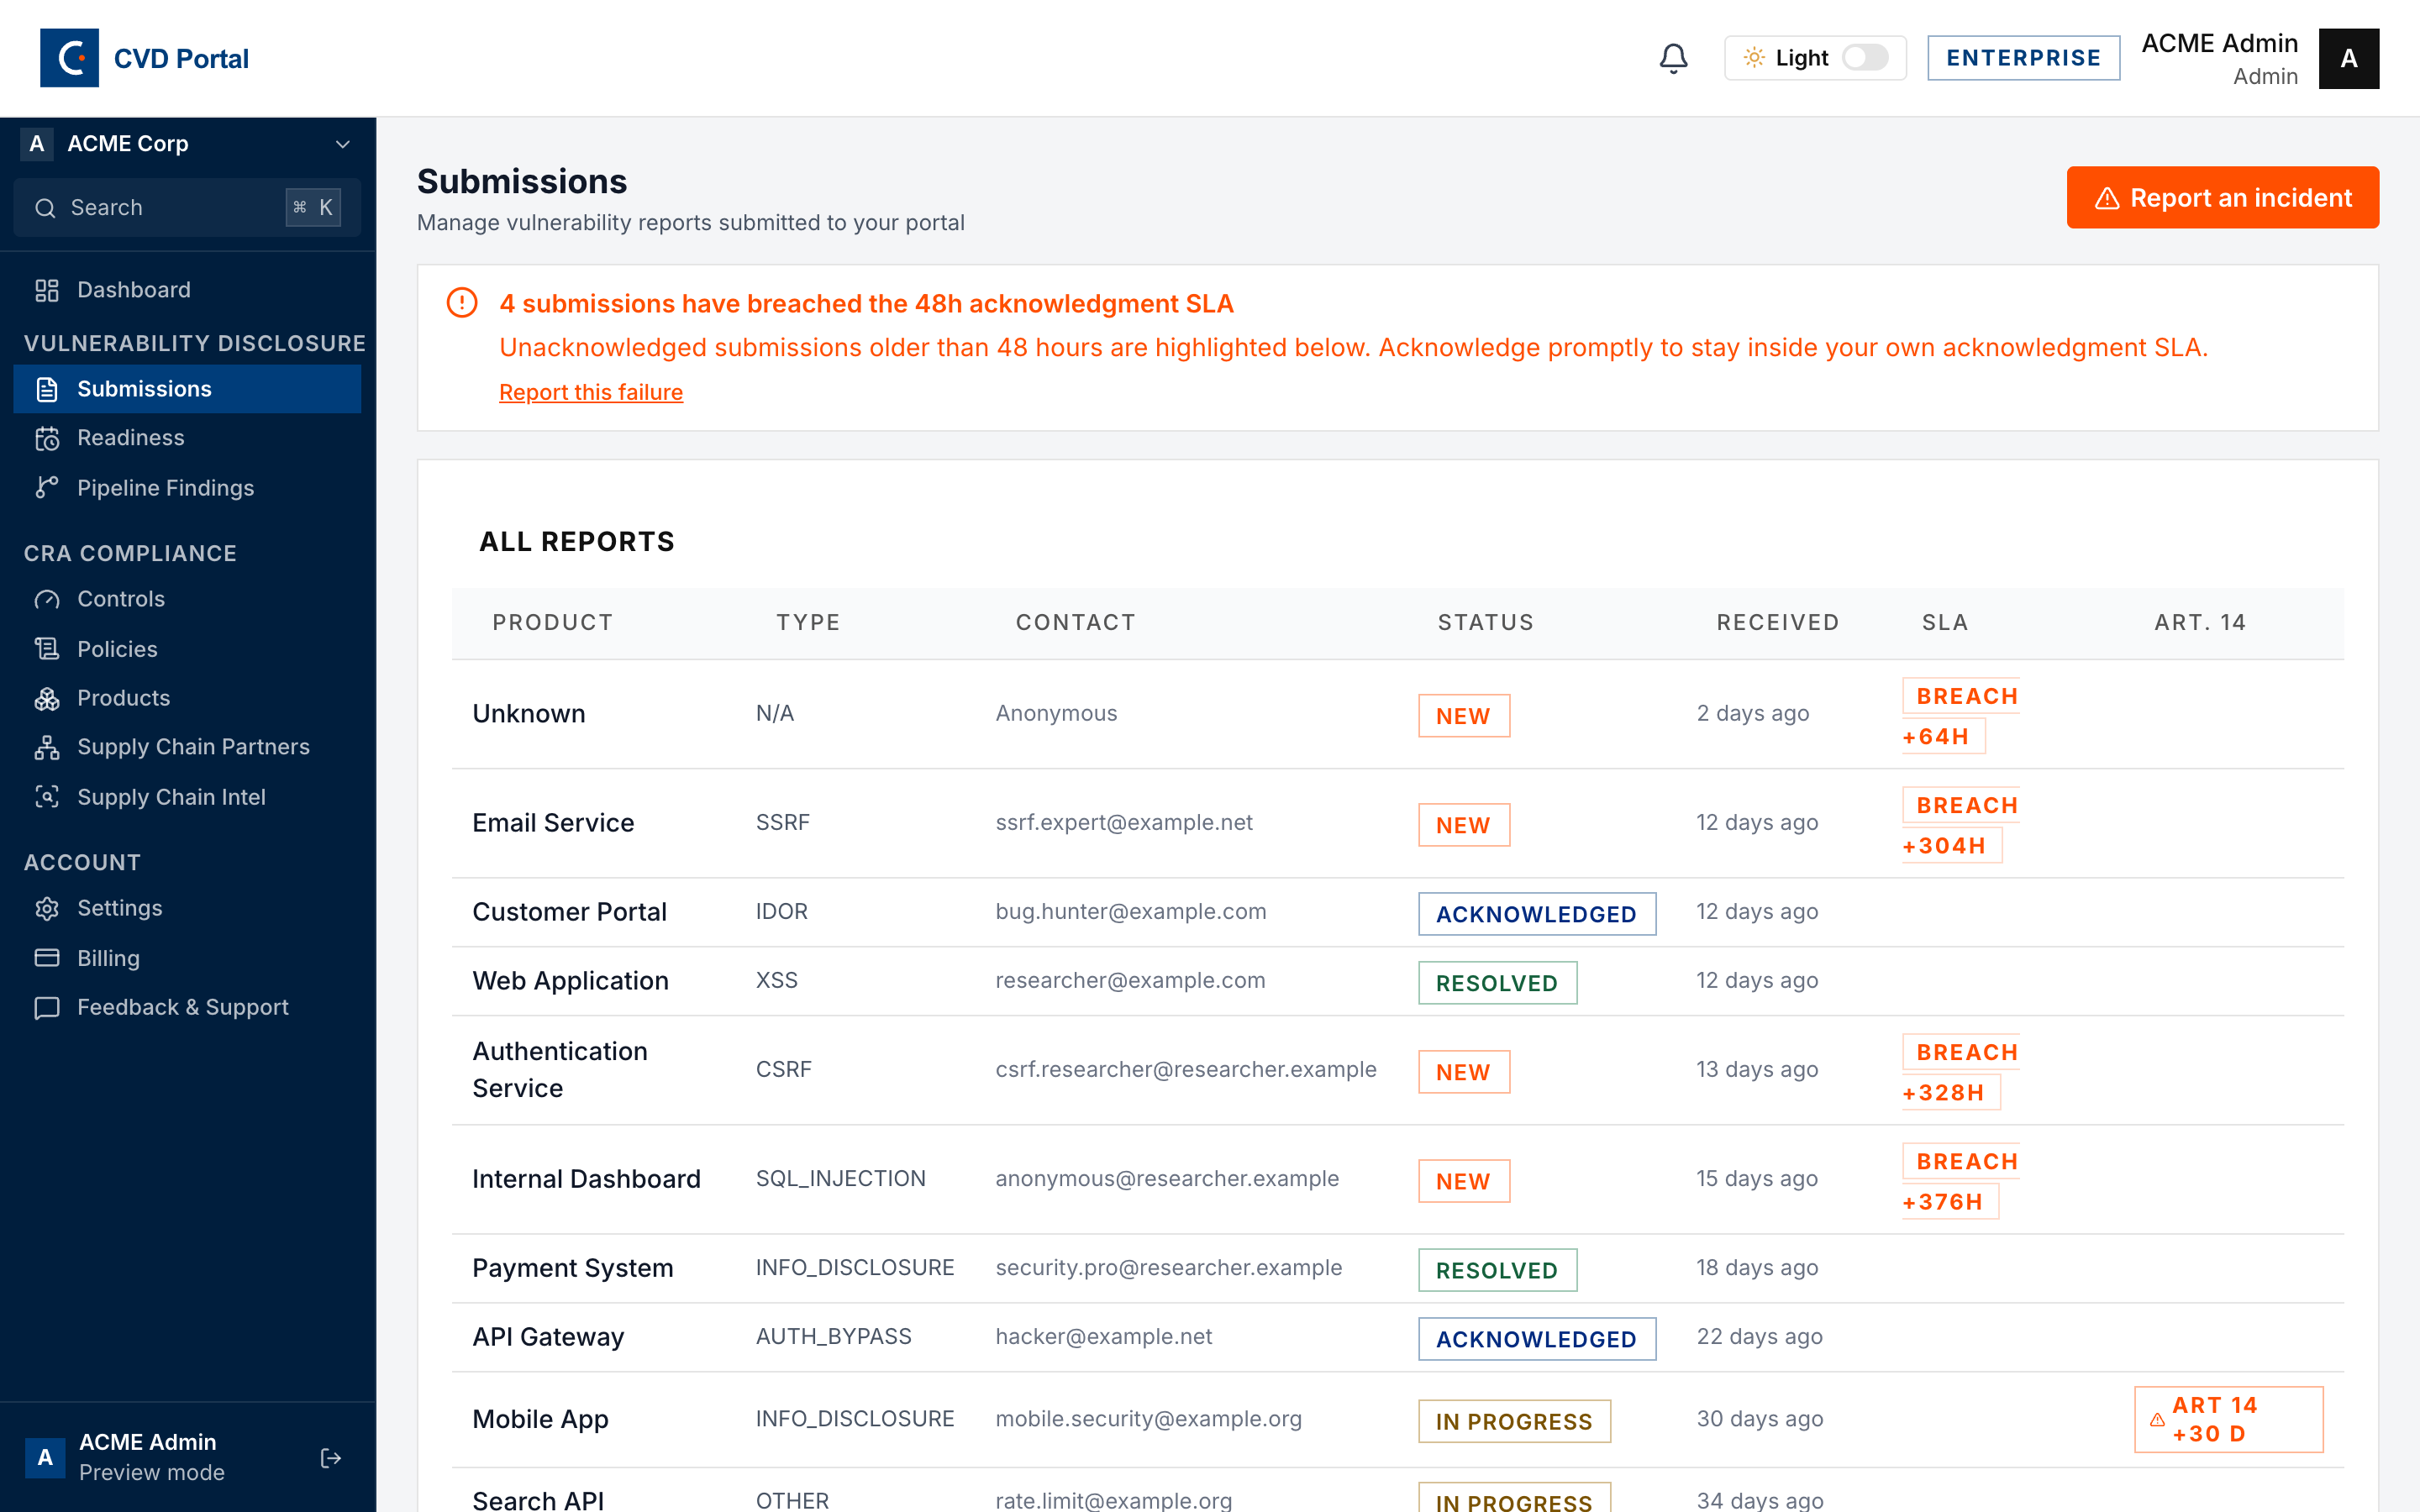
Each open report also has a row under Needs attention now on the Overview. The row shows the current stage, who acts and the nearest due date. Next step opens the report at that stage.
Open the report. The stage bar is at the top of the page.
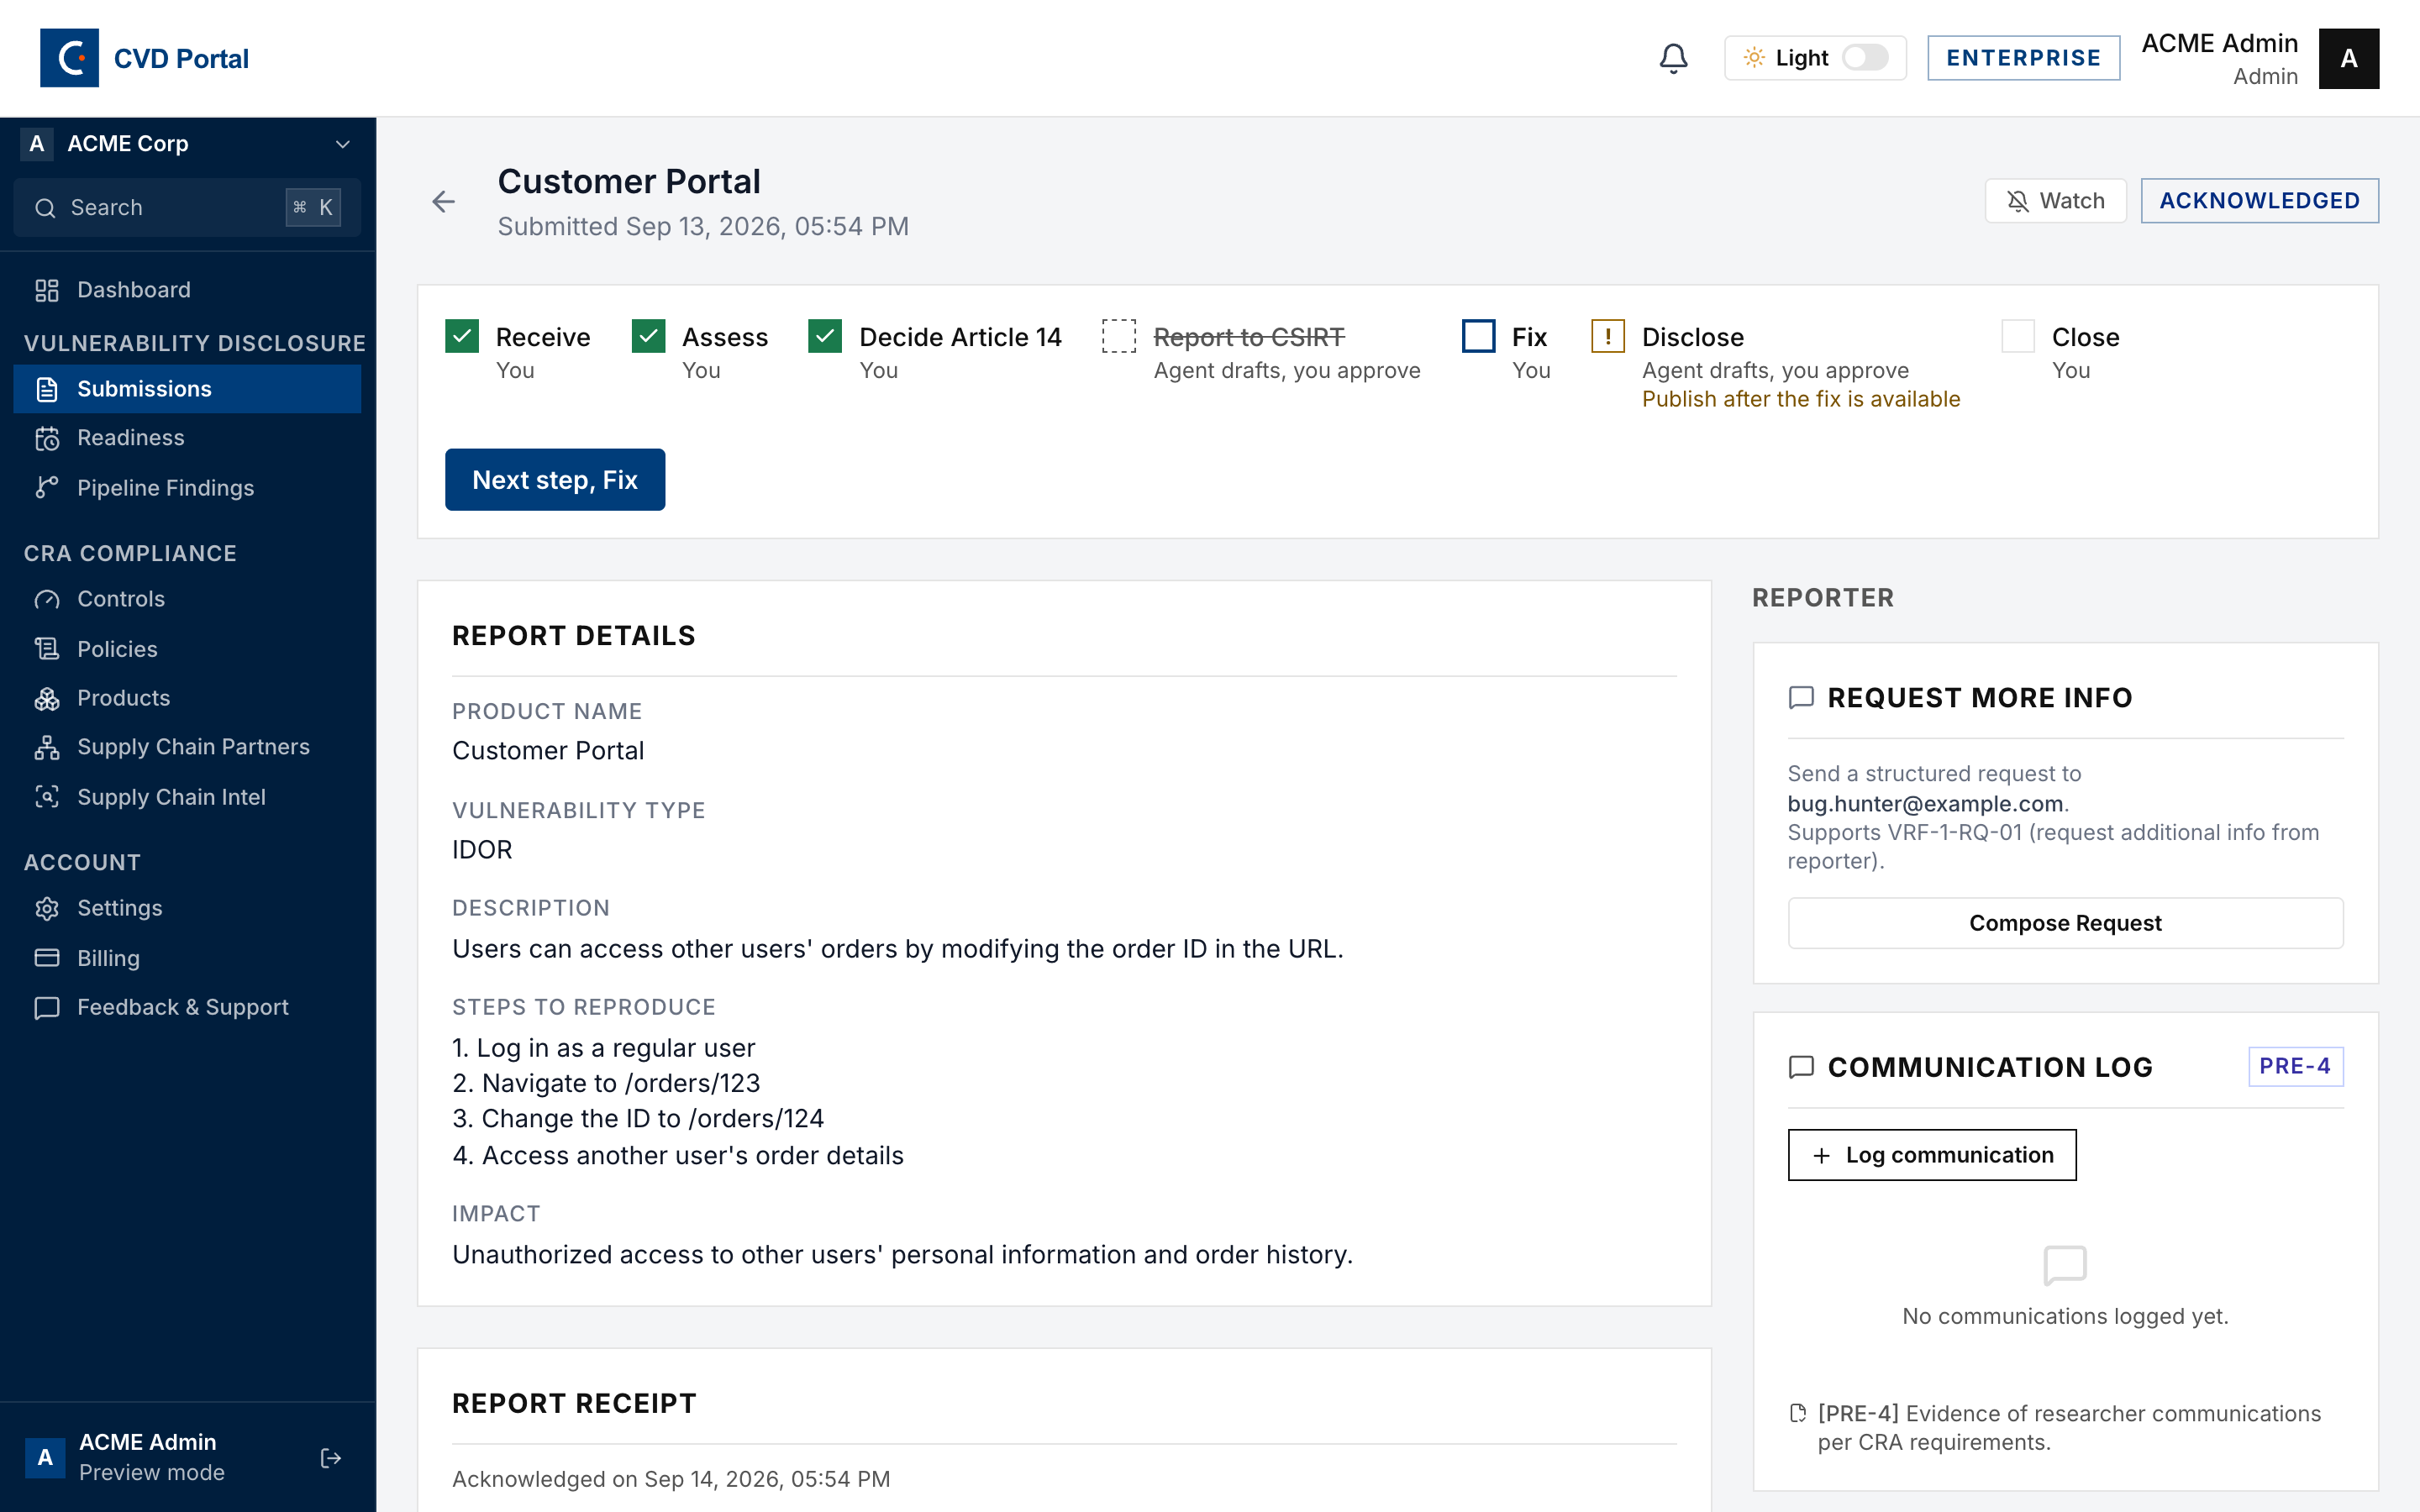

Read the bar from left to right.
| Marker | Meaning |
|---|---|
| Filled box with a tick | Done |
| Outlined box | Current. This is the next step. |
| Box with "!" | Blocked. The text under the label gives the reason. |
| Dashed box, label struck through | Skipped. The stage does not apply to this report. |
| Empty box | To do, after the current stage |
The text under each label says who acts. "You" means a person does the work. "Agent drafts, you approve" means the portal prepares a draft for you to check. Click a stage label to go to its section. Click Next step to go to the current stage.
Step 1. Receive

Click Acknowledge report in the alert at the top of the report. The alert shows when the acknowledgement is due.
Acknowledge first and investigate after. The acknowledgement only says that a person has the report.
Done when. The report is acknowledged, resolved or dismissed.
Step 2. Assess
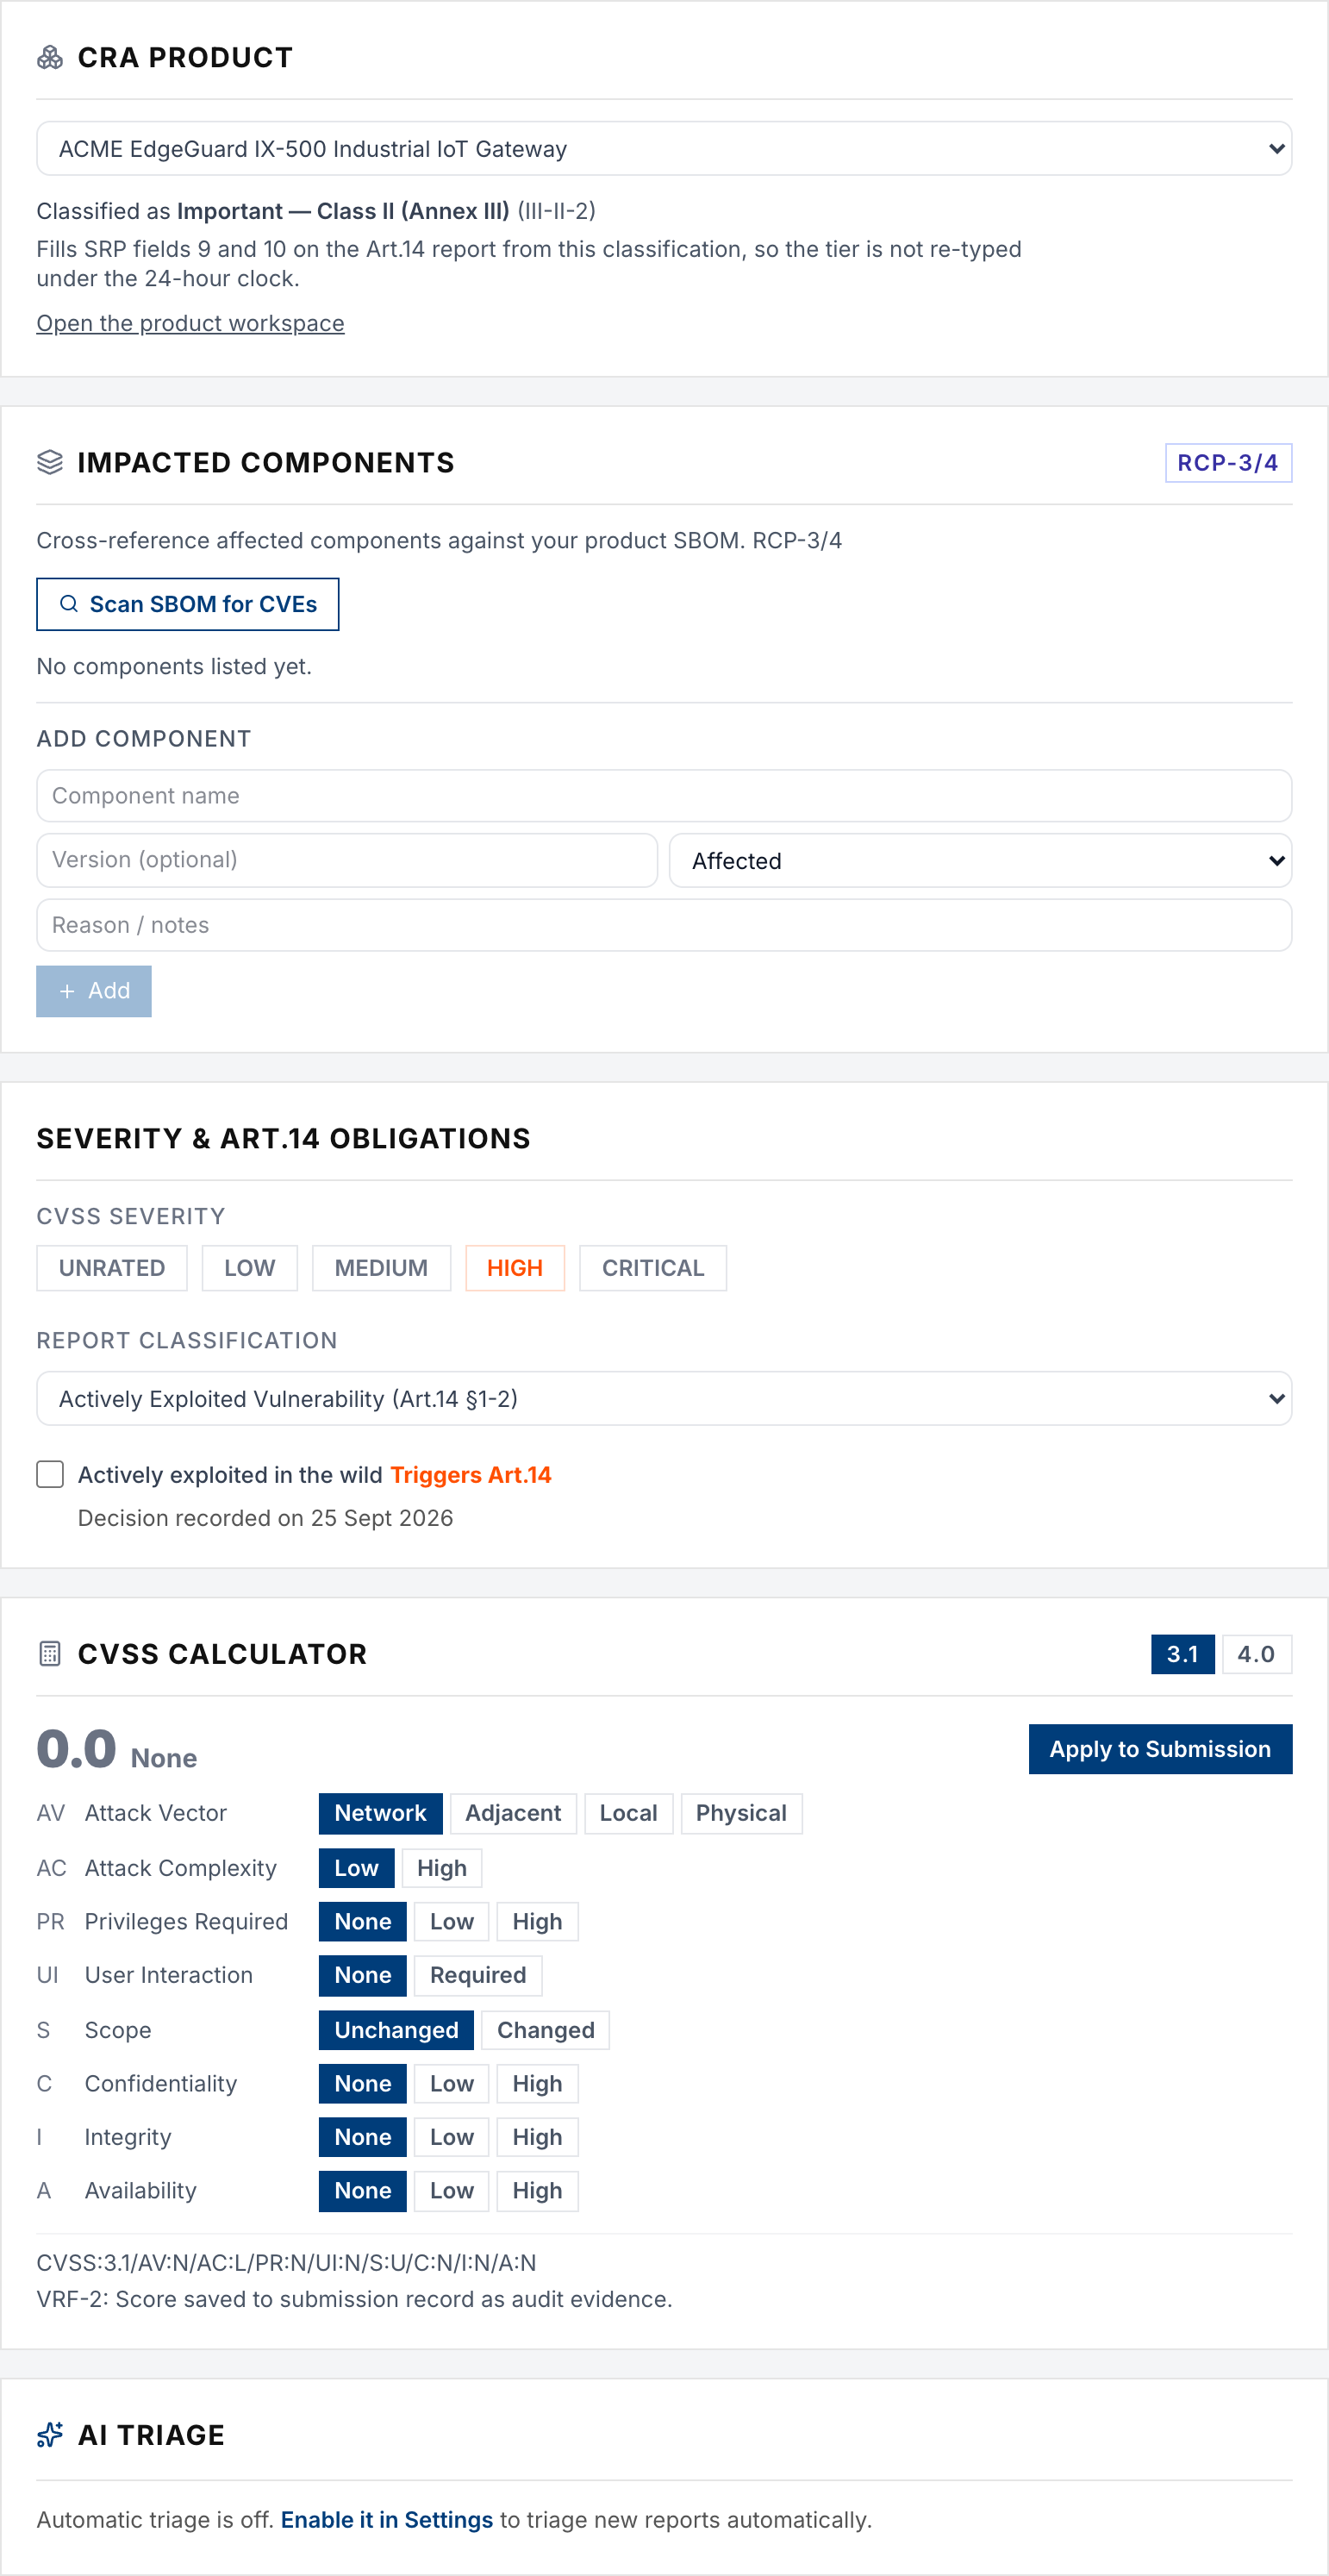
- In CRA product, select the product the report affects. The product classification then fills fields 9 and 10 of the Article 14 report.
- In Impacted components, add each affected component and version. Use Scan SBOM for CVEs if the product has an SBOM.
- In CVSS Calculator, set the vector and click Apply to Submission.
- In Severity & Art.14 obligations, set the severity.
- If AI triage is on, review its draft in AI Triage. The stage then shows "Agent drafts, you approve".
Done when. The report is linked to a product and its severity is not UNRATED.
Step 3. Decide Article 14

Record the decision in Severity & Art.14 obligations, in the Assess section. The link Record Article 14 decision in Assessment takes you there.
- If the vulnerability is actively exploited, tick Actively exploited in the wild. The Article 14 clock starts.
- If it is not, click Record: not actively exploited.
Done when. The decision is recorded. The panel shows "Decision recorded on" and the date.
Blocked when. Assess is not done.
Step 4. Report to CSIRT
This stage applies only when Article 14 is triggered. When you record "not actively exploited", the stage shows as skipped.
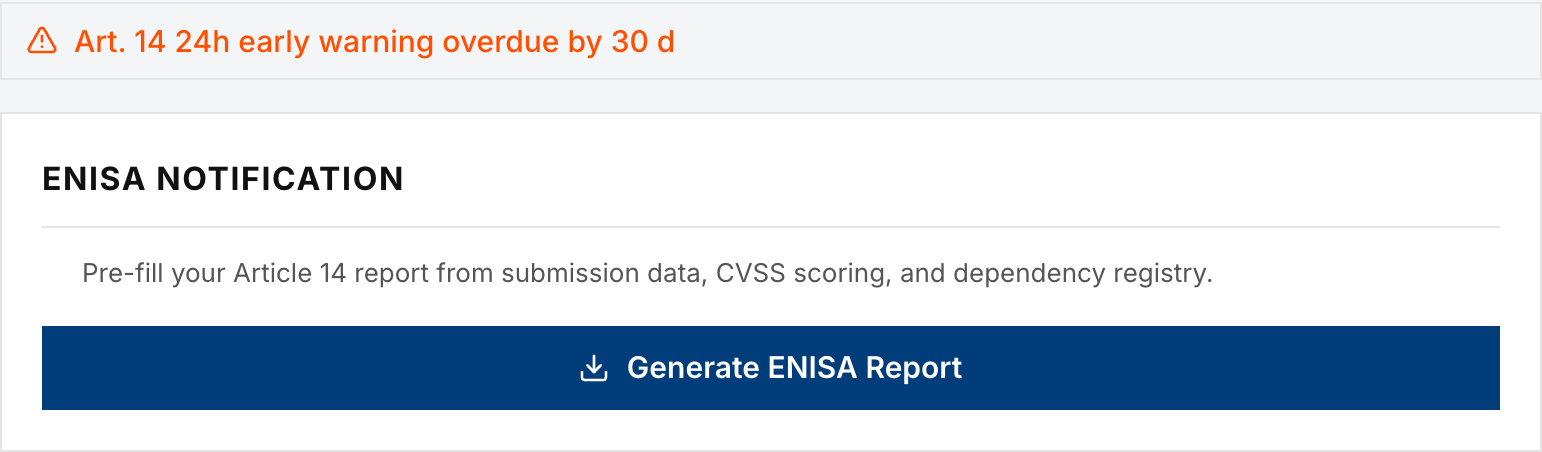
- Read the deadline line. It shows the next Article 14 filing and the time left.
- Click Generate ENISA Report. The portal pre-fills the report from the submission, the CVSS score and the dependency registry.
- Submit each filing through the ENISA Single Reporting Platform yourself. The portal prepares the package and records the filing. It does not submit to ENISA for you.
- Record each filing. Follow SOP-04 for the full procedure.
Done when. The 24-hour early warning, the 72-hour notification and the final report are all recorded as sent.
Blocked when. The Article 14 decision is not recorded. After the first two filings, the stage is also blocked until a fix is available, because the final report is due 14 days after that.
Step 5. Fix
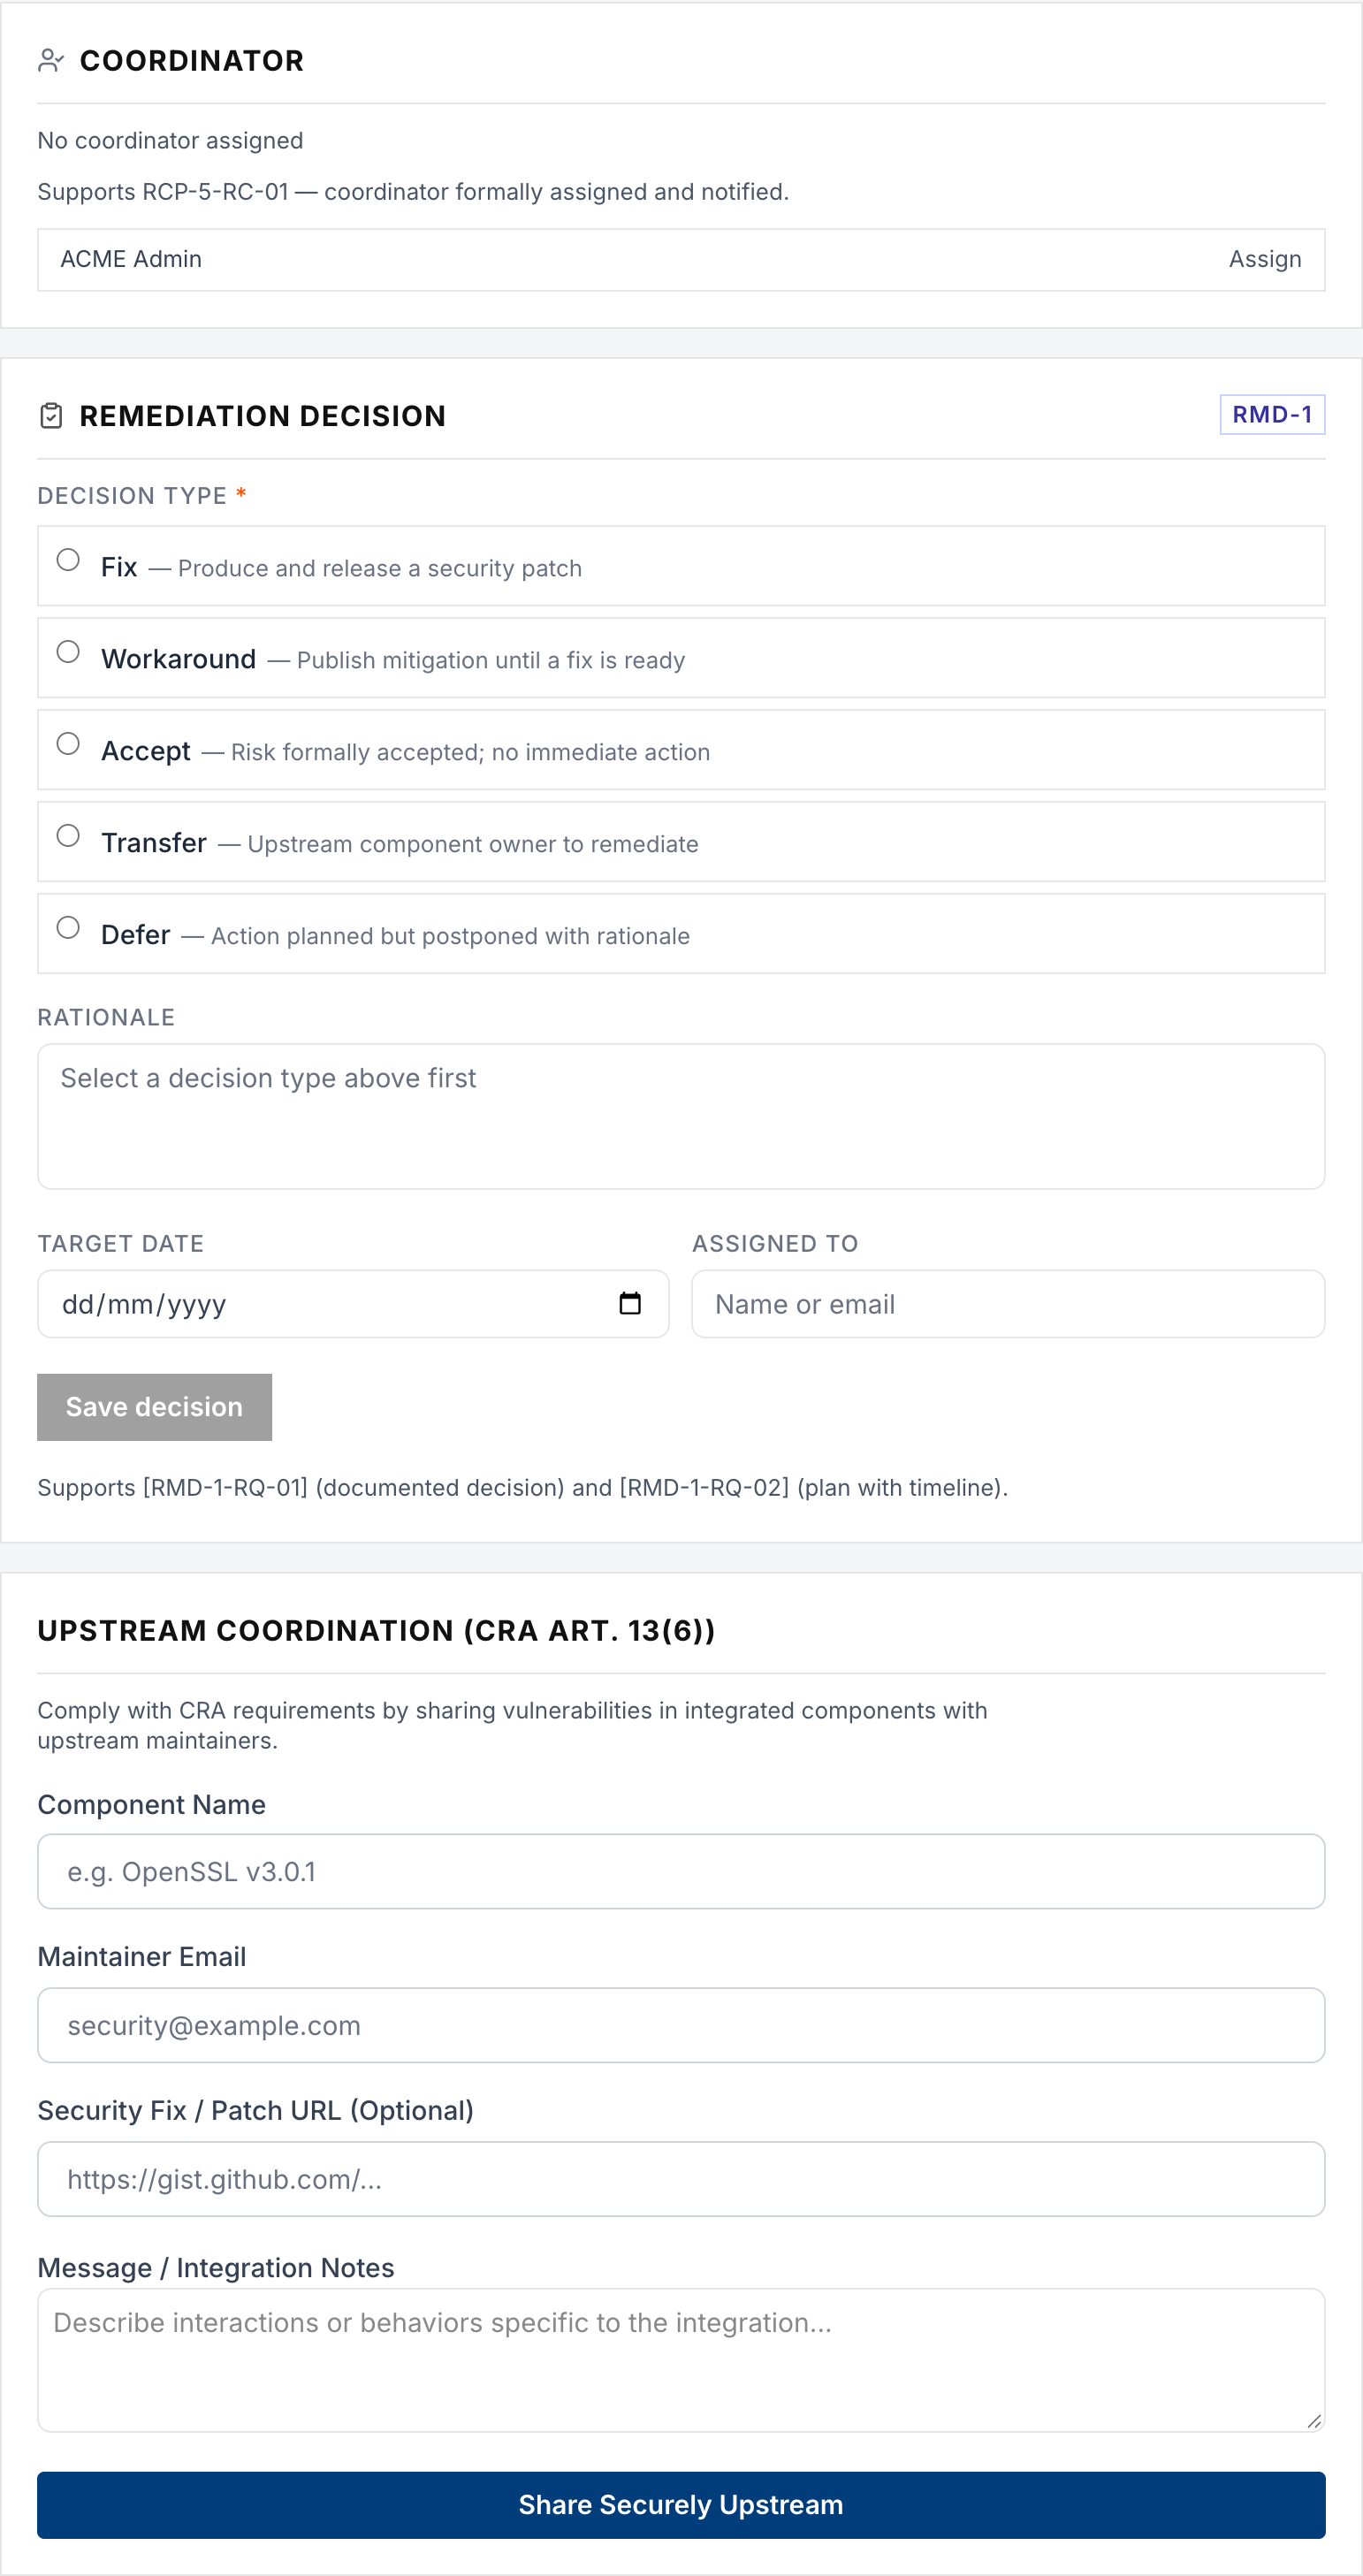
- In Coordinator, assign the person who owns the report.
- In Remediation decision, select the decision type. Fix, Workaround, Accept, Transfer or Defer.
- Enter the rationale, the target date and the owner. Click Save decision.
- If a third-party component is affected, use Upstream coordination (CRA Art. 13(6)) to notify its maintainer.
- After the report is resolved, click Verify fix is holding in production. Describe how you checked it. This record is evidence for PRA-1.
Done when. A Fix, Accept or Transfer decision is saved, or the fix is verified. A Workaround or Defer decision keeps this stage current until you verify the fix.
Blocked when. Assess is not done.
Step 6. Disclose
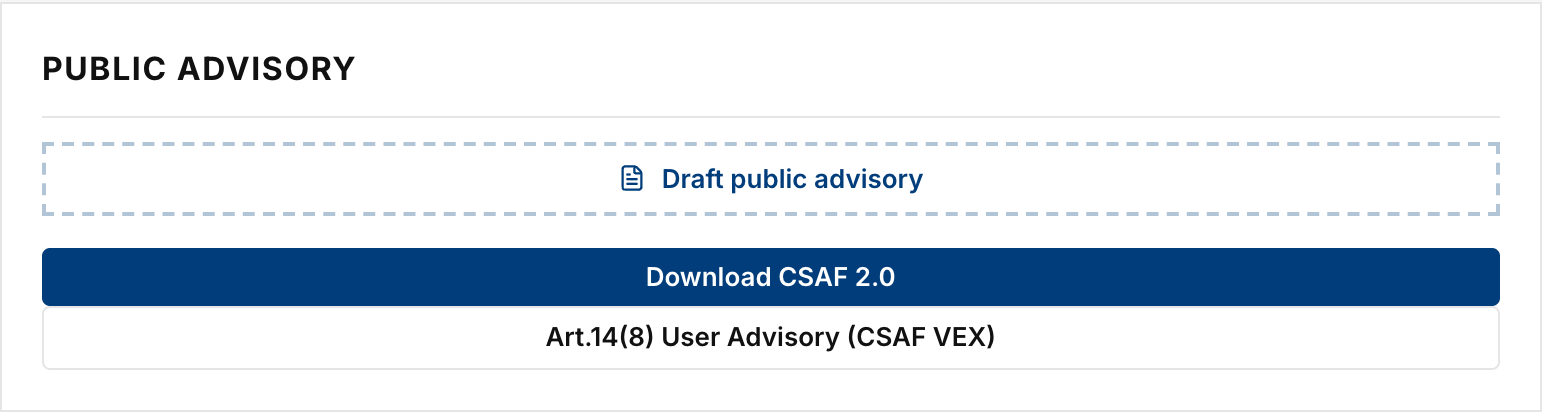
- In Public Advisory, click Draft public advisory. The portal drafts the advisory for you to check.
- Edit the draft and click Publish.
- Use Download CSAF 2.0 for a machine-readable advisory. Use Art.14(8) User Advisory (CSAF VEX) to inform users under Article 14(8).
Done when. The advisory is published.
Skipped when. The report is dismissed, or the remediation decision is Accept.
Blocked when. Fix is not done.
Step 7. Close
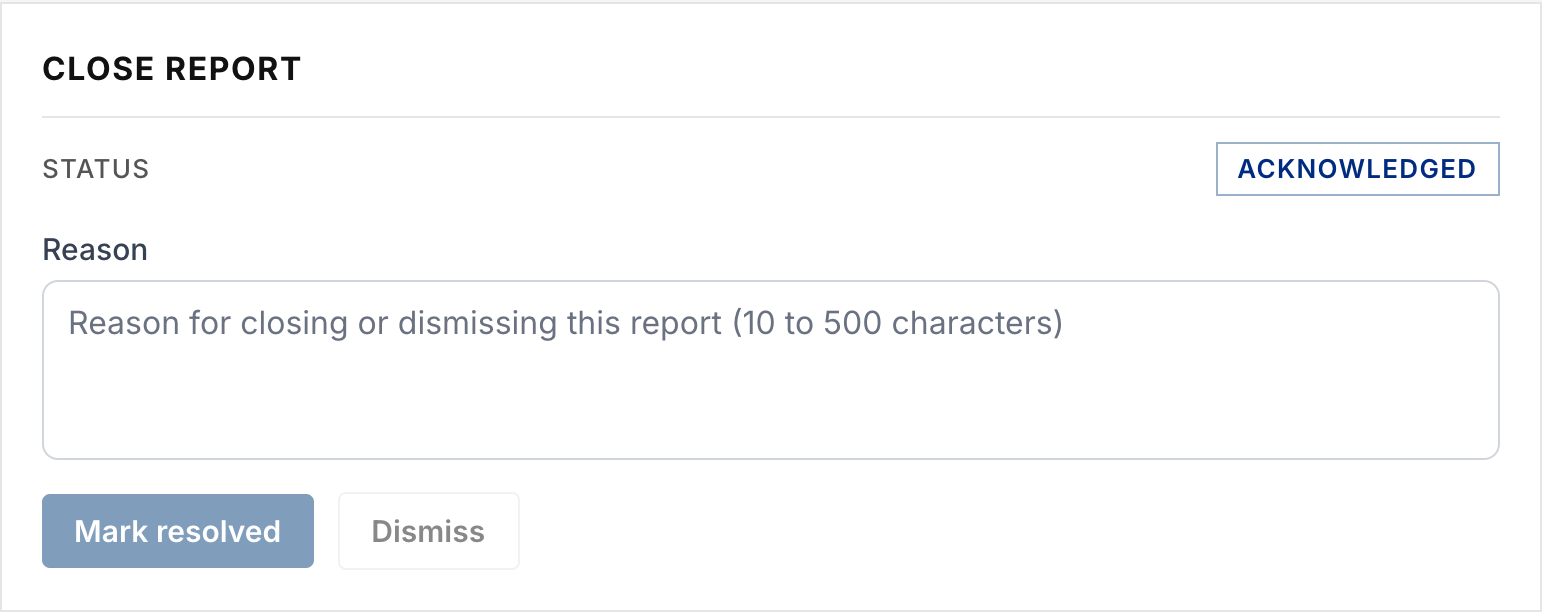
- In Close Report, enter the reason. Use 10 to 500 characters.
- Click Mark resolved when the vulnerability is fixed. Click Dismiss when the report is out of scope, a duplicate or not a vulnerability.
Done when. The report is resolved or dismissed. When every stage is done or skipped, the stage bar shows "All stages complete" and the row leaves the Overview.
Completion checklist
Per report.
- Acknowledged inside the acknowledgement target
- Linked to a product, with severity and CVSS set
- Article 14 decision recorded
- If Article 14 applies, all three filings sent through the ENISA Single Reporting Platform and recorded
- Remediation decision saved with rationale, target date and owner
- Upstream maintainer notified if a third-party component is affected
- Fix verified in production after the report is resolved, where the decision was Fix
- Advisory published, unless the decision was Accept
- Report resolved or dismissed with a reason